
Laser engraving tumblers is one of the most popular ways to personalize drinkware for gifts, branding, or custom retail products. From stainless steel to powder-coated surfaces, engraving logos, names, or artwork on tumblers adds value and uniqueness. This guide explains exactly how to laser engrave tumblers, what machine settings to use, which tumblers work best, and how to ensure high-quality, permanent results every time.
Laser engraving tumblers involves using a high-precision laser to etch designs onto the surface of a tumbler, typically made of stainless steel or coated metal. The process creates a durable, professional finish that won’t fade or peel.
What You Need to Laser Engrave a Tumbler
To get started with tumbler engraving, you’ll need the following:
- A laser engraving machine (CO₂ or fiber laser, depending on material)
- Rotary attachment (for cylindrical objects like tumblers)
- Design software (LightBurn, RDWorks, Adobe Illustrator, etc.)
- Compatible tumblers (stainless steel, powder-coated, or painted)
- Masking tape or laser marking spray (optional, for contrast)
Pro tip: For powder-coated tumblers, a CO₂ laser is ideal. For bare stainless steel, use a fiber laser or CO₂ with laser marking spray.
Best Laser Machines for Engraving Tumblers
The type of laser engraver you use significantly impacts the results. Here’s a quick comparison:
| Laser Type | Best For | Notes |
|---|---|---|
| CO₂ Laser | Powder-coated tumblers | Needs a rotary attachment; won’t mark bare metal without coating |
| Fiber Laser | Bare stainless steel | More expensive but does not require coatings |
| Diode Laser | Hobby use | Limited power; works slowly and usually requires marking spray |
Many engraving professionals prefer CO₂ lasers with rotary attachments due to their affordability and wide availability.
Step-by-Step Process to Laser Engrave a Tumbler
1. Prepare Your Design
Use design software to create or import your logo, text, or graphic. Make sure your canvas size matches the engraving area of the tumbler. Vector files (SVG, AI, DXF) are recommended for clean results.
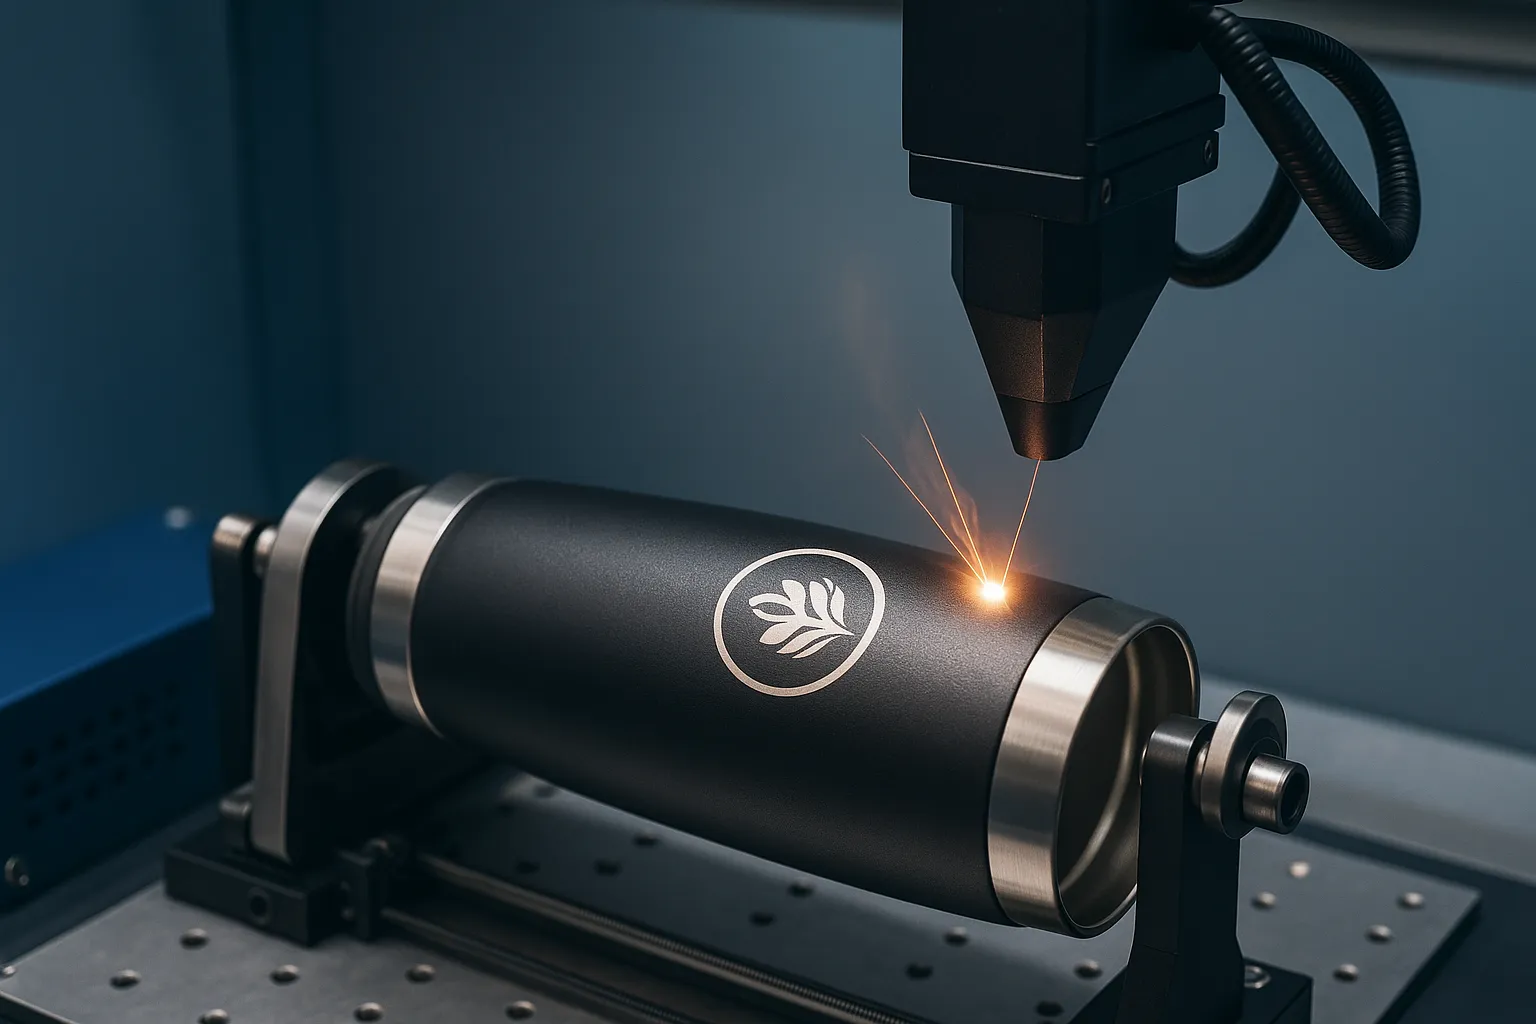
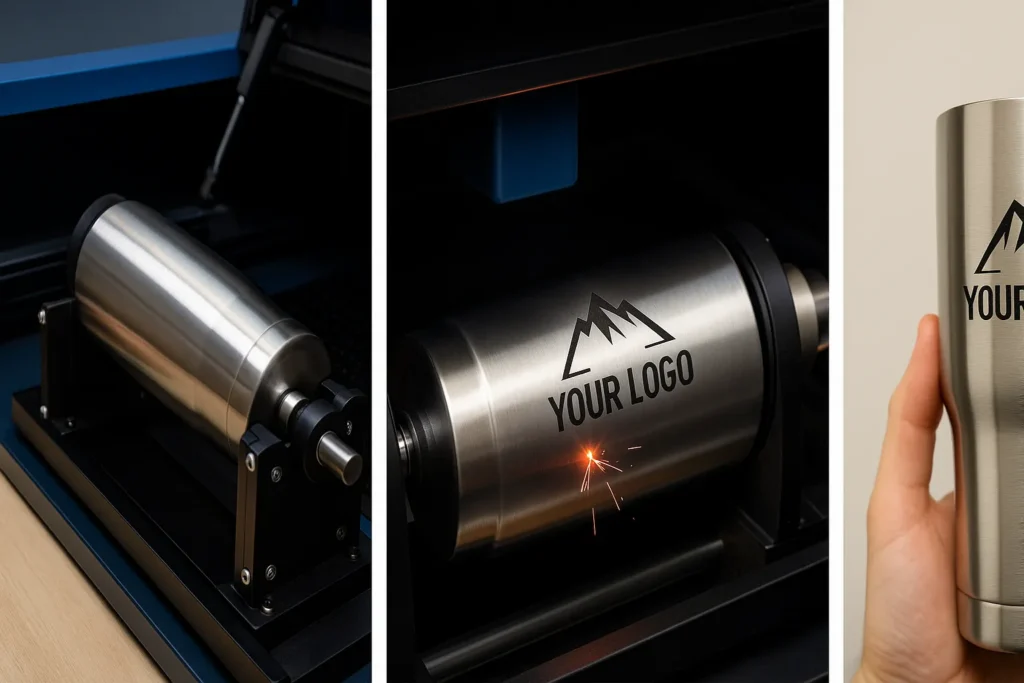
2. Position the Tumbler Using a Rotary Tool
Install the rotary attachment in your laser machine. Place the tumbler on the rotary so it spins evenly and is level. Adjust the focus height of the laser to match the surface of the tumbler.
3. Configure Laser Settings
Settings vary depending on the machine and tumbler type. For a 60W CO₂ laser on a powder-coated tumbler, start with:
- Power: 85–95%
- Speed: 250–400 mm/s
- Passes: 1
- Air Assist: On
Always test settings on a similar surface before doing a final pass.
4. Mask or Spray (Optional)
For contrast or if using a CO₂ laser on stainless steel, apply laser marking spray like Cermark or use high-temperature masking tape to reduce burn marks.
5. Run the Job
Once everything is set, run a test pass if needed, then engrave your final design. Monitor the job for movement, rotation errors, or missed spots.
6. Clean the Engraving
Use isopropyl alcohol or a damp cloth to wipe away residue or marking spray. For powder-coated surfaces, you’ll see a bright, clean etch beneath the coating.
What Materials Can You Laser Engrave on Tumblers?
Here are the most common tumbler types and what works with them:
- ✅ Powder-coated stainless steel – Best with CO₂ lasers
- ✅ Bare stainless steel – Best with fiber lasers or marking spray
- ✅ Painted aluminum – Can be etched with proper power settings
- ❌ Plastic tumblers – Risk of melting; check compatibility first
- ❌ Glass tumblers – Requires different laser type and slower speed
Common Mistakes to Avoid
- Incorrect focus height – Causes blurry or uneven engraving
- No rotary tool – Engraving on curved surfaces without rotation leads to distortion
- High speed, low power – Incomplete or shallow engravings
- Skipping test runs – Each tumbler may vary slightly in coating and reaction
Always test on a scrap tumbler or hidden area before doing a full pass on a final product.
Tips for Better Tumbler Engraving Results
- Use horizontal designs for better alignment with the rotation.
- Clean tumblers before engraving to remove oils or dust.
- Keep the rotary level with the laser head to avoid distortion.
- For logos, increase DPI (dots per inch) to 500–600 for detailed clarity.
Can You Sell Laser Engraved Tumblers?
Yes. Personalized tumblers are in high demand for:
- Wedding gifts
- Corporate branding
- Custom merchandise
- Etsy or Shopify stores
A small engraving business can earn substantial profit margins on tumblers by offering customized, short-run products with quick turnaround.
Final Thoughts
Learning how to laser engrave tumblers opens up opportunities for creative expression and profitable custom product creation. Whether you’re a hobbyist or a business owner, the key to success lies in:
- Choosing the right laser and attachments
- Mastering the setup and settings
- Practicing and testing regularly
With the right technique and tools, you can produce professional-quality engraved tumblers that stand the test of time.
Explore the Perfect Laser Engraver for Custom Tumblers and Drinkware
Ready to start engraving your own custom tumblers? Explore Thunder Laser’s CO₂ laser engravers designed for high precision and long-lasting performance — perfect for tumblers, bottles, and more.
Check Thunder Laser Engraving Machines here.
FAQs About Laser Engraving Tumblers
What wattage laser do I need to engrave tumblers?
A 40W to 60W CO₂ laser is sufficient for powder-coated tumblers. Use higher wattage or a fiber laser for bare metal.
Do I need a rotary attachment for tumblers?
Yes, a rotary tool ensures accurate engraving on curved surfaces like tumblers.
Can I engrave YETI or Stanley tumblers?
Absolutely. Just make sure they are stainless steel or powder-coated. Adjust settings accordingly.