How to Darken Laser Engraving on Wood
Why some engravings come out pale, the counterintuitive air assist setting that fixes most of them, and what actually works on dark wood.

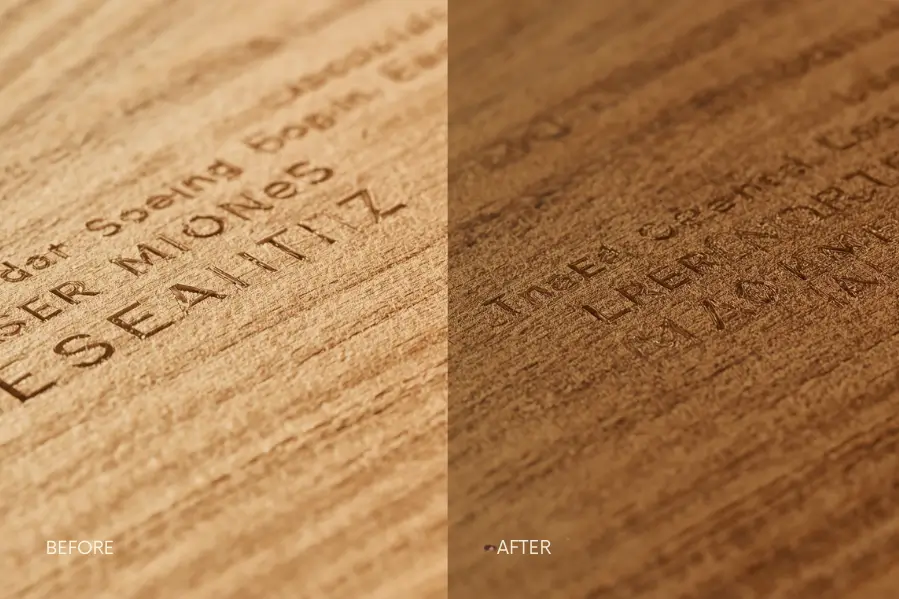
A laser engraving looks dark because of char that stays on the surface, not because of how deep the beam cut. That single fact changes what you should adjust. Lower the speed or raise the power to create more char, turn the air assist down so the char is not blown away, and defocus slightly for a broader, heavier mark. For a bigger jump, pre-treat the wood with a borax solution, roughly one tablespoon in 400ml of hot water, applied and left to dry fully before engraving. Whatever you use, seal the result, because char rubs off.
Key takeaways
- Darkness is char, not depth. You can engrave deep and pale or shallow and black. Everything that darkens an engraving either makes more char or keeps more of it in place.
- Turn the air assist down, not up. Air assist exists to blow smoke and char out of the way. For a dark engraving that is exactly the wrong thing, and it is the most common reason a correctly set job looks washed out.
- Borax works, and it has real downsides. Side-by-side tests rate it above baking soda. It also produces fumes, leaves residue, tints the whole board and needs sealing.
- Dark wood is a different problem entirely. On walnut, more power gives you a darker mark on an already dark background, which is less visible rather than more. Contrast there comes from a lighter mark, not a darker one.
- Char rubs off. Any method that relies on surface char will transfer to hands and cloth until it is sealed. Plan a clear coat into the job.
Pale engravings are the most common complaint in wood lasering, and most advice answers it with the same two words: more power. That works sometimes and produces a burnt, blurry mess the rest of the time.
The reason is that power is only one of the things controlling darkness, and it is not the most important one.
Darkness Is Char, Not Depth
When a laser engraves wood it burns away material, and what is left behind in the recess is charred wood: carbon, essentially soot bonded to the surface. That char is what you see. The depth of the cut has very little to do with how dark it looks.
You can prove this to yourself in two passes. Engrave the same design twice on scrap, once at high power and once at low power with the speed adjusted to match, then wipe one with a damp cloth. The wiped one will be dramatically lighter despite being exactly as deep. The char left, the darkness went with it.
Reframed that way, every method in this article does one of two things. It either produces more char, or it stops the char you produced from being removed. Settings, defocusing and chemical pre-treatment are in the first group. Air assist management and sealing are in the second.
Why Your Engraving Came Out Pale
The wood may simply be light and low in resin. Maple, birch and basswood char less readily than cherry or walnut. Species sets the ceiling on what settings can achieve.
The air assist may be blowing the char away. Covered in detail below, and the single most common cause of a job that looks underpowered when the settings are fine.
The beam may be out of focus. A beam a few millimeters off focus loses a great deal of energy density. This usually looks like a power problem and is not.
The speed may be too high for the power. Each point on the surface gets too little energy to char properly. Lower the speed before you raise the power; it is the gentler adjustment.
Or you sanded or cleaned afterwards. Sanding an engraving removes the char along with any raised grain. If you need to sand, do it before engraving.
Method 1: Settings
Start here, because it costs nothing and it is reversible.
Lower the speed before raising the power. Both increase the energy per unit area, but high power at high speed tends to produce sharp, violent burning that widens the mark and lifts grain. Lower speed at moderate power produces an even, controlled char. Move in steps of about 20 percent and test.
Expect to trade detail for darkness. More energy means a wider burn, and a wider burn fills in the gaps between fine lines. If small text is going muddy at the same time as the engraving is getting darker, you have passed the useful limit and need a different method.
For starting numbers by species and tube wattage, our wood laser engraving settings guide has tables for 40W through 100W machines.
Method 2: Turn the Air Assist Down
This is the one that surprises people. Air assist exists to clear smoke and combustion products from the beam path, which is why it is essential for cutting and for clean, light engraving. But it also blows away the char that makes an engraving dark. If you want a dark mark, high air pressure is working directly against you. |
If you have a manual regulator, turn it down for dark engraving work. You still want some flow, because smoke sitting in the beam path absorbs energy before it reaches the wood and redeposits as a loose haze, but a gentle flow is enough. Many people run engraving air assist at cutting pressure without thinking about it, and then wonder why their marks are pale.
The trade-off is a slightly hazier surface around the mark, because less air means more soot settling on the wood next to the engraving. Masking the surface with low-tack paper tape before engraving deals with that completely, and is worth doing on anything visible.
Method 3: Defocus Slightly
Lowering the bed by one or two millimeters spreads the beam over a wider spot. The energy per unit area drops, but the affected area grows, and the result is a broader mark with a heavier, softer char.
It is a genuinely useful technique for bold graphics, logos and large text where you want visual weight rather than fine resolution. It is the wrong tool for small text or detailed line work, because everything blurs by the same amount the mark widens.
Some operators combine this with a second pass, running the design once in focus for detail and once defocused for darkness. It doubles the job time and the results on light woods are noticeably better than either pass alone.
Method 4: Multiple Passes
Two moderate passes often produce a darker, more even result than one aggressive pass, because the wood cools slightly between them and the char builds rather than blowing out.
The requirement is registration. The second pass has to land exactly on the first. Any machine with backlash or a loose belt will produce a doubled, blurry edge, and the fix for that is mechanical rather than a settings change.
Three or more passes rarely helps on wood. By then you are cutting a trench rather than darkening a surface, and the mark widens faster than it darkens.
Method 5: Borax Pre-Treatment
This is the method that produces the biggest single jump in contrast on light woods, and it is worth understanding properly rather than just following a recipe.
To do it, dissolve about one tablespoon of borax in 400ml of hot water. Hot matters; borax dissolves poorly in cold. Brush or spray a thin, even coat onto the surface, then let the wood dry completely before it goes anywhere near the laser. Engraving damp wood produces steam, inconsistent marks and a mess.
Then engrave at lower power than usual, because treated wood chars at lower energy, so your existing settings will over-burn. Drop the power and run a test; this is not a case where you keep the old settings and get a bonus.
It genuinely works. A side-by-side comparison published by a makerspace that tested borax against baking soda and untreated wood rated borax the most effective of the three, and forum consensus among people doing photo engraving on birch agrees.
Four things nobody tells you about borax. It gives off fumes under the laser that you do not want to breathe, so extraction matters more than usual on treated wood. It leaves soot and residue that has to be cleaned off, and the surface stays smeary until it is sealed. It tints the entire board slightly, not just the engraved area, and that tint does not wash out. And it is restricted for consumer sale in some countries, the UK among them. Do not mix a batch and store it either; it crystallizes out of solution and ruins spray bottle pumps. |
Method 6: Baking Soda
The gentler alternative, and the one to reach for if borax is unavailable or you would rather not deal with the fumes.
Mix a light solution with water, brush it on, let it dry fully and engrave. The effect is milder than borax, and the commonly reported downside is that it yellows the wood slightly. On a project where the untreated wood is a visible part of the design, that matters; on a piece that will be stained or oiled afterwards, it does not.
Test both on the same board before committing. Which one suits a project depends on the species and on whether you mind the tint, and twenty minutes of testing settles it.
Method 7: Stain Before Engraving
Staining the wood dark before you engrave inverts the usual approach. Instead of making the mark darker, you make the background darker and let the engraving show as a lighter line through it.
This is particularly effective on light woods, where a dark stain and a shallow engrave produce crisp pale lettering that no amount of char can match. It is also the standard answer to the dark wood problem covered below.
Let the stain cure completely. Engraving over wet or partially cured stain produces smoke, odd smells and unpredictable marks, and some stains contain solvents you do not want vaporizing in an enclosed machine.
Method 8: Post-Processing
Everything above happens before or during the engrave. These happen after.
Fills are the strongest option. Dark wax, colored epoxy or wood filler pressed into the recess and the excess sanded or wiped off. This gives the strongest possible contrast and a clean edge, and it survives handling in a way that char does not. It is also the most work.
Paint pens and oil-based markers are the quickest. Fine-tip markers run into the engraved line and wiped back off the surface. Quick, effective on bold designs, fiddly on fine detail.
Oils work well on finished pieces. Danish, tung, linseed or mineral oil applied over the finished engraving deepens the contrast by darkening the char more than the surrounding wood. Linseed adds a warm yellow tint and takes days to cure. Mineral oil is the food-safe choice for cutting boards and is the mildest in effect.
Clear coats do double duty. A clear acrylic or matte spray deepens the apparent contrast slightly and, more importantly, locks the char down so it stops transferring. On anything that will be handled, this is not optional.
One correction worth making: CerMark does not work on wood. Laser marking sprays such as CerMark are sometimes recommended for darkening wood engravings. They are ceramic-based coatings that bond to metal, glass, ceramic, stone and slate, and the manufacturer's own labeling states plainly that they are not intended for use on wood or plastics. Wood already chars dark under a laser without help, which is why no such product exists for it. Spending thirty dollars on an aerosol that will do nothing is an easy mistake to avoid. |
Seal It, or the Darkness Comes Off
Char rubs off, because it is carbon sitting loosely on a surface. Run a finger across a fresh engraving and some of it comes away, which is why a piece that looked perfect in the machine looks faded a week later after handling.
Brush the loose soot off first, with a soft brush or compressed air, before any finish goes on. Sealing over loose char traps a muddy layer rather than a crisp one.
Then seal. Clear spray lacquer, wipe-on polyurethane, oil, or wax depending on the piece. All of them lock the char in place and most of them deepen the apparent contrast slightly as they go on.
On borax-treated work this matters more, because borax residue is smearier than ordinary char and will transfer readily until it is sealed.
The Dark Wood Problem
Everything above assumes a light wood where a dark mark creates contrast. On walnut, dark-stained oak or wenge, the logic inverts and most advice stops being useful.
More power does not help. It gives you a darker mark on an already dark background, which is less visible rather than more. People try it, get a worse result, and assume they have the settings wrong.
Contrast on dark wood comes from a lighter mark, not a darker one. Three approaches work. A very shallow, fast, low-power engrave removes the dark surface and exposes paler wood underneath, which on some species gives a surprisingly crisp light-on-dark result. A fill in a light color, white epoxy or light wax, gives the strongest contrast and the cleanest edge. And on stained wood, engraving through the stain to the bare wood beneath produces exactly the effect you want.
Air assist turns back up here, since you want the char removed rather than retained, higher airflow helps rather than hurts. This is one of the few cases where the standard advice and the dark-engraving advice point in opposite directions.
Choosing Wood That Engraves Dark
Species sets the ceiling on everything else. If a project needs maximum contrast, the choice of board does more than any setting.
Engrave dark readily: cherry, alder, walnut and bamboo. Higher resin and sugar content means more char at lower energy.
Engrave medium: Baltic birch plywood, poplar and pine. Birch is the most common and sits comfortably in the middle; pine is unpredictable because resin pockets char unevenly.
Engrave light: maple, basswood and ash. Tight, pale, low-resin woods that take fine detail beautifully and need help to go dark.
The best of both: alder and cherry give good natural contrast while still holding detail, which is why they are so common in commercial engraving work.
Start With the Free Fixes
Before buying anything or mixing any solution, try the two adjustments that cost nothing: turn the air assist down and lower the speed rather than raising the power. Between them they solve most pale engravings, and they are the two things almost no guide mentions.
If that is not enough, defocus slightly or add a second pass. If you still need more, borax is the step change on light woods, with the caveats above. And if the wood itself is dark, stop fighting it and work for a lighter mark instead.
Whatever gets you there, seal the result. The most common version of this problem is not a pale engraving at all, it is a good engraving that lost its char to a shirt sleeve. For tested starting settings across 22 materials, our free materials library is a better starting point than any chart.
Frequently asked questions
How do I make laser engraving darker on wood?
Lower the speed or raise the power to create more char, turn the air assist down so the char is not blown away, and defocus slightly for a heavier mark. For a bigger change, pre-treat the wood with a borax solution before engraving. Seal the result afterwards, because char rubs off.
Why is my laser engraving so light?
Most often the air assist is blowing away the char that creates the darkness, or the speed is too high for the power you are using. Check focus as well, since a beam a few millimeters out loses a lot of energy density and looks exactly like a power problem.
Does engraving deeper make it darker?
No, and this is the most useful thing to understand. Darkness comes from char sitting on the surface, not from depth. A deep engraving with the char wiped off is pale; a shallow one with the char intact is black.
How do I use borax to darken laser engraving?
Dissolve about a tablespoon of borax in 400ml of hot water, brush or spray a thin even coat onto the wood, and let it dry completely before engraving. Then lower your usual power, because treated wood chars at less energy. Expect fumes, residue that needs cleaning off, a slight tint across the whole board, and the need to seal afterwards.
Is baking soda or borax better for darkening wood?
Borax gives the stronger effect and side-by-side testing supports that. Baking soda is milder and easier to handle but tends to yellow the wood slightly. If the untreated wood is part of the finished look, test both on the same board before choosing.
Can I use CerMark to darken wood engraving?
No. CerMark and similar laser marking sprays are ceramic-based coatings formulated for metal, glass, ceramic, stone and slate, and the manufacturer states they are not intended for wood or plastics. Wood chars dark under a laser without any coating, which is why no equivalent product exists.
Should air assist be on or off for dark engraving?
Turned down rather than off. Air assist blows away the char that makes the mark dark, so high pressure works against you. Keep a gentle flow so smoke does not sit in the beam path, and mask the surface with low-tack tape to deal with the soot that settles.
How do I darken engraving on a cutting board without stain?
Lower the speed, consider a second pass, and keep the air assist low. Afterwards, food-safe mineral oil deepens the contrast noticeably and is the correct finish for a board that will meet food. Avoid borax on anything used for food preparation.
How do I get contrast on dark wood like walnut?
Stop trying to make the mark darker. On dark wood the contrast has to come from a lighter mark: a shallow, fast, low-power pass that removes the dark surface and exposes paler wood beneath, or a light-colored fill such as white epoxy or wax. Turn the air assist up here rather than down, since you want the char cleared away.
Will the darkness fade over time?
The char itself does not fade, but it rubs off with handling, which looks like fading. Brush the loose soot away and seal with a clear coat, oil or wax and the engraving will stay as dark as the day it came off the machine.