How to Laser Engrave Tumblers: The Complete Guide
Which laser for which tumbler, how to handle the taper that distorts most wrap designs, rotary setup, settings, and the trademark rule nobody tells you about.

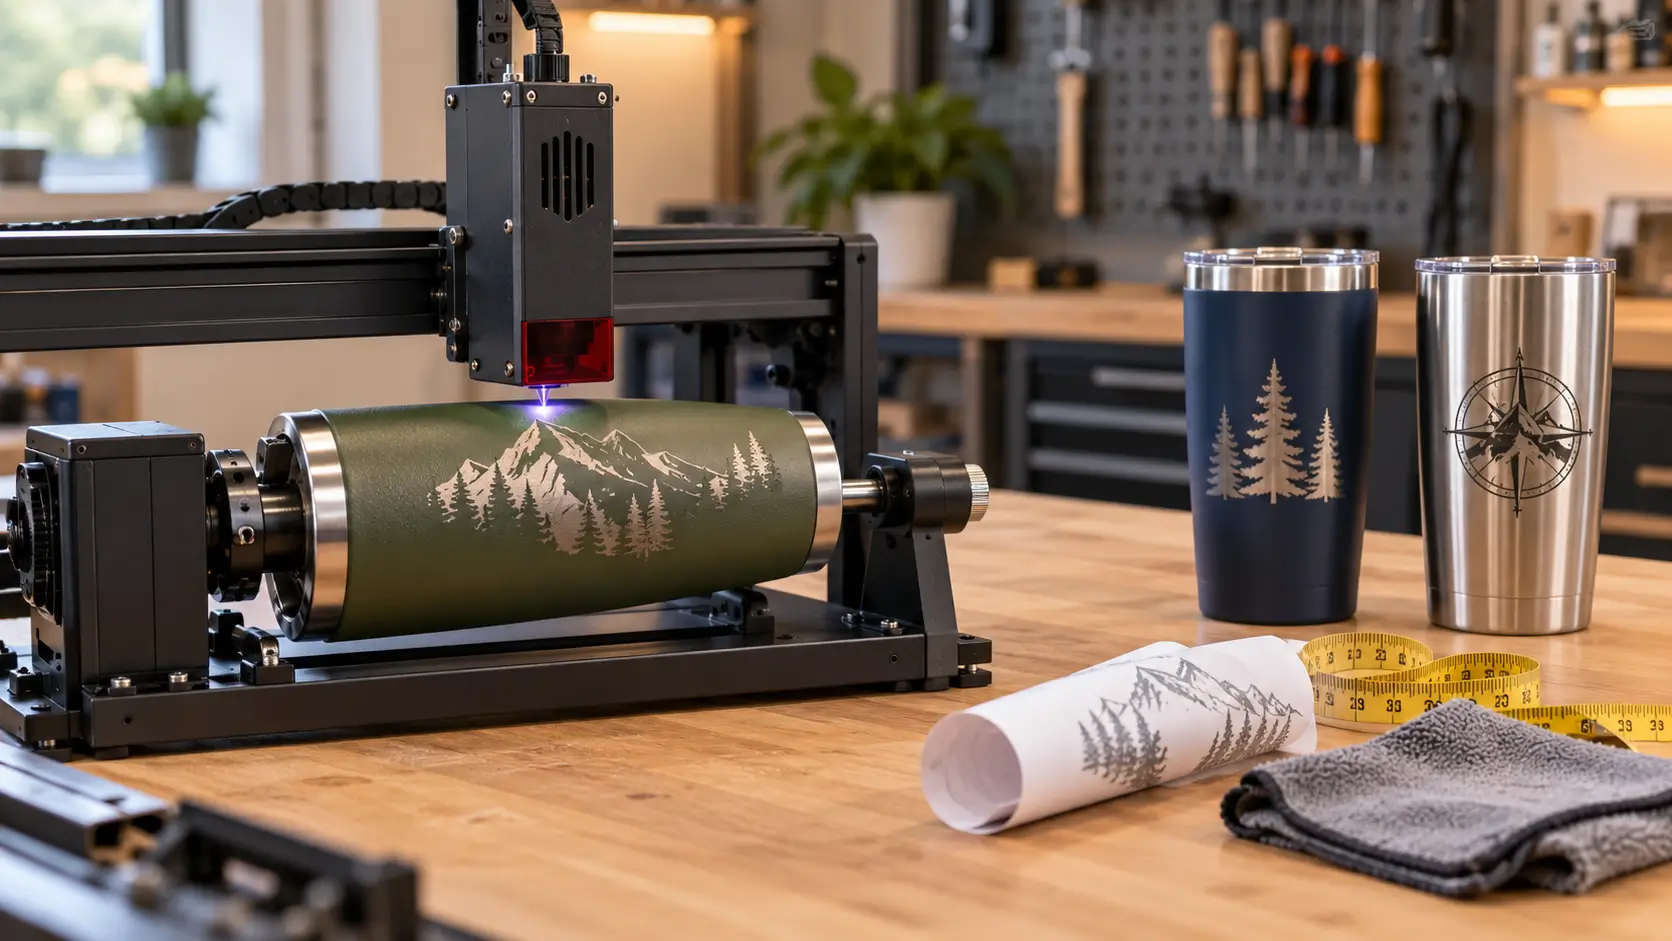
Laser engraving a tumbler needs three things: the right laser for the surface, a rotary attachment to turn the cylinder under the beam, and a design sized to the tumbler's actual circumference. Powder-coated tumblers run on a CO2 laser, which burns away the coating to expose bright stainless underneath. Bare stainless needs a fiber laser, or a CO2 laser with marking spray. The detail that catches most people out is that tumblers are tapered, not straight cylinders, so the circumference at the top differs from the bottom and a full-wrap design will not line up unless you account for it.
Key takeaways
- Match the laser to the surface, not the tumbler. Powder coat and paint are CO2 jobs because you are removing a coating. Bare stainless is a fiber job because you are marking metal.
- Most tumblers are tapered, and that causes two problems. The design distorts because circumference changes with height, and on a roller rotary the wider end drives the tumbler sideways as it turns.
- Measure the circumference where the design will sit. Not at the rim, not at the base. Diameter times 3.1416, or wrap a strip of paper around that exact band and measure it.
- Level the engraving surface, not the tumbler. Shim the narrow end until the band you are engraving runs parallel to the bed. If it is not level, focus drifts across the job.
- Engraving branded tumblers to resell is a trademark risk. Personalising a customer's own Yeti or Stanley is fine. Buying them, engraving them and selling them as your product is a different legal question.
Tumblers are the highest-volume personalisation product in laser engraving, and for good reason. The blanks are cheap, the turnaround is minutes, the perceived value is high, and the finished mark does not fade, peel or wash off the way vinyl does.
The process is also less forgiving than flat work. You are engraving a moving curved surface, the design has to wrap correctly, and there is no second chance on a customer's cup. This guide covers the whole process, including the geometry problems most tutorials skip entirely.
What You Need
A laser engraver. CO2 for coated tumblers, fiber for bare metal. More on which below.
A rotary attachment. Not optional. Engraving a cylinder without one distorts the design badly toward the edges of the curve.
Design software. LightBurn, RDWorks, EZCad or your machine's native package, plus vector artwork in SVG, AI or DXF.
Tumblers. Powder-coated, painted or bare stainless. Quality of the coating matters more than brand.
Isopropyl alcohol and a microfibre cloth. For cleaning before and after.
A ruler or flexible tape. For measuring circumference. A strip of paper works just as well.
Optional: marking spray, such as CerMark, if you want to mark bare stainless on a CO2 machine.
Optional: shims. Thin card, foam, or a machined riser for levelling tapered tumblers on a roller rotary.
Which Laser for Which Tumbler
This is the first decision and it is entirely determined by the surface, not the cup.
Tumbler Surface | Best Laser | What Happens | Result |
|---|---|---|---|
Powder-coated stainless | CO2 | Coating is burned away | Bright silver design on colour. High contrast, fast |
Painted stainless | CO2 | Paint is removed | Similar to powder coat, but the paint chips more easily |
Bare stainless | Fiber | Metal surface is marked directly | Dark grey to black mark, permanent, no coating needed |
Bare stainless (CO2 route) | CO2 + marking spray | Spray bonds to the metal under heat | Black mark; adds a consumable and cleanup step |
Anodised aluminium | Fiber | Anodised layer removed | Crisp white mark, very fast |
PVD or electroplated | Fiber | Plating altered or removed | Subtle, low-contrast effect |
Glass | CO2 | Surface is frosted | Frosted white; needs low power and care |
Plastic | Depends on polymer | Varies widely | Test first. Never PVC |
Why CO2 Works on Coated Tumblers but Not Bare Metal
A CO2 laser emits at 10.6 microns. Bare stainless reflects most of that wavelength, so nothing happens. Powder coating absorbs it very well, which is why a CO2 machine strips coating cleanly and quickly.
So when you engrave a powder-coated tumbler on a CO2 laser, you are not marking metal at all. You are removing paint to reveal the metal underneath. That distinction explains most of the confusion people have about which machine to buy.
A fiber laser is the opposite: at roughly 1,064 nm, stainless absorbs efficiently and the beam marks the metal directly with no coating required. Our guide to CO2 vs fiber lasers covers the decision across a whole product line rather than just drinkware.
The Marking Spray Route
If you only have a CO2 machine and a customer brings a bare stainless cup, marking spray bridges the gap. You spray the surface, engrave through it, and the compound bonds to the steel under heat, leaving a black mark. Wash off the excess afterwards.
It works well. It also adds a consumable cost per unit, application and drying time, and a cleanup step. For occasional jobs it is a sensible bridge. For production volume on bare metal, a fiber laser is cheaper per piece within a fairly short run.
Choosing Tumblers That Engrave Well
The Taper Problem
This is the single most useful thing in this guide, and almost no tutorial mentions it.
Very few tumblers are true cylinders. Most taper, narrower at the base than the rim, because that is what makes them fit a cup holder. That taper causes two separate problems.
Problem one: the circumference changes with height. A tumbler measuring 3.5 inches across at the top and 2.8 inches at the base has a circumference of 11.0 inches at the rim and 8.8 inches at the base. That is a difference of over two inches. A full-wrap design sized for one will overlap or leave a gap at the other.
Problem two: on a roller rotary, a tapered tumbler walks. The wider end covers more distance per rotation than the narrow end, so the tumbler creeps sideways as it turns. Over a long engraving pass, that drift shows up as a design that slides out of position, and you will not notice until the job is finished.
Both are solvable.
Shim the narrow end. Raise the base until the band you are engraving sits parallel to the machine bed. You are not levelling the tumbler, you are levelling the surface you intend to mark. Thin card, foam, or a purpose-made wedge all work.
Use a chuck rotary instead of rollers. A chuck grips the tumbler at one end and rotates it on a fixed axis, so taper does not drive any sideways movement. It is the better tool for tapered drinkware generally.
Keep the design in a narrow band. The less vertical height your artwork occupies, the less the circumference changes across it, and the less any of this matters.
Handles and Obstructions
Handled tumblers are increasingly common and they collide with the laser head. Most have handles that unscrew or unclip with a screwdriver. Remove it before setting up, and if the mounting lugs still protrude, bend them clear or rotate the tumbler so they sit away from the engraving path.
Also check for moulded grips, ridges, welded seams and logo embossing. Anything that breaks the smooth curve will interrupt the engraving and throw focus.
Coating Quality
Cheap blanks have inconsistent coating thickness, and it shows. One area engraves through to bright steel, the next still has colour left in it, and no setting fixes a coating that varies across the cup.
Consistent, smooth powder coating is what you are paying for in a quality blank. Run a test on any new supplier before you commit to a customer order.
Size vs Your Machine
Check three things before buying blanks in quantity: whether the tumbler fits under your laser head with the rotary installed, whether your rotary can grip its diameter, and whether the height clears the gantry. Tall 40 oz tumblers in particular need more vertical clearance than many machines offer as standard.
Measuring for the Design
Getting the size right before you cut anything is what separates a clean wrap from a design that does not meet itself.
1. Decide where the design sits. Pick the vertical band on the tumbler where the artwork will go, and mark the top and bottom of it lightly.
2. Measure the circumference of that band. Either measure the diameter at that height and multiply by 3.1416, or wrap a strip of paper around the tumbler at that exact height, mark where it overlaps, and measure it flat. The paper method is more reliable on a tapered cup.
3. Measure the usable height. Stay clear of the rim, the base and any lid thread. Most tumblers give you less usable height than they look like they will.
4. Size the artwork to those two numbers. For a full wrap, the design width equals the circumference. For a partial design, anything up to that.
5. Enter the circumference into your rotary settings. Your software needs it to work out how far to rotate. Getting this wrong stretches or compresses the design horizontally, which is the most common cause of a wrap that does not meet.
Diameter | Circumference |
|---|---|
2.8 inches | 8.80 inches |
3.0 inches | 9.42 inches |
3.25 inches | 10.21 inches |
3.5 inches | 11.00 inches |
3.75 inches | 11.78 inches |
Circumference equals diameter multiplied by 3.1416. Measure at the height your design will sit, not at the widest point of the tumbler.
Setting Up the Rotary
Chuck vs Roller
Type | How It Holds | Best For | Watch Out For |
|---|---|---|---|
Roller | Tumbler rests on two rotating rollers | Straight-sided cups, bottles, glasses | Tapered items walk sideways; light items can slip |
Chuck | Gripped at one end, rotated on a fixed axis | Tapered tumblers, stemware, irregular shapes | Needs the open end accessible; grip must be centred |
If drinkware is most of your work and most of your stock is tapered, a chuck rotary will save you more frustration than any other single purchase.
Levelling and Centring
Get the engraving band parallel to the bed. Not the tumbler overall, the specific band you are marking. Shim as needed.
Check it spins true. Rotate it by hand and watch for wobble. Any wobble means the design will drift in and out of focus as it turns.
Centre it on the rotary axis. An off-centre tumbler rises and falls through each rotation, which shows as bands of light and heavy engraving.
Focus
Focus on the highest point of the curve, which is the point nearest the lens, directly above the axis of rotation. That is where the laser fires. Focusing on the shoulder of the curve puts your actual engraving line out of focus.
If your machine has autofocus, verify it landed on the top of the curve rather than the edge. A manual focus gauge on the crown of the tumbler is more reliable on a curved surface.
Step by Step
1. Clean the tumbler. Isopropyl alcohol and a microfibre cloth. Fingerprints and manufacturing oils cause patchy engraving, particularly on bare metal.
2. Remove the handle and lid. Anything that protrudes will collide with the head or block the beam.
3. Measure and size the design. As above. Enter the circumference into your rotary settings.
4. Mount and level. Secure it, shim the taper, confirm it spins true with no wobble.
5. Set focus on the crown of the curve. Directly above the rotation axis.
6. Frame the job. Run the frame or preview function so the head traces the design boundary. Mark your intended start point with a removable marker so you can confirm the rotation lands where you expect.
7. Run a test on a scrap tumbler. Same brand, same coating colour. Coatings vary between colours from the same manufacturer, so a black blank and a white blank may need different settings.
8. Engrave, and watch it. Stay with the machine. Look for the tumbler drifting sideways, rotation slipping, or the design walking out of position. Catching it in the first rotation saves the blank.
9. Clean and inspect. Wipe away residue, check contrast and coverage, and confirm the wrap meets cleanly if it is a full wrap.
Settings
Settings vary by machine, wattage, lens, coating and even coating colour, so treat any published figure as a starting point rather than a recipe. Always test on a scrap of the same stock.
CO2 on Powder-Coated Tumblers
On a 60 W CO2 laser, a reasonable starting point is 85 to 95 percent power at 250 to 400 mm/s, single pass, with air assist on. Higher wattage machines will want proportionally less power or more speed.
The target is removing the coating cleanly without heating the steel underneath enough to discolour it. If you see a brown or straw-coloured halo around the engraving, you are putting too much heat in. Increase speed before you reduce power, because power that is too low leaves coating residue in the engraved area.
Fiber on Bare Stainless
Bare metal is a different process with different goals. You are choosing between annealing for a flat dark mark, etching for speed and contrast, or deep engraving for a recessed mark.
For drinkware, annealing or light etching is usually right, because a deep engrave on a thin double-walled tumbler puts unnecessary heat into the vessel. Our guide to laser engraving stainless steel covers the three processes and when each applies.
Rather than guessing, our free Thunder Materials Library gives tested power, speed and interval settings across 22 materials as a LightBurn file you can load straight into your library panel.
Resolution
For logos and fine text, higher DPI holds detail better on a curved surface, and 500 to 600 DPI is a sensible working range. Going higher increases job time substantially for diminishing returns on most drinkware artwork.
Full-Wrap and Seamless Designs
A design that wraps the entire circumference is the most impressive thing you can do on a tumbler and the easiest to get wrong.
Size to the measured circumference exactly. Not the nominal size from the product listing. Manufacturing tolerances vary, and a quarter inch of error is very visible at the seam.
Put the seam where it matters least. Behind where a handle sits, or at the point the customer is least likely to look. There is almost always a natural back to a tumbler.
Design a pattern that tolerates a seam. Scattered motifs, organic textures and repeating patterns hide a small mismatch. A continuous horizontal line or a band of text does not.
Or leave a deliberate gap. A design that clearly stops and starts, with a defined blank band between, reads as intentional. A design that almost meets reads as a mistake.
Remember the taper. On a tapered tumbler a full wrap will only meet perfectly at one height. Keeping wrap designs to a shallow band minimises the mismatch.
Common Mistakes
Skipping the rotary. Engraving a curve flat distorts everything away from the centre line. There is no setting that fixes it.
Entering the wrong circumference. Stretches or compresses the design horizontally. This is the most common reason a wrap does not meet.
Ignoring the taper. The tumbler walks sideways mid-job and the design ends up crooked.
Focusing on the edge of the curve. Focus belongs on the crown, directly above the rotation axis.
Not cleaning first. Oils and fingerprints cause patchy, inconsistent marks.
Too much power on powder coat. Burns through the coating and discolours the steel, leaving a brown halo.
Assuming settings transfer between colours. A white powder coat and a black one from the same supplier can behave differently.
Testing on the customer's cup. Always keep scrap blanks in the same stock for testing.
Leaving the machine unattended. Rotation errors and slippage are only recoverable if you catch them in the first few seconds.
Cleaning and Finishing
Engraving leaves residue, and the difference between a good result and a great one is often just the cleanup.
Wipe with isopropyl alcohol and a microfibre cloth to remove soot and coating debris.
For powder coat, check the engraved area is fully cleared. Any residual coating dulls the contrast. A soft brush helps in fine detail.
For marking spray, wash the excess off completely with warm water before it dries hard.
A metal polish can lift contrast on exposed steel, though keep it out of the surrounding coating.
Reassemble and inspect under good light. Curved surfaces hide flaws until you rotate them, so turn the finished piece fully before it goes to the customer.
Durability and Care
A properly engraved tumbler outlasts any printed or vinyl alternative, because the design is part of the surface rather than sitting on top of it. It will not peel, crack or fade with UV exposure.
There is one detail worth passing on to customers. On a powder-coated tumbler, engraving removes the coating and exposes bare stainless in the design area. That steel is corrosion resistant and perfectly durable, but it is no longer protected by the coating, so on a cup that lives outdoors or gets left wet, that area will weather slightly differently over years.
Most engraved tumblers are dishwasher safe. Hand washing is still the better advice, not because the engraving needs it, but because repeated dishwasher cycles degrade the vacuum insulation and outer finish on almost all double-walled drinkware regardless of whether it has been engraved.
Selling Engraved Tumblers
Custom drinkware is one of the most reliable revenue lines in personalisation. Blanks are inexpensive, the process takes minutes per unit once dialled in, and the perceived value of a personalised tumbler is well above its material cost.
The work that pays best is repeat and batch work rather than one-off custom pieces. A corporate order of fifty tumblers with one logo is a single design setup amortised across fifty units. Fifty individual names is fifty setups.
A trademark point worth understanding. Engraving a tumbler a customer already owns is straightforward personalisation, and there is no issue. Buying branded tumblers wholesale, engraving them, and reselling them as your own product is a different question, because you are commercialising someone else's trademark. Several drinkware brands have programmes that authorise customisation partners, and some actively pursue unauthorised resellers. If branded blanks are going to be a significant part of your business, look into the brand's customisation policy before you scale, or use unbranded blanks.
On the wider economics, our guide on whether laser engraving is profitable covers cost structure, pricing method and why design time is what quietly erodes margin on custom work.
Getting Consistent Results
Tumbler engraving is a geometry problem more than a settings problem. The machine work is straightforward. What separates clean, repeatable results from frustrating ones is measuring the circumference where the design actually sits, levelling the engraving band rather than the tumbler, and understanding that a tapered cup behaves differently from a straight one.
Get those three right, test them on scrap material from the same stock, and the rest becomes routine production work. If you’re still exploring your options, our guide to what a fiber laser can engrave covers the full range of materials and applications you can work with.
Frequently asked questions
Do I need a rotary attachment to engrave tumblers?
Yes. Engraving a cylindrical surface on a flat bed distorts the design as the surface curves away from the laser, and it goes out of focus toward the edges. A rotary turns the tumbler so the laser always works on the crown of the curve.
What laser do I need to engrave tumblers?
A CO2 laser for powder-coated and painted tumblers, because you are removing a coating. A fiber laser for bare stainless, because you are marking the metal itself. A CO2 laser can also mark bare stainless if you use a marking spray such as CerMark.
What wattage do I need?
For powder-coated tumblers, 40 to 60 W of CO2 is plenty, since you are only clearing a thin coating. More power mainly buys speed. For bare stainless on a fiber laser, 20 to 50 W covers drinkware comfortably.
Why does my wrap design not meet up?
Almost always the circumference. Either it was measured at a different height than the design sits, taken from the product listing rather than the actual cup, or entered incorrectly in the rotary settings. Measure at the exact band you are engraving.
Why is my tumbler drifting sideways while it engraves?
Because it is tapered and sitting on a roller rotary. The wider end travels further per rotation than the narrow end, which pushes the tumbler along. Shim the narrow end so the engraving band is parallel to the bed, or use a chuck rotary.
Can I engrave a Yeti or Stanley tumbler?
Technically yes, and they engrave well. Powder-coated versions run on a CO2 laser; bare stainless needs fiber or marking spray. Note that handled models need the handle removed first. If you plan to buy branded tumblers and resell them engraved, look into that brand's customisation policy first.
Are engraved tumblers dishwasher safe?
The engraving is. Most manufacturers still recommend hand washing their double-walled drinkware, engraved or not, because dishwasher cycles are hard on vacuum insulation and outer finishes.
How long does it take to engrave one tumbler?
Setup aside, a simple name or logo typically runs in a few minutes. A dense full-wrap design takes considerably longer. Setup time, not engraving time, is what determines how many you can produce in an hour.
Can you engrave plastic tumblers?
Some, with care. Pigmented acrylic and polycarbonate can mark, but many plastics melt, deform or release harmful fumes. Never laser PVC. Test any unfamiliar plastic on a spare before committing.
Can you engrave glass tumblers?
Yes, with a CO2 laser at low power. The laser frosts the surface rather than cutting into it. Glass is prone to cracking from thermal shock, so use conservative settings and expect a higher reject rate than on metal.
Why is there a brown halo around my engraving?
Too much heat. The coating has been removed and the steel underneath has begun to oxidise. Increase speed first rather than dropping power, since power that is too low leaves coating residue in the engraved area.
Do different coating colours need different settings?
Often yes. Coating thickness and pigment both affect how the material absorbs energy, so a white blank and a black blank from the same supplier can need different settings. Test each colour once and record what worked.