One of the skills CO2 laser engravers and cutters need to master is trying to avoid creating scorch marks on the edges of the engraving. With some materials, no matter where the focus of the laser is, burn marks are inevitable. However, by using the right substrate and carefully following guidance, you can keep time-consuming cleanups to a minimum during the cutting process.
In this article, we’ll tell you which types of wood to avoid and provide helpful tips about cutting wood with a laser without burning it.
What Causes Burn Stains on Cut Wood?
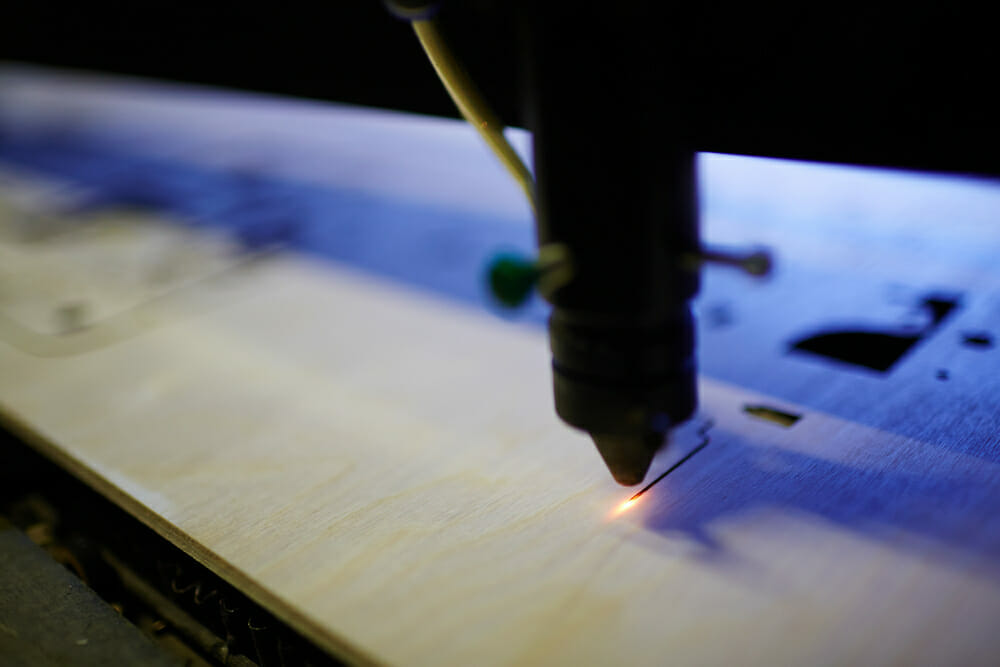
The first thing to understand is that the laser beam never actually touches the surface of the wood. Just like on the inside of a chimney, soot from the burning of organic material is deposited on the surrounding area. As such, there’s no need to be worried about the laser damaging wood; it’s just a case of taking precautions to avoid staining your woodworking.
There are several ways to avoid these stains, with the most popular being to put application tape on the surface of the wood. You can also amend the laser cutting machine’s settings, apply a coating, use air assist — and make sure that you choose the right wood, ideally with a high moisture content.
Choose Your Wood Carefully
Some types of wood are better for laser cutting than others, largely because of the amount of glue binders used to make certain wooden materials. Laser cutters tend to work best with softer woods that have a simple grain pattern, like alder and basswood.
Materials like plywood and MDF are more challenging due to the high glue content — but if you do need to use them, using tape, a coating or sanding afterwards are always options.
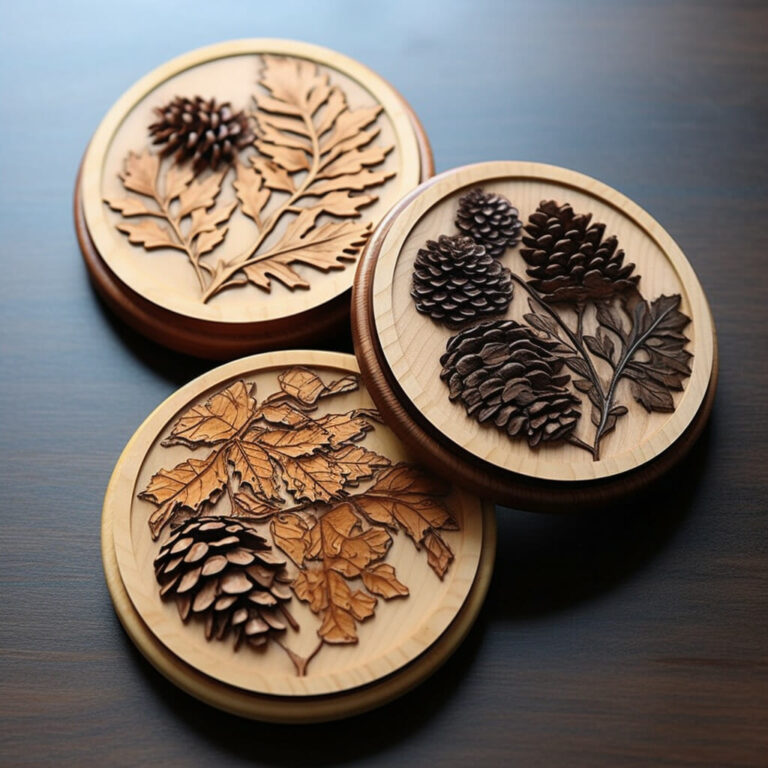
- Soft wood: Soft woods like balsa and alder require a low power setting and cut easily without too much resistance. Using lighter wood results in the least amount of contrast between the original surface and the new cut edge.
- Hard wood: Hard woods like cherry and oak are more prone to scorching than light wood because you’ll need to use a stronger laser to engrave or cut the surface. The result of this is a darker edge with a higher likelihood of burning.
- Veneers: Veneered wood uses wood as the material on the surface, so engraving can work well in many cases. It might not work with laser cutting, depending on what the core material is.
- Plywood: Plywood is one of the more difficult substrates to cut without burning, although it is possible if you use our tips below. It’s one of the most versatile materials, with a wide range of sizes and styles. However, you need to select one that’s especially designed for laser cutting, such as birch plywood.
Wavelength
Even the wavelength of the laser affects the cut edge of your material, with a 1.06-micron fiber laser not being advisable. Instead, for cutting wood with a CO2 laser, a 9.3 or 10.6-micron fiber beam produces the fewest burn marks.
Resin Content
The amount of sap or resin in the wood makes a huge difference when it comes to using a laser cutter machine. Materials like alder with a high resin content are much more likely to scorch or have a dark-edged finish, whereas oak has lower resin content and is better for light, clean cuts.
Test Before Starting
The type of wood you choose and even the thickness of the particular piece can make a significant difference to your finished product. Speed, power, wattage and your environment also play a crucial role. As such, we’d recommend always performing a materials test on an off-cut before you begin.
5 Tips for Preventing Burning When Laser Cutting
Provided you apply a little patience and practice during the initial stages, there are some simple solutions to prevent burn marks from a CO2 laser.
1. Use Transfer Tape on the Surface of the Wood
You can tack masking tape to the surface of the wood, but application tape comes in a ready-made wide roll and works perfectly with a laser engraver. You can apply the tape to both sides of your product for a perfectly clean finish. Use a little plastic squeegee to firmly press down the tape and ensure there are no air bubbles, which might affect the cutting process.
The major downside with this strategy is how time-consuming applying the tape and then removing it afterward is. To make money with a laser cutter, speed is a top priority — and peeling tape off piece by piece could be a serious dampener on productivity. Don’t worry, though — you can opt to use a plastic razor to efficiently remove the tape.
2. Modify the CO2 Laser Power Settings
There are several settings you can play with to avoid scorching. Once you’ve found the setup that works for each type of wood, you can make a note of it to speed up the process in the future. It’s possible to manually adjust the focus of the laser so that it zooms out slightly. A slightly more diffuse laser diminishes the amount of smoke produced while still providing enough power to engrave or cut your material.
3. Apply a Coating
Another effective method is to add a coating to your wood before putting it under the laser cutter. When the job is finished, all you need to do is clean off the remaining burned residue, leaving the wood clean and fresh. This also stops any burnt matter from getting into the grain of the wood and looking unsightly. You can remove marks using wooden furniture polish or denatured alcohol and they’ll come off easily because of the smooth coating.
4. Submerge Thin Wood in Water
Thin plywood or other similar types of wood will avoid scorching altogether if you simply immerse them in water before cutting. While it won’t work on large pieces of wood or non-composite pieces, it’s a quick and easy fix in specific cases.
5. Use Air Assist
Air assist won’t necessarily remove the risk of burning wood with a CO2 laser entirely, but it helps in every instance and is highly effective for some people. Minute details such as air pressure and setup could change the way your machine works, but it’s always recommended that you apply this setting. As you gain more experience using the laser cutting machine, you’ll use trial and error to find out how to use air assist for the best results.
How to Remove Charring Caused by a Laser Cutter
While your priorities should always be planning, prevention and preparation, sometimes the inevitable happens and you end up with burn marks on a finished piece. There’s no need to fret; in most cases you can fix the problem instead of having to start over. In extreme cases, you might have to admit defeat and start again, but otherwise you can try the following:
Use Sandpaper on the Edges of the Cut
It might seem obvious, but sandpaper is any woodworker’s best friend. You can clean up unsightly marks quickly, easily and with little risk just by using this cheap and widely available tool. Fine-tooth sandpaper is ideal to make sure you don’t alter any of the fine details or measurements of your finished product.
Pumice Liquid Soap
You can apply pumice liquid soap using a small paintbrush or toothbrush and the tiny grains will gently wash away the unwanted burned areas. If you’re using wood with a lot of crevices and details, this can help ensure the whole finished piece is uniformly cleaned.
Denatured Alcohol
In case the other methods haven’t worked, denatured alcohol is a last resort in case of stubborn marks. All you need to do is add a tiny amount to a cloth and then wipe it over the charred areas.
More Tips to Prevent Laser Cut Burn Marks
Here are some final tips to help you get the cleanest, lightest finish on the edges of your cut materials:
- Use more than one preventive method for the best results.
- Try black acrylic if you’re looking for a perfect finish.
- Add furniture polish before cutting and to wipe off light soot stains.
- Use mineral spirits to clean slightly discolored acrylic or wood.
- Adjust the frequency or PPI of your laser cutter.
- Play with the cut speed.
- Try using a lower power setting.
Get Laser Engraving Today
If you’re looking to get into the laser cutting business or you’d like to add a new tool to your laser engraving business, Thunder Laser USA has the best laser machines in the business.