Can You Laser Engrave Copper? Everything You Need to Know
Which laser handles copper, why it is harder than any other common metal, the machine risk nobody mentions, and what happens to the mark months after you engrave it.

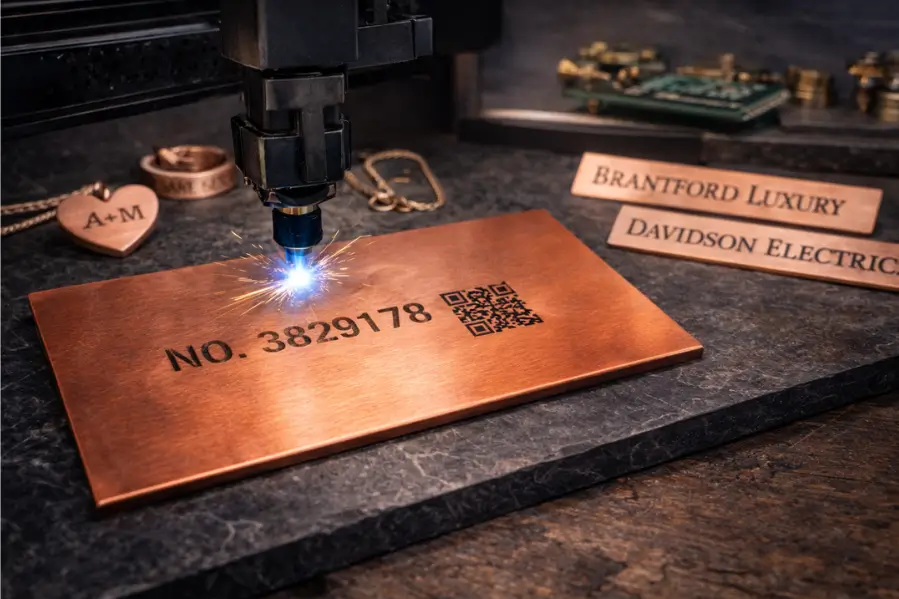
Copper can be laser engraved, but it is the most difficult common metal to work with. It reflects roughly 95 percent or more of the beam at 1,064 nm and conducts heat away at around 401 W/m·K, about 27 times faster than stainless steel, so energy that does land spreads instead of marking. A MOPA fiber laser gives the best control, a standard fiber works for deep engraving, and UV or green lasers suit fine detail. A CO2 laser cannot engrave bare copper at all. Two things most guides omit: reflected energy can damage your laser source, and engraved copper keeps oxidising afterwards, which changes how the mark looks over time.
Key takeaways
- Reflected energy is a machine risk, not just a settings problem. Copper sends most of the beam back toward the source. Confirm your machine has back-reflection protection before running production work.
- Heat conduction is the second problem. Copper moves heat roughly 27 times faster than stainless steel, so energy dissipates before it can mark. Short pulses beat high power.
- Brass is much easier than copper, and the reason is zinc. Zinc vaporises readily and produces a deep black mark. Pure copper has no zinc, which is why it resists blackening.
- The mark keeps changing after you finish. Copper oxidises continuously, so contrast can shift or fade over months. Depth or a protective coating is what preserves it.
- Surface condition affects results batch to batch. Existing oxidation, roughness and oils all change absorption. Clean every piece, and expect variation across stock that looks identical.
Copper is one of the most attractive metals to engrave and one of the least cooperative. The warm tone and premium feel make it popular for jewellery, branding plates, decor and electronics, and the physics make it harder to mark cleanly than stainless steel, brass or aluminium.
This guide covers what works, what settings to start from, and two things most copper guides leave out entirely: the risk reflected energy poses to your laser source, and what happens to an engraved mark in the months after it leaves your workshop.
Can You Laser Engrave Copper?
Yes, with the right machine. A fiber laser, and preferably a MOPA fiber laser, will engrave and mark bare copper permanently. UV and green lasers handle fine detail and electronics work particularly well. A CO2 laser cannot engrave bare copper at all, though it can mark it using a ceramic marking spray.
What it will not do is behave like stainless steel. Settings that produce a clean mark on steel will often produce almost nothing on copper, and the reason is worth understanding before you start adjusting parameters at random.
Why Copper Is Difficult to Engrave
Two physical properties cause nearly every copper engraving problem, and they compound each other.
Reflectivity
Copper reflects roughly 95 percent or more of laser energy at 1,064 nm, the wavelength fiber lasers operate at. Only a small fraction of the beam is absorbed, which is why standard metal settings frequently produce no visible mark at all.
This is also why shorter wavelengths work better. Copper absorbs green light at 532 nm and ultraviolet at 355 nm considerably more efficiently than infrared, which is why green and UV lasers are the preferred choice for fine marking on copper in industrial settings.
Thermal Conductivity
The second problem is that copper is an exceptional heat conductor, and that works against you.
Metal | Thermal Conductivity | Relative to Copper |
|---|---|---|
Copper | About 401 W/m·K | Baseline, the fastest of these |
Aluminium | About 237 W/m·K | Around 60 percent |
Brass | About 110 to 120 W/m·K | Around 28 percent |
Bronze | About 70 to 85 W/m·K | Around 19 percent |
Carbon steel | About 50 W/m·K | Around 12 percent |
Stainless steel | About 15 W/m·K | Around 4 percent |
The practical consequence: copper moves heat away roughly 27 times faster than stainless steel. Energy that does get absorbed spreads through the part instead of staying where the beam landed. That is why raising power often produces a wider, shallower, blurrier mark rather than a deeper one.
The answer is not more power. It is shorter pulses at higher frequency, which deliver energy faster than the material can conduct it away. This is precisely what a MOPA source is built for, and it is the main reason MOPA outperforms standard fiber on copper.
The Back-Reflection Risk
This is the part that most copper guides leave out, and it is the one that can cost you a laser source rather than a workpiece.
Reflectivity is usually framed as a results problem: the beam bounces off, so the mark is weak. But that reflected energy does not simply disappear. It travels back through the focusing optics and can couple down the delivery fibre toward the laser source.
Uncontrolled back-reflection damages hardware. Reflected energy re-entering the system can destabilise the laser, damage the delivery fibre and optics, and reach the pump diodes. This is a documented failure mode in fiber systems, not a theoretical concern, and copper is the material most likely to cause it because it reflects more of the beam than anything else you are likely to run.
Three things keep it in proportion.
It scales with power. The severe failures come from kilowatt-class cutting and welding. A 20 to 60 W marking laser working a small engraved area is a far milder case.
Most modern sources are protected. Current fiber lasers generally include back-reflection protection, either hardware isolation that dumps reflected energy as heat, or software monitoring that shuts the laser down when it detects a problem. Hardware isolation is preferable, because software protection interrupts the job and needs a reset.
Angling the part helps. Tilting the workpiece a few degrees off perpendicular directs the reflection away from the beam path rather than straight back down it. On flat copper plate this is a simple and effective precaution.
If copper is incidental to your work, most machines handle it without drama. If copper or precious metals are your core business, ask the manufacturer directly what back-reflection protection the source has. It is a specification question, and a reputable supplier will answer it plainly.
Which Laser Do You Need for Copper?
Laser Type | Works on Copper | Best For | Notes |
|---|---|---|---|
MOPA fiber | Yes, best all-round | Colour marking, fine detail, thin parts | Adjustable pulse width delivers energy faster than copper conducts it away |
Standard fiber | Yes | Deep engraving, serial marking | Needs higher power, typically 30 to 50 W and up |
UV (355 nm) | Yes, excellent detail | Micro-marking, electronics, data matrix | Copper absorbs UV far better than infrared; very low heat input |
Green (532 nm) | Yes | Fine industrial marking | Better absorption than IR and limits thermal diffusion |
CO2 (10.6 microns) | Not on bare copper | Marking spray only | Copper reflects this wavelength almost entirely |
Diode | No, practically | Not recommended | Insufficient absorption and power for reliable results |
For most workshops, MOPA fiber is the right answer. The pulse width control solves the thermal conductivity problem directly, and it is also what makes colour marking on copper possible at all.
If you are still choosing between technologies, our comparison of CO2 vs fiber lasers covers the decision by product line, and what a fiber laser can engrave covers the wider material range.
Can You Engrave Copper With a CO2 Laser?
Not bare copper. At 10.6 microns the beam is reflected almost entirely and nothing happens.
A CO2 laser can mark copper using a ceramic marking spray such as CerMark, Thermark or LaserBond. The spray is applied to the surface, the laser heats it, and the compound bonds permanently to the metal leaving a dark mark. This works well for logos, labels and barcodes.
It is marking, not engraving. There is no material removal and no depth. The mark sits on the surface, so it will not survive abrasion the way an engraved mark will, and it adds a consumable cost plus application and cleanup time to every part.
Copper vs Brass vs Bronze
People often assume these behave similarly because they are all copper-based. They do not, and the differences explain a lot.
Material | Composition | Thermal Conductivity | Marking Behaviour |
|---|---|---|---|
Pure copper | Cu | About 401 W/m·K | Hardest of the three. Resists blackening; heat dissipates fastest |
Brass | Cu + Zn | About 110 to 120 W/m·K | Easiest. Zinc vaporises readily and produces deep black marks |
Bronze | Cu + Sn or P | About 70 to 85 W/m·K | Oxidises to brown or black with a matte finish |
The zinc explains everything. Brass marks well because zinc has a much lower vaporisation point than copper and leaves behind a dark, high-contrast result. Pure copper has no zinc to vaporise, which is exactly why it resists blackening and why brass settings will not transfer.
If you have been engraving brass successfully and copper is giving you nothing, this is why. They are not the same job.
Copper Grades and Surface Finishes
Copper is not a single material, and the variation matters more than most people expect.
Purity affects marking. High-purity electrolytic copper such as C110 conducts heat fastest and is the hardest to mark. Alloyed grades generally behave better. Always test a new supplier's stock rather than assuming.
Surface finish changes absorption. Polished copper reflects more than brushed or mill finish, so a mirror-polished piece is measurably harder to mark than a satin one. A brushed finish is more forgiving and often gives better contrast.
Existing oxidation is a variable. Copper starts oxidising the moment it leaves the mill. A piece with a light tarnish absorbs differently from freshly cleaned stock, which is why results can vary across a batch that looks identical. Clean every piece with isopropyl alcohol immediately before engraving.
Check whether it is solid copper or copper-plated. A great deal of consumer copper is plated steel or plated zinc alloy with a thin copper layer. Engraving through the plating exposes the base metal, giving a mark in the wrong colour that will corrode differently from the surface around it. A magnet is the quick test: solid copper is not magnetic, copper-plated steel is.
Recommended Settings for Copper
Settings depend on wattage, source type, copper grade and surface finish, so treat published figures as starting points and always test on scrap of the same stock.
Fiber Laser Settings
Wattage | Speed (mm/s) | Power (%) | Frequency (kHz) | Use |
|---|---|---|---|---|
30 W | 300 to 600 | 70 to 90 | 100 to 200 | Light engraving and surface marking |
50 W | 400 to 800 | 50 to 70 | 80 to 150 | Deeper engraving |
60 W and up | 500 to 900 | 40 to 60 | 60 to 120 | Industrial speed and depth |
MOPA Colour Marking
Colour | Pulse Width (ns) | Frequency (kHz) | Speed | Notes |
|---|---|---|---|---|
Black | 150 to 220 | 200 to 300 | Medium | Strongest contrast on copper |
Blue | 80 to 120 | 200 to 250 | Slow | Needs careful testing; narrow window |
Gold | 100 to 140 | 200 to 300 | Fast | Oxidation-based |
Rainbow | 50 to 200 | 150 to 300 | Multiple passes | Advanced; highly sensitive to purity |
Copper purity and surface finish both shift these results noticeably. Colour marking on copper is less repeatable than on stainless or titanium, so expect a longer test session before committing to a production run.
If a mark is too shallow, do not simply raise power. Higher power on copper usually spreads heat rather than adding depth. Increase frequency, shorten pulse width if you have MOPA control, or add passes before reaching for more watts.
For tested starting points on other materials, our free Thunder Materials Library covers power, speed and interval settings for 22 materials as a LightBurn file and printable PDF.
How to Laser Engrave Copper Step by Step
1. Confirm it is solid copper. Check with a magnet if you are unsure. Plated stock behaves entirely differently.
2. Clean the surface immediately before engraving. Isopropyl alcohol and a lint-free cloth. Oxidation and handling oils both change absorption, and copper re-oxidises quickly, so clean it just before the job rather than the day before.
3. Prepare high-contrast vector artwork. Convert text to paths so nothing substitutes on the machine.
4. Angle the part slightly if you can. A few degrees off perpendicular directs reflected energy away from the beam path.
5. Start conservative and work up. Begin around the middle of the ranges above. Copper punishes overpowering more than underpowering.
6. Run a parameter grid on scrap of the same stock. Vary frequency and speed before you vary power.
7. Engrave with air assist and extraction running. Metal marking produces fine particulate that settles on the focus lens.
8. Clean the finished piece. Isopropyl alcohol and a microfibre cloth remove residue and oxidation halo.
9. Decide on a protective finish. This matters more for copper than any other metal. See below.
Oxidation, Patina and Long-Term Contrast
This is the second major omission in most copper guides, and it is specific to copper in a way it is not to steel or aluminium.
Copper oxidises continuously in air. The process runs through predictable stages: first cuprous oxide, which is reddish brown, then cupric oxide, which is black, and eventually basic copper carbonates, which produce the familiar green patina. How fast this happens depends on humidity, temperature, pollutants and salinity.
The mark you deliver is not the mark the customer has in a year. Laser marking on copper produces contrast largely through controlled oxidation. But the surrounding untouched copper keeps oxidising too, and at a different rate. Over months, the contrast between mark and background can shift, fade, or in some conditions reverse. Industrial marking specialists note this explicitly and recommend post-marking treatment for anything where readability has to last.
Three approaches address it, depending on what the piece is for.
Engrave deeper. A physically recessed mark stays readable even after the surface oxidises, because the geometry survives regardless of colour. Industrial practice for copper parts in harsh environments is a depth of roughly 50 to 200 microns, which remains legible after oxidation or abrasion.
Seal the surface. A clear lacquer, wax or specialist metal sealant slows oxidation dramatically. This is the usual approach for jewellery, décor and branding plates where appearance matters more than industrial durability.
Accept and design for the patina. For decorative work, an evolving surface is often desirable. If that is the intention, say so to the customer rather than letting them discover it.
Sealing and Protecting Engraved Copper
Clean thoroughly first. Any sealant traps whatever is underneath it, including residue and partial oxidation. Isopropyl alcohol, then let it dry completely.
Clear lacquer gives the longest protection and keeps the bright finish. Spray application is more even than brush on engraved detail, which can pool.
Renaissance wax or microcrystalline wax is the conservation-grade option. Less durable than lacquer but reversible and it does not yellow.
For industrial parts, varnishing, nickel plating or passivation are all used to preserve mark readability in corrosive environments.
Tell the customer. If a piece is unsealed, say so and explain that it will develop a patina. If it is sealed, explain that the coating will eventually need renewing. Neither is a problem; discovering it unexpectedly is.
What People Make With Engraved Copper
Application | Why Copper | Typical Approach |
|---|---|---|
Jewellery | Warm tone, premium feel, takes colour marking | MOPA, shallow marking, sealed |
Branding and maker plates | Looks considerably more expensive than steel | Fiber, moderate depth, often sealed |
Electronics and PCB marking | Copper is already the substrate | UV or green for fine detail and low heat |
Industrial tags and busbars | Conductivity means copper is already in place | Deep engraving, 50 to 200 microns, unsealed |
Barware and kitchen items | Copper mugs and accessories are a strong gift market | Fiber, rotary for cylindrical items |
Home décor and wall art | Patina is part of the appeal | Fiber, often deliberately unsealed |
Commemorative and award plates | Premium appearance, long life | Deeper engraving, sealed |
Copper mugs and tumblers are worth noting because they are cylindrical and need a rotary attachment. Our guide to laser engraving tumblers covers rotary setup, circumference measurement and how to handle tapered vessels.
Safety
Wear goggles rated for your wavelength. This matters more with copper than almost any other material, because so much of the beam is reflected rather than absorbed. Scattered 1,064 nm light is invisible and is an eye hazard.
Run extraction. Metal marking produces fine particulate, and coated or plated copper produces more.
Never engrave PVC-coated copper wire or sheet. PVC insulation releases hydrogen chloride that becomes acid inside the machine. Strip it first or do not run it.
Avoid unidentified plated copper. Plating chemistry varies and some finishes release harmful fumes. If you cannot confirm what the coating is, treat it as unknown.
Our guide to materials not suitable for laser cutting and engraving covers the full list of what to avoid and how to identify it.
Getting Consistent Results on Copper
Copper rewards a different approach than other metals. High power is the wrong instinct, because the material conducts heat away faster than almost anything else you will run. Short pulses at high frequency deliver energy faster than copper can disperse it, which is why MOPA control matters here more than wattage.
Beyond settings, two things separate reliable copper work from frustrating copper work. Know what your machine does with reflected energy before you run production, and decide what happens to the piece after it leaves, because copper does not stay the way you delivered it. Get those right and it becomes one of the most rewarding materials on a fiber system. If you would like verified results on your specific stock, Thunder Laser's samples lab will process your material and return it with a report.
Frequently asked questions
Can you laser engrave raw copper?
Yes, with a fiber laser and ideally a MOPA fiber for the best control. UV and green lasers also work well and are preferred for fine detail. A CO2 laser cannot engrave bare copper and requires a marking spray.
Why is copper hard to engrave?
Two reasons that compound. It reflects roughly 95 percent or more of the beam at 1,064 nm, so little energy is absorbed. And it conducts heat at about 401 W/m·K, roughly 27 times faster than stainless steel, so energy that is absorbed spreads through the part instead of marking it.
Can copper damage my laser?
Potentially, through back-reflection. Copper sends most of the beam back toward the source, and uncontrolled reflected energy can damage the delivery fibre, optics and pump diodes. Most modern fiber sources include protection against this. If copper is central to your business, confirm what protection your machine has before buying.
Can a CO2 laser engrave copper?
Not bare copper. At 10.6 microns the beam is reflected almost entirely. A CO2 laser can mark copper using a ceramic spray such as CerMark, which bonds to the surface under heat, but that is surface marking rather than engraving and has no depth.
Why is brass easier to engrave than copper?
Zinc. Brass is copper alloyed with zinc, and zinc vaporises at a much lower temperature than copper, leaving a deep black mark. Pure copper has no zinc to vaporise, which is why it resists blackening. Brass also conducts heat roughly a quarter as fast, so energy stays where it lands.
Will my engraved copper mark fade over time?
The contrast can change. Copper oxidises continuously, and the untouched surface around your mark oxidises at a different rate than the marked area, so the contrast between them shifts over months. Engraving deeper or sealing the piece both preserve legibility.
Should I seal engraved copper?
For jewellery, décor and branding plates, usually yes. A clear lacquer or microcrystalline wax slows oxidation and keeps the bright finish. For industrial parts, depth is often preferred over coating, because a recessed mark stays readable even once the surface has oxidised.
How deep should an engraved mark on copper be?
For decorative work, a shallow surface mark is fine. For industrial parts that must stay readable after oxidation or abrasion, marking specialists work to roughly 50 to 200 microns of depth.
Why do my results vary between identical-looking copper pieces?
Surface condition. Existing oxidation, roughness and handling oils all change how much energy is absorbed, and copper starts oxidising immediately. Clean every piece with isopropyl alcohol right before engraving rather than in advance.
How do I know if something is solid copper or copper-plated?
Use a magnet. Solid copper is not magnetic; copper-plated steel is. Plated zinc alloy is also non-magnetic, so weight and price are secondary clues. Engraving through plating exposes the base metal and gives a mark in the wrong colour.
What laser wattage do I need for copper?
For marking and light engraving, 30 W of fiber is a workable minimum. For deeper engraving and faster cycle times, 50 W and up. Beyond a point, pulse control matters more than raw wattage on copper, which is why a 30 W MOPA often outperforms a higher-power standard fiber.
Is laser engraving copper profitable?
It can be. Copper commands a premium over steel and aluminium for jewellery, branding and décor, which supports higher pricing. The costs to account for are longer setup and testing time, higher material cost, and the finishing step if pieces are sealed.