
Laser cut maps have become a popular choice for wall art, gifts, and personalized décor. From city street layouts to world maps, they offer a clean, modern look that is both decorative and meaningful.
Whether you are creating a custom gift or selling products, learning how to laser cut a map can help you produce detailed, high quality designs that stand out.
Key Takeaways
- Laser cut maps require clean vector files for accuracy
- Design preparation is the most important step
- Materials like wood and acrylic work best
- Fine details need proper laser settings and optimization
- Testing ensures clean cuts and reduces errors
What Does It Mean to Laser Cut a Map?
Laser cutting a map means converting geographic data such as roads, borders, or coastlines into a vector design and cutting it into a material using a laser machine.
Instead of printing a map, you are physically cutting or engraving it, which creates depth and texture.
What Do You Need to Laser Cut a Map?
Successful map projects require the right combination of laser machine, vector design files, and compatible materials.
Essential tools and materials:
- Laser cutting machine
- Design software like Illustrator or LightBurn
- Vector map file (SVG, DXF, AI)
- Material such as wood, acrylic, or MDF
Optional tools:
- Masking tape for cleaner edges
- Paint or backing board for contrast
- Sandpaper for finishing
Having the right tools ensures better precision and finish quality.
How Do You Create a Map Design for Laser Cutting?
Creating a map design involves selecting the location, downloading vector data, and simplifying the design for clean cutting.
Step 1: Choose your map area
Decide what you want to create:
- City map
- Country outline
- World map
- Custom location
Step 2: Download vector map data
Use sources like:
- OpenStreetMap
- Mapbox
- GIS tools
Make sure the file is in vector format.
Step 3: Simplify the design
Maps can be very detailed, so simplify by:
- Removing unnecessary layers
- Thickening thin lines
- Adjusting scale for readability
This step is crucial for clean cutting.
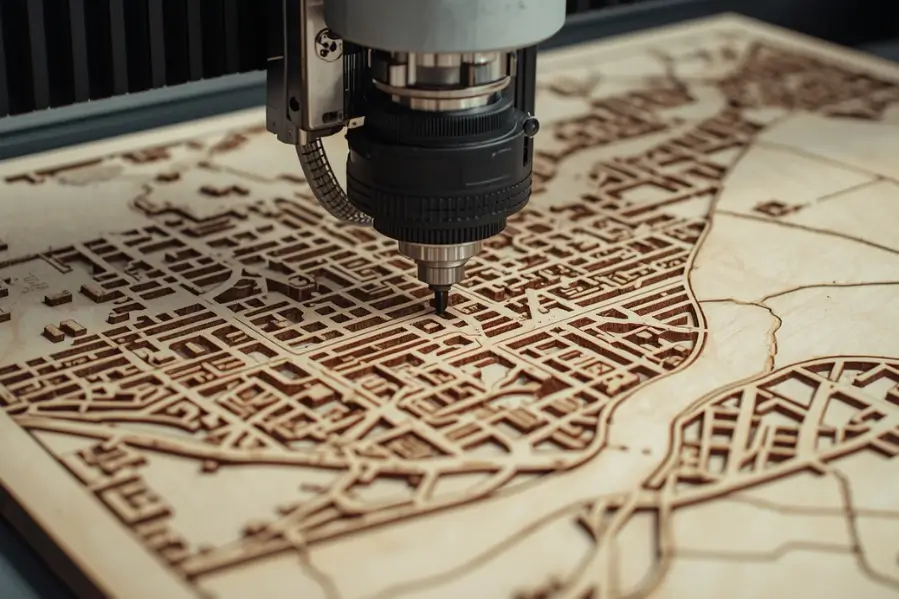
How to Laser Cut a Map Step by Step
A detailed step-by-step process ensures accurate cuts and minimizes errors, from importing the design to running the final laser job.
Step 1: Import your design
Load the vector file into your laser software.
Step 2: Adjust line settings
- Set cut lines for outer shapes
- Use engraving for fine details
- Assign different layers if needed
Step 3: Choose material
Popular options include:
- Wood for a natural look
- Acrylic for a modern finish
- MDF for budget projects
Step 4: Set laser parameters
- Adjust power and speed based on material
- Use air assist for cleaner cuts
- Focus the laser properly
Step 5: Run a test cut
Always test a small section before the final job.
Step 6: Start cutting
Monitor the process to ensure clean results.
What Are the Best Materials for Laser Cut Maps?
Materials like wood, acrylic, and MDF offer the best combination of precision, aesthetics, and cut-ability for map projects.
1. Wood
- Warm and natural appearance
- Easy to cut and engrave
- Ideal for wall décor
2. Acrylic
- Smooth and modern look
- Available in multiple colors
- Great for layered designs
3. MDF
- Affordable option
- Easy to paint
- Good for bulk production
Laser Cutting vs Engraving for Maps
| Feature | Cutting | Engraving |
|---|---|---|
| Depth | Full cut through material | Surface marking |
| Detail level | Medium | High |
| Use case | Shapes and outlines | Roads and labels |
| Visual effect | Layered design | Flat detail |
Most map projects use a combination of both.
What Are Common Challenges When Laser Cutting Maps?
Challenges such as too much detail, thin lines, or burn marks can impact quality but are manageable with proper techniques.
Too much detail
Maps can become messy if not simplified. Always clean up the design.
Thin lines breaking
Very fine lines may burn or break. Increase thickness slightly.
Burn marks
Wood can show burn marks. Use masking or adjust settings.
Alignment issues
Layered maps require precise alignment. Use guides and templates.
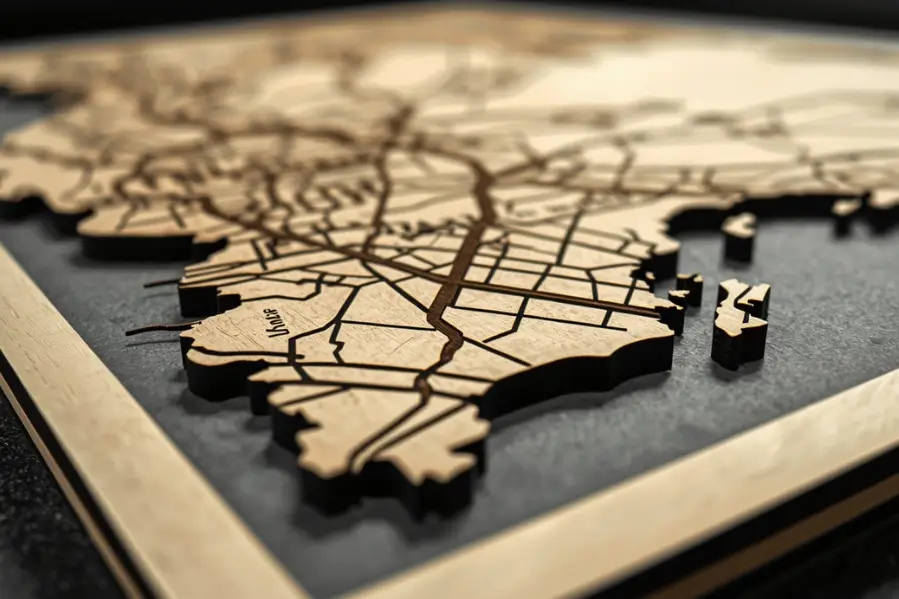
How Can You Make Your Map Design Stand Out?
To create premium looking maps:
- Use layered designs for depth
- Combine engraving and cutting
- Add a contrasting background
- Use lighting for acrylic maps
- Personalize with names or dates
These elements increase visual appeal and perceived value.
What Are the Best Use Cases for Laser Cut Maps?
Laser cut maps are used for:
- Home décor and wall art
- Personalized gifts
- Wedding or travel memories
- Office decoration
- E-commerce products
They are especially popular in custom product businesses.
Get Better Results with the Right Setup
For detailed projects like maps, precision and consistency are essential. Thunder Laser USA offers laser machines designed to handle intricate designs with accuracy and ease.
Explore their systems to create high quality map designs and scale your production with confidence.
Final Thoughts
Laser cutting a map combines creativity with precision. The key to success lies in clean design, proper material selection, and optimized laser settings.
With practice and the right setup, you can create stunning map designs that are both visually appealing and commercially valuable.
Related Read:
- How Much Does a Laser Cutting Machine Cost?
- Which Materials Are Not Suitable for Laser Cutting and Engraving?
- Can You Laser Engrave Anodized Aluminum?
Frequently Asked Questions
What file format is best for laser cutting maps?
SVG, DXF, and AI formats are best for accurate cutting.
Can beginners laser cut maps?
Yes, with proper design preparation and testing.
What is the best material for map wall art?
Wood is the most popular due to its natural look.
How do you add detail to maps?
Use engraving for roads, labels, and fine features.
Can you sell laser cut maps?
Yes, they are popular products in the custom décor market.