
AccuMetal Cutting Head Guide
Weihong WISE MASER WM04T autofocus head · 1.5 kW / 3 kW AccuMetal 24 and 51 · Thunder Laser USA · Nov 6, 2026
1. What's inside
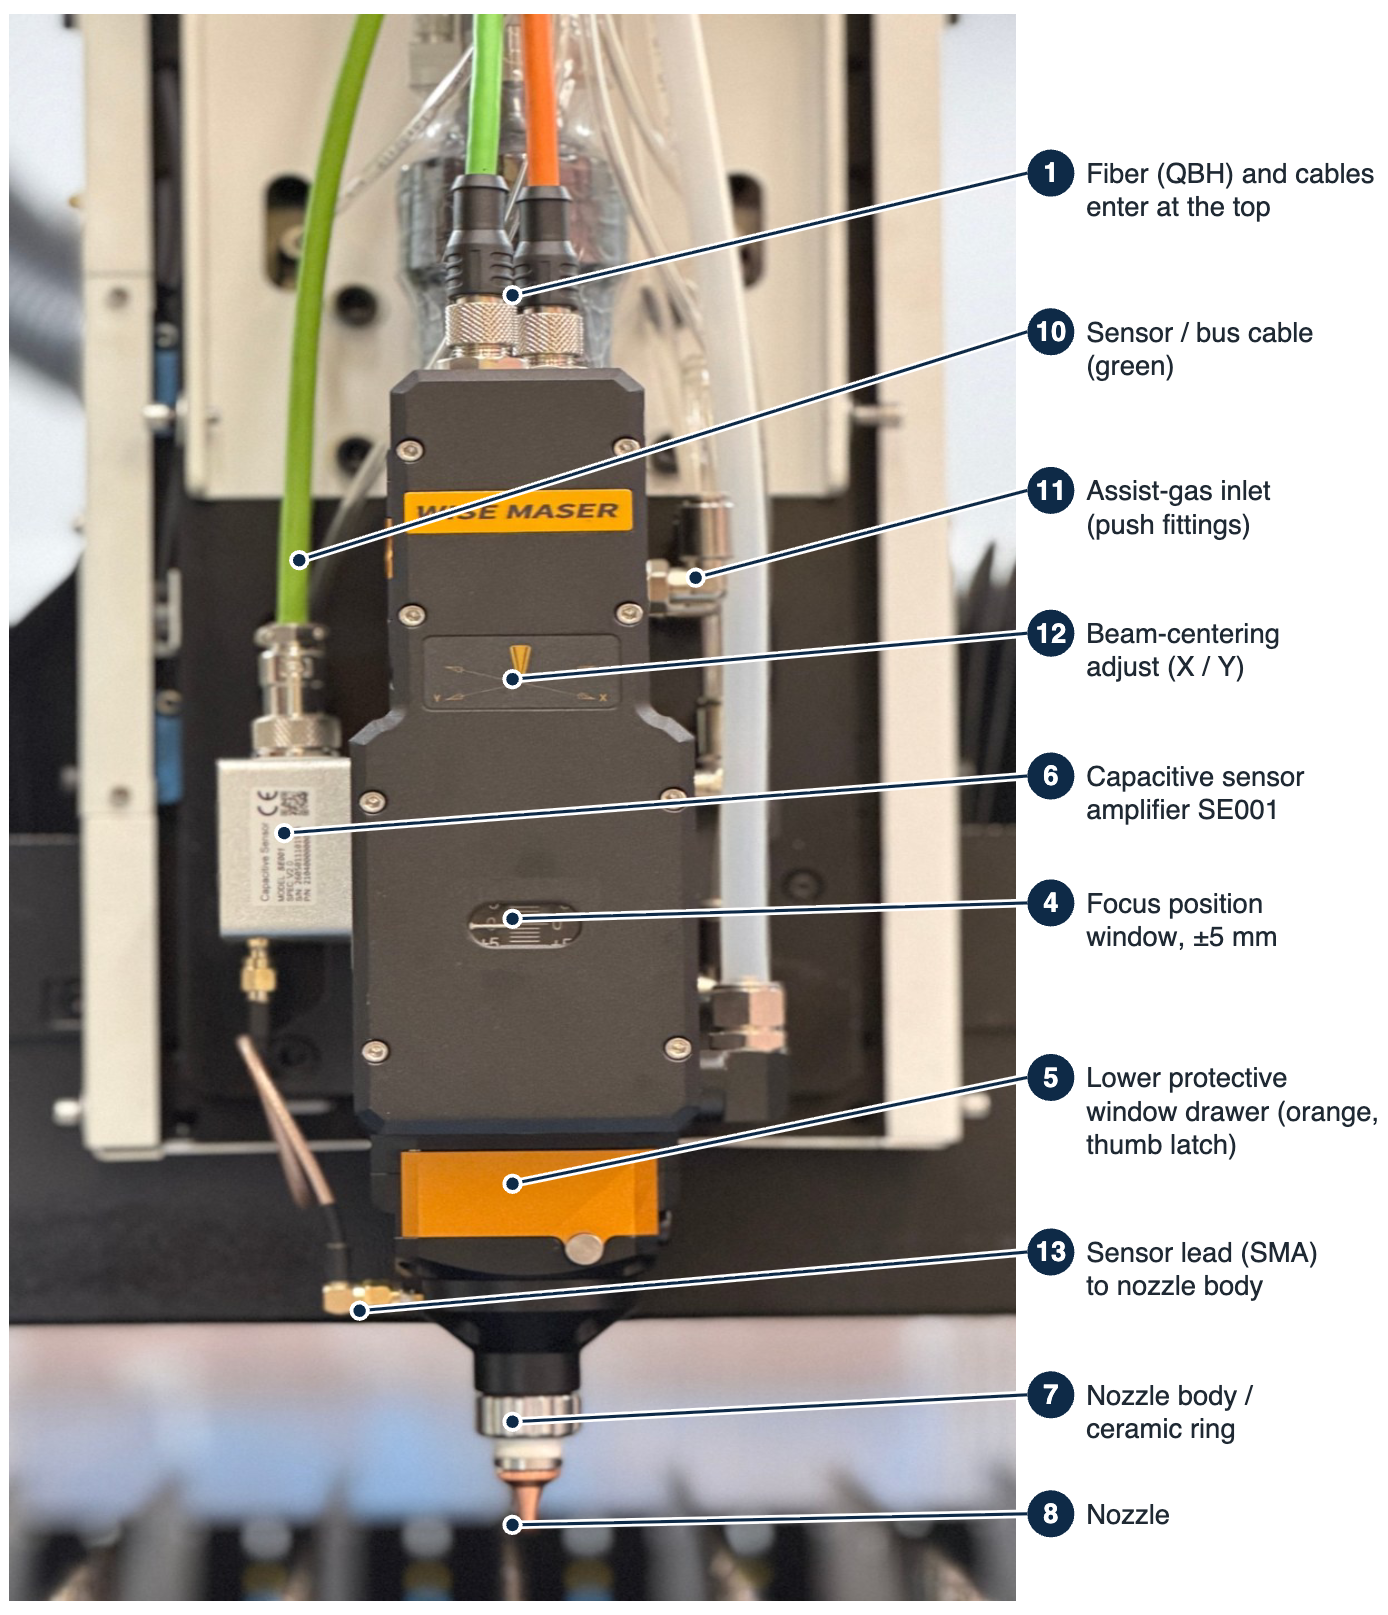
WISE MASER WM04T on the AccuMetal 24, Florida demo unit. Items 2, 3, 9 are inside the sealed body.
The consumables, as shipped
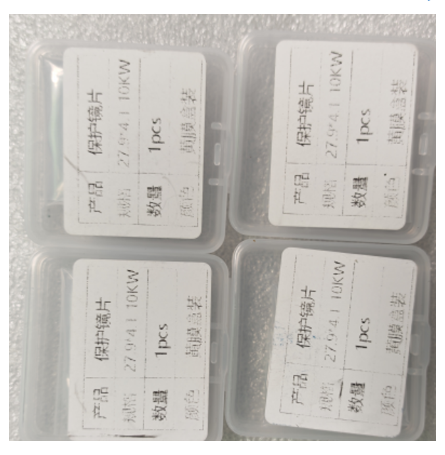
5 Lower protective windows 28×4 — 4 in the box
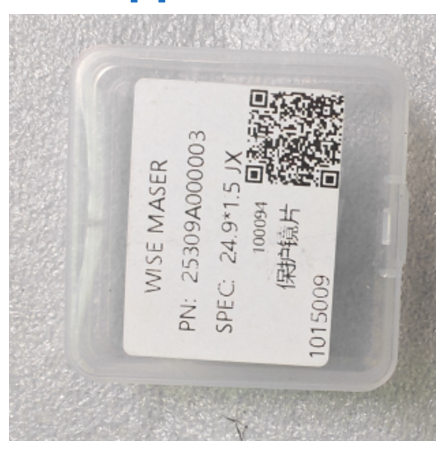
2 Upper window 24.9×1.5, WISE MASER bag
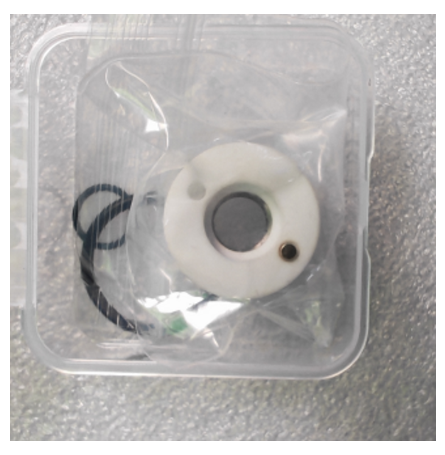
7 Ceramic ring WTC-04 with O-ring
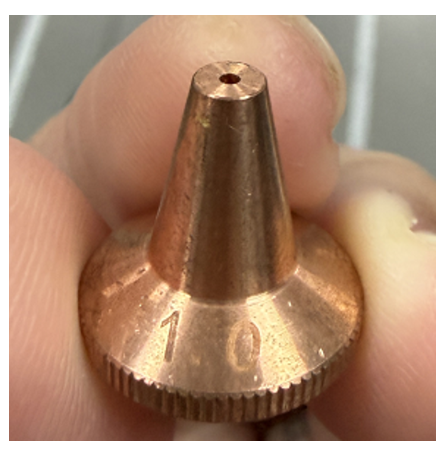
8 Nozzle, single-layer (air / N2)
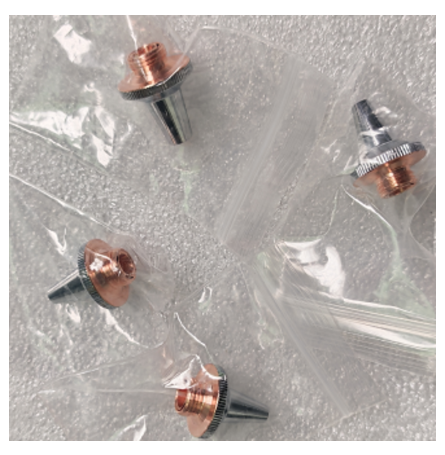
8 Nozzle set, M8 — 1.5 / 2.0 / 3.0 S and D
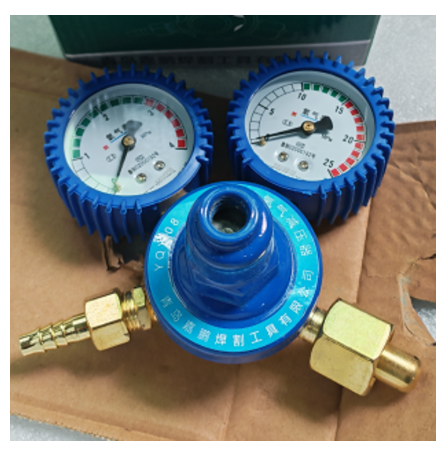
O2 regulator as shipped (YQY-08, Chinese thread — see China Q13)
Parts, by number
| # | Part | Role |
|---|---|---|
| 1 | QBH fiber connector | Laser source fiber terminates here. Never open with the source on. |
| 2 | Upper protective window | Shields the collimating lens from the fiber side. Rarely contaminated. |
| 3 | Collimating lens | Straightens the beam from the fiber. F75 / F100 on the WM04T. Not a user part. |
| 4 | Focus lens | Motorized; the controller moves it for autofocus and pierce stages. F125 / F150 / F200. |
| 5 | Lower protective window | Takes all the spatter. The #1 consumable. |
| 6 | Capacitive sensor / amplifier | Measures nozzle-to-sheet distance for height following. Needs calibration after any nozzle or ring change. |
| 7 | Ceramic ring | Electrically isolates the nozzle and carries the sensor signal. Cracks when the head hits a tipped part. |
| 8 | Nozzle | Shapes the assist gas. Single-layer for air/N2, double-layer for O2. Sizes 1.0–3.0 mm. |
| 9 | Head body | Sealed, with temperature and gas-pressure sensors. |
| 10 | Sensor / bus cable | Green cable to the controller. Carries height-sensor signal and focus-motor commands. |
| 11 | Assist-gas inlet | Push-fit; clear tube from the gas manifold. Pressure is read inside the head. |
| 12 | Beam-centering adjust | Two screws (X and Y) behind the crosshair label. Only touch when the nozzle-center test says to. |
| 13 | Sensor lead | Short SMA lead from the amplifier to the nozzle body. Keep it dry and clear of spatter. |
2. Consumables and part numbers
| Part | Spec | Thunder P/N | Ships with |
|---|---|---|---|
| Lower protective window | 28 × 4 mm (Weihong 27.9 × 4.1) | 10.04.0045 | 4 |
| Upper protective window | 24.9 × 1.5 mm | 10.04.0044 | 1 |
| Ceramic ring | WTC-04 | 10.09.0006 | 1 |
| Nozzle, single 1.0 | M8 | 10.09.0008 | — |
| Nozzle, single 1.5 | M8 | 10.09.0007 | 1 |
| Nozzle, single 2.0 / 3.0 | M8 | [assign] | 1 each |
| Nozzle, double 1.2 | M8 | [assign] | on head |
| Nozzle, double 1.5 / 2.0 / 3.0 | M8 | [assign] | 1 each |
| Focus / collimating lens | Weihong service part | [Weihong P/N] | — |
| Sensor amplifier / cable | Weihong service part | [Weihong P/N] | — |
Which nozzle: S1.5 — thin stainless, steel, brass on air · S2.0 — 2–4 mm stainless, Al, brass · S3.0 — 5–6 mm stainless, 4 mm Al · D1.2 — 4–6 mm steel on O2 · D3.0 — 10–16 mm steel on O2. From the 1.5 kW cutting chart.
3. Replace the lower protective window
When: visible spots, haze or burn marks; cut quality drops suddenly; gas-pressure or lens-temperature warning. Check at the start of every shift.
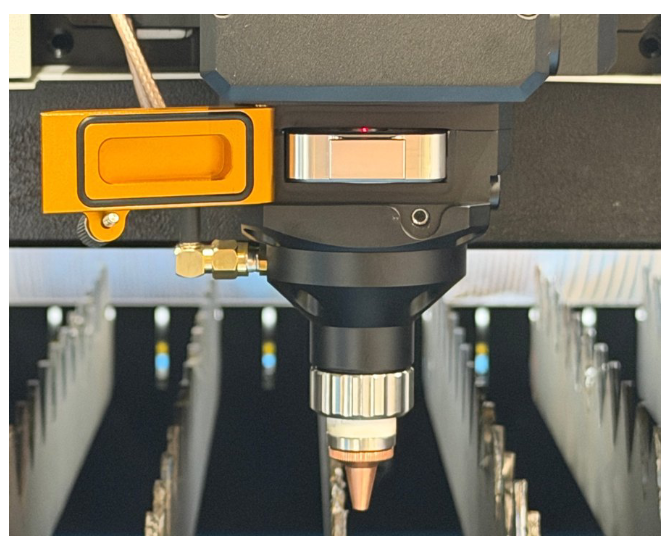
Orange cover slid out on its thumb screw. The window cartridge sits in the slot; red LED = drawer open.
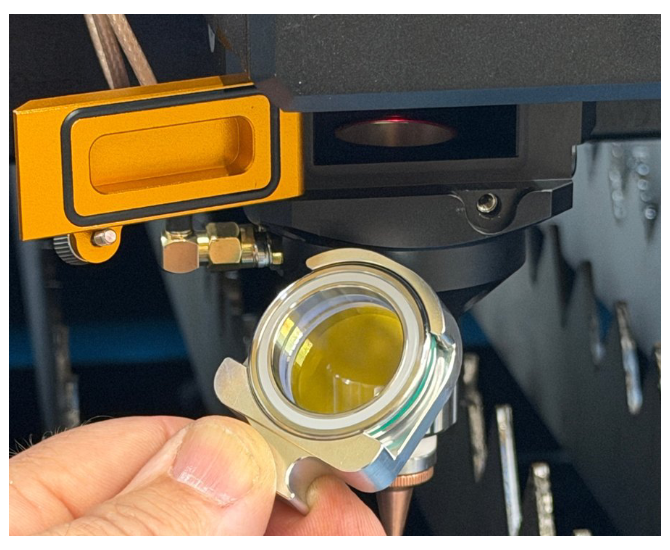
Cartridge lifted out by its tab. Window is held by the retaining ring; O-ring seals the slot.
- Laser off (source disabled), head parked, gas off. Clean hands or nitrile gloves — fingerprints on optics burn in.
- Wipe the outside of the drawer area so nothing falls in when it opens.
- Loosen the knurled thumb screw under the orange cover and slide the cover out sideways. The red LED in the slot lights to show the drawer is open — the controller will not fire with it open.
- Lift the steel cartridge out by its tab. Set it on a clean lint-free cloth, window up.
- Push the old window out of the retaining ring from below. Inspect the cartridge O-ring; replace if flattened or nicked.
- Hold the new window by the edge only and seat it in the ring. The coating is the same both sides unless the bag says otherwise.
- Drop the cartridge back in, tab out, and slide the orange cover home until the LED goes out. Snug the thumb screw — finger-tight.
- Run gas for 10 seconds before the first cut to purge.
The upper window is the same idea on the upper drawer, but it should almost never need it. If it does, the lower window was run too long or the cover was open while cutting.
4. Replace the nozzle
- Laser off, gas off. Unscrew the nozzle by hand (M8 thread); it should not need tools. If it's seized, the ceramic ring is likely cracked — replace both.
- Match the type to the job: single-layer for air and nitrogen, double-layer for oxygen. Match the size to the cutting chart.
- Thread the new nozzle on finger-tight plus a quarter turn. Do not overtighten — it crushes the ceramic ring.
- Center check: a nozzle that is off-center leaves a one-sided burr. Run the nozzle-center routine or a tape-burn test.
- Calibrate the capacitive sensor (section 6). Every time.
5. Replace the ceramic ring
When: the head stops or alarms for poor sensor contact; height following becomes erratic; the ring is visibly cracked or chipped after a collision.
- Laser off, gas off. Remove the nozzle (section 4).
- Unscrew the ceramic ring by hand. Note the orientation of the contact pins.
- Clean the seat on the sensor body with a dry lint-free cloth. No solvents on the contacts.
- Fit the new ring, pins aligned to the seat. Hand-tight only.
- Refit the nozzle. Calibrate the sensor.
6. Calibrate the capacitive sensor
Required after any nozzle, ring or window change, after a collision, and when the Stability / Smooth ratings in the controller drop. In NcStudio: Cutting Head → Calibrate. Automatic calibration runs about 20 seconds with the nozzle over clean, flat, grounded sheet.
- Keep a hand on the E-stop during calibration. If the touch capacitance is wrong the head can drive into the sheet.
- Calibrate over bare metal, not over a cut-out or the slats.
- A noisy or unstable curve after a fresh ring usually means a cracked ring, a wet nozzle, or electrical interference on the sensor cable.
7. Focus
The WM04T focus lens is motorized; the controller sets focus per layer from the cutting and piercing parameters, and the Focus Control dialog allows manual jog, locate and return-to-origin. Enable Focus Control must be Yes in system parameters (restart after changing). Focus values in the cutting chart are relative to the sheet surface: negative = into the sheet (air, stainless, Al), positive = above (O2 on thick steel).
8. Maintenance schedule
| Interval | Do |
|---|---|
| Every shift | Inspect lower window through the drawer. Wipe the nozzle tip. Check the status lights. |
| Weekly | Check gas-pressure reading against the regulator. Blow out the drawer seats with dry air (drawer closed). Check the sensor cable and strain relief. |
| Monthly | Nozzle-center check. Inspect the ceramic ring for hairline cracks. Verify sensor calibration curve. |
| Quarterly | Inspect the upper window. Check the QBH connector exterior for dust; do not open it. |
| After any collision | Ring, nozzle, lower window, then calibrate. Check head squareness before cutting. |
9. Symptoms
| You see | Check first |
|---|---|
| Dross on one side only | Nozzle off-center or damaged tip |
| Cut quality drops mid-sheet | Lower window contaminated; gas pressure |
| Head alarms, 'poor contact' or erratic height | Ceramic ring cracked; sensor needs calibration; wet nozzle |
| Can't pierce thick steel | Wrong nozzle (needs double-layer), focus too low, O2 pressure |
| Lens temperature warning | Burnt lower window — replace now, don't finish the sheet |
| Source trips on brass / copper / Al | Back-reflection protection — see the unlock procedure in the support KB |
10. Manuals and references
| Document | Where |
|---|---|
| Weihong WM-series head — product page and specs | weihong.com.cn/en/products/detail/164 |
| NcStudio V15 laser control — user manual (PDF)Sections 2.2.2 calibration, 2.2.7 height follow, 2.2.8 focus | NcStudio V15 User Manual (R2, 2022) |
| WM04T head hardware manual (Hanma / Weihong) | [Pending from factory — add link when posted to the support KB] |
| AccuMetal 1.5 kW cutting chart | thunderlaser.com/laser-settings/metal-cutting-machine |
| Thunder Laser USA support | thunderlaserusa.com · support knowledge base |
Procedures in sections 3–5 are the standard method for drawer-type autofocus heads of this class, written from the WM04T spec and the NcStudio manual. Verify against the factory head manual when it arrives and update this guide.
Still stuck?
Fastest response times in the industry from our US-based support team.