
Aeon Mira 7
A detailed build quality and functionality comparison between the Aeon Mira 7 60W CO2 laser and Thunder Laser machines, covering electrical, motion control, optics, and warranty.
NOTE: THIS MACHINE WAS PURCHASED USED AND IS ASSUMED TO BE A STOCK OFFERING FROM THE USA BASED EQUIPMENT RESELLER. WE WERE UNABLE TO ACQUIRE A MACHINE DIRECT SINCE THE USA BASED EQUIPMENT RESELLER DECLINED TO SELL ThunderLaserUSA A MACHINE EVEN AFTER WE SOLD THE USA BASED RESELLER A MACHINE. ANY ERRORS MADE BECAUSE OF END USER MODIFICATION WOULD NOT BE KNOWN BY ThunderLaserUSA.
Overview and Description of the Aeon Mira 7
As configured this Mira 7 60w would cost you around $10,000 with shipping and taxes factored in. The US based distributor receives the lasers from the OEM, Un-crates, rewires, and tunes it up to make it better and suitable for the North American Market (Source Video) which is an added cost to the customer for no real added value since its mostly re-work and wasted time (Check out the current lead times). Per the source video, they can spend upwards 2 hours rewiring, 8 hours checking out and up to 6 hours aligning the tube for a total of up to 16hrs of labor costs which has to be absorbed somewhere which is in the price of the machine most likely.
Thunder Laser takes a different approach. Since they design and build their lasers in-house, Thunder Laser wires the 110v AC machines for the North American Market with excellent wiring harnesses and terminations, the proper gauge wire, etc... instead of the distributors having to spend all that overhead on workspace, employees, and time to re-do it. Thunder Laser can put that value back into the best quality components as well as things like dual-stage air assist and the other proprietary systems that set Thunder Laser apart from the rest. Additionally, we utilize proprietary circuit boards to automatically control peripheral devices like the exhaust fan and air pump as well as safety and machine interlocks, but use mostly off the shelf peripherals that are not rebranded and are able to be purchased easily through 3rd party channels.
This article is focused on build quality and functionality, not necessarily full capabilities etc. There are spec sheets and website images as well as videos to show what the machines can do, this is about what is behind the curtain that adds value to a machines longevity and build quality. It will cover things you may not know to look for or know why it is different or more important.
As you read through this article, look for the links to the Thunder Knowledge Base and compare it to what is available for all machines. Drawings, Tutorials, How-To's etc that can get you back running quickly. Open and available without having to make a phone call or submitting a ticket and waiting for a reply.
Seems these are made in a non branded form and Aeon brand, without the modifications done on Aeon Laser USA machines
Mira 7 Front
Mira 7 Manufacturers Label
Front Hinged Pass Through
One of a few things we do like, hinged pass through. That noted, NONE of their other doors are hinged. They are pinned and locked.
Apparently Unused Air Valve
While a new valve and solenoid was installed, this was left behind. Not very clean or tidy. Also in a very odd location to begin with.
 |
 |
 |
 Thunder Dual Air Assist with Easy Access Knobs Thunder Dual Air Assist with Easy Access Knobs |
Motion Control
X, Y Driver
Motor/Belts In Laser Bay
Open Loop 2 Phase Steppers vs Closed Loop Hybrid Stepper Motor
Z Motor Mounting and Adjustment
 |
 |
| ~$40 dual driver for x and y. No S/N or Model available, private labeled as AEON but available without the markings. If one driver channel fails, the entire unit needs to be replaced. Looks very similar to this other Rebranded Driver | As compared to the Leadshine drivers Thunder uses for the closed-loop hybrid motors. |
Steppers can lose steps and without having a feedback loop, the driver will not know and just keep running. This can lead to a crash of the laser head and damage to the machine. |
 Thunder uses Hybrid Steppers from Leadshine called their Ez Servo Series Thunder uses Hybrid Steppers from Leadshine called their Ez Servo Series |
 |
|
| The mounting is in a decent location, no preferred. It is nice to see that there are jack bolts to adjust the tension of the belt. Motor is small so Z moves while running may run into some loss of position since it is not closed loop. |
Electrical
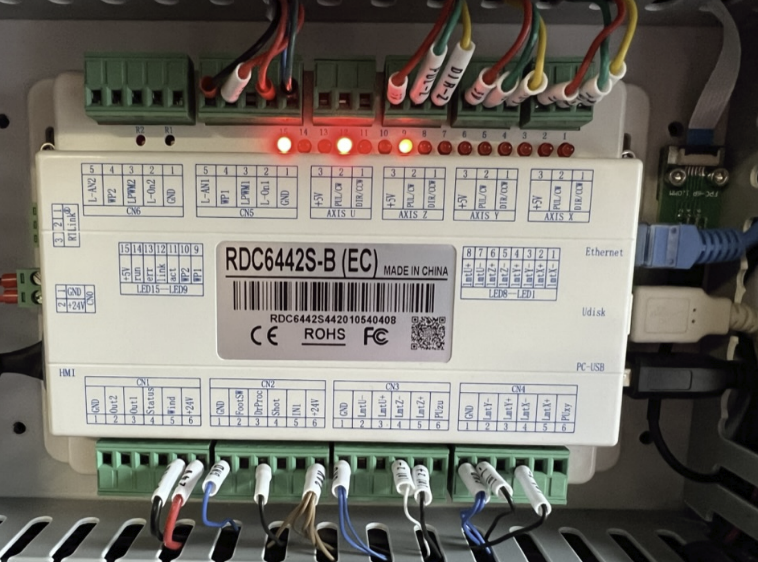
DSP Controller
Uses Y Axis to control Rotary, requires a relay. U axis is available to use and is much simpler to implement. The rotary expansion box for the 6 cup turner apparently uses the U-axis with a supplied harness and box to install, more on that down below.
Fan and Rotary Relay
E-Stop, Main Power, & Fan Switches
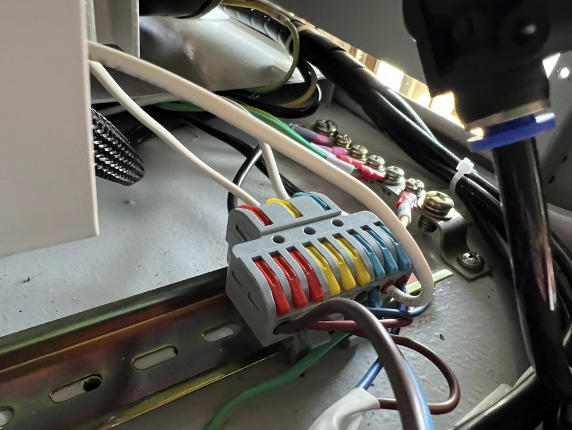
Main AC Power Distribution & Ground
Main Power Contactor
LPSU
Cut and Left Alarm Wire, New Plug 110v to Contactor
5v Converter For Red Dot Pointer
Separate AC to DC converter for the Red Dot Pointer is haphazardly placed in the machine. Not very neat or tidy.
WiFi Module
Exhaust and Air Pump Compartment
 |
|
| Note that there is not a wire on LPWM1 which is used to adjust power output to the Laser Tube Power Supply input signal, they decided to use L-AN1 which is older Analog signal. 256mb version | Thunder laser now offers a Ruida controller with 1gig of memory for larger file storage. |
 |
 |
| Exhaust fan activated by button only. Not on job start. Cannot take advantage of Start and End Delay from Lightburn for the exhaust fan? | As compared to the neat relay bank and TL Timer in the Thunder |
 |
 |
| Notice the exposed terminals and non insulated connectors | As compared to the factory crimped insulated connectors in Thunder machines |
 |
 |
| Not very clean or tidy. Unlabeled wires. Main Power does not appear to have AC filters | As compared to Thunder's Filtered main power distribution (2 Power Filters on the AC lines) |
 |
 |
| Likely replaced once in USA with a 120v Coil Contactor. Wiring is far from neat and tidy. | As compared to Thunder's Contactor that only controls the laser power supply and chiller to isolate noise, leakage, and draw from high energy components from the rest of the machine. |
 |
 |
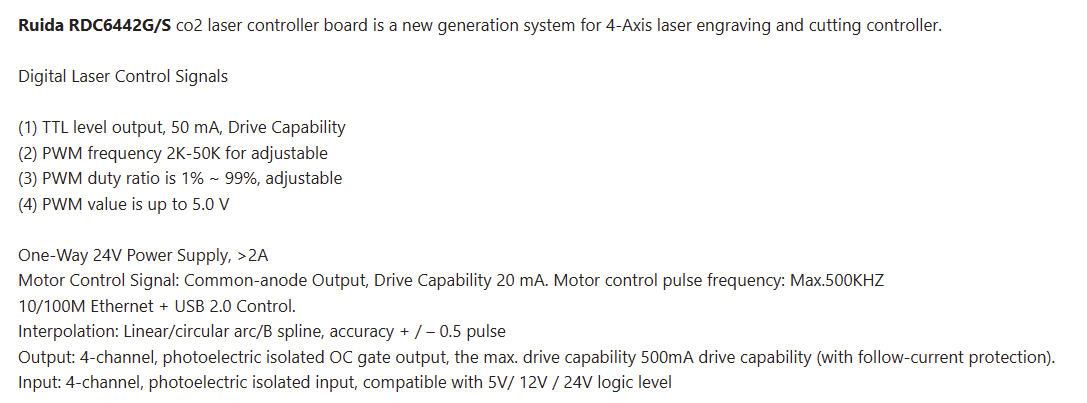 |
| Notice there is no opto-isolation on I/O | Thunder optically isolates the I/O on the LPSU to prevent high voltage leakage back to the DSP | Ruida does provide Opto Isolation for the 4 discrete inputs and 4 discrete outputs, does not appear to have OPTO isolation built in for the 2 Laser Tube outputs. |
 |
|
| Possible external chiller alarm port, cut and left behind. HV tube wire passing right under 110v supply. While it doesn't hurt anything, it is a detriment to quality and cleanliness. | Thunder Supplies and 5000\5200 Active Chiller with all Nova 24 and larger machines with an alarm interconnect cable that is factory installed and is wired to the Ruida Controller |
 |
 Pin 9 on the TL timer provides the 5V for the Red Dot Pointer with a spare channel on Pin 10 |
 |
|
| Wifi has been shown to be a poor method of transferring the files from a computer to the Ruida Controller. The communication protocol used is UDP which limits error checking. File transfer errors are widely known. Since the machine has a WIFI module, does it need to have a FCC certification? https://www.fcc.gov/oet/ea/rfdevice. No information could be found on the wireless device or a statement of conformity on the machine. The statement may be present, but could not be located. | Thunder ships machines with Ethernet and USB cable connections only. Thunder does however have information on the knowledgebase about how to configure for WIFI or the Lightburn Bridge. |
 |
 |
 |
| 10lbs of potatoes in a 5lb sack comes to mind. Heat soak, noise, vibration and cramped location to work on. Why the small square inlet to the large duct? | Air flow across hot fan and pump to the chiller. Tight area to work in. | Notice the Soft Start Cap which is common to 120v motors but is also another failure point |
Integrated Passive Chiller
 |
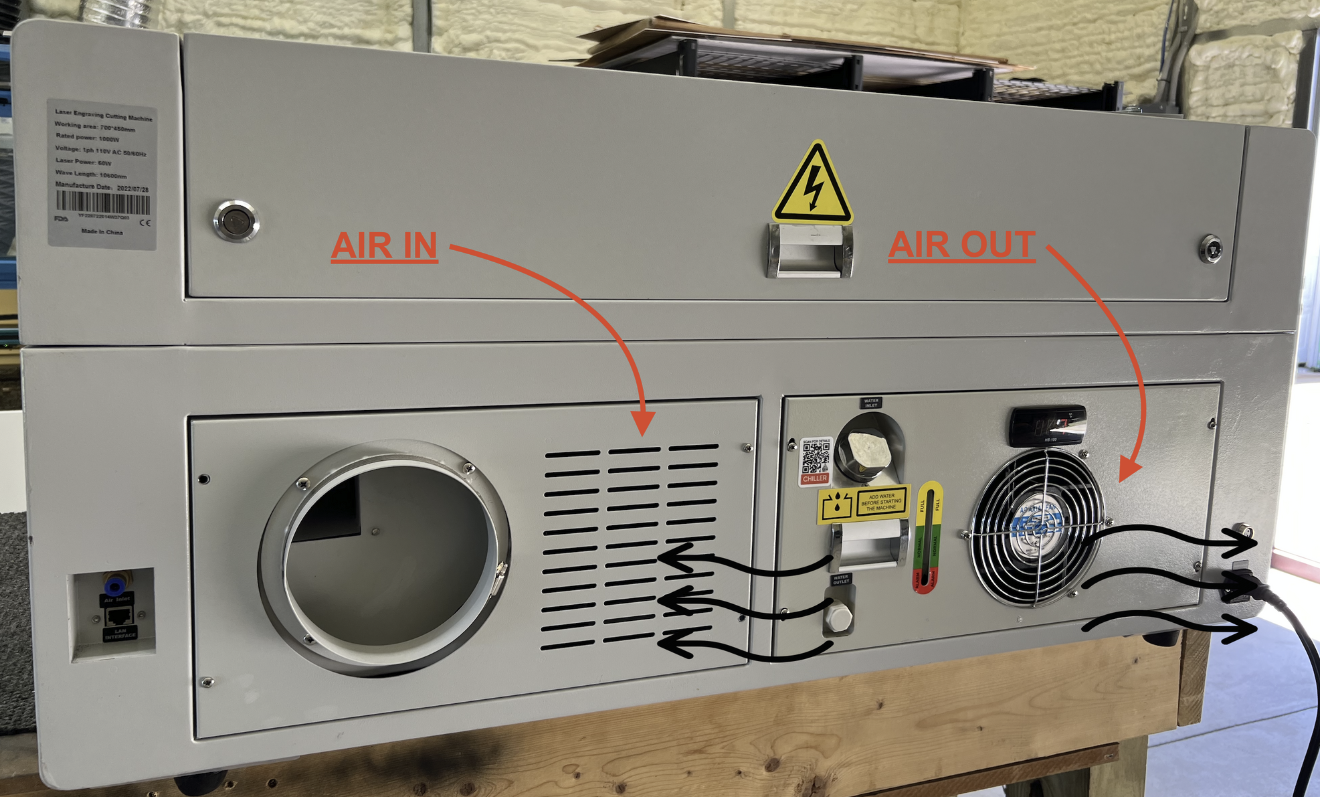 |
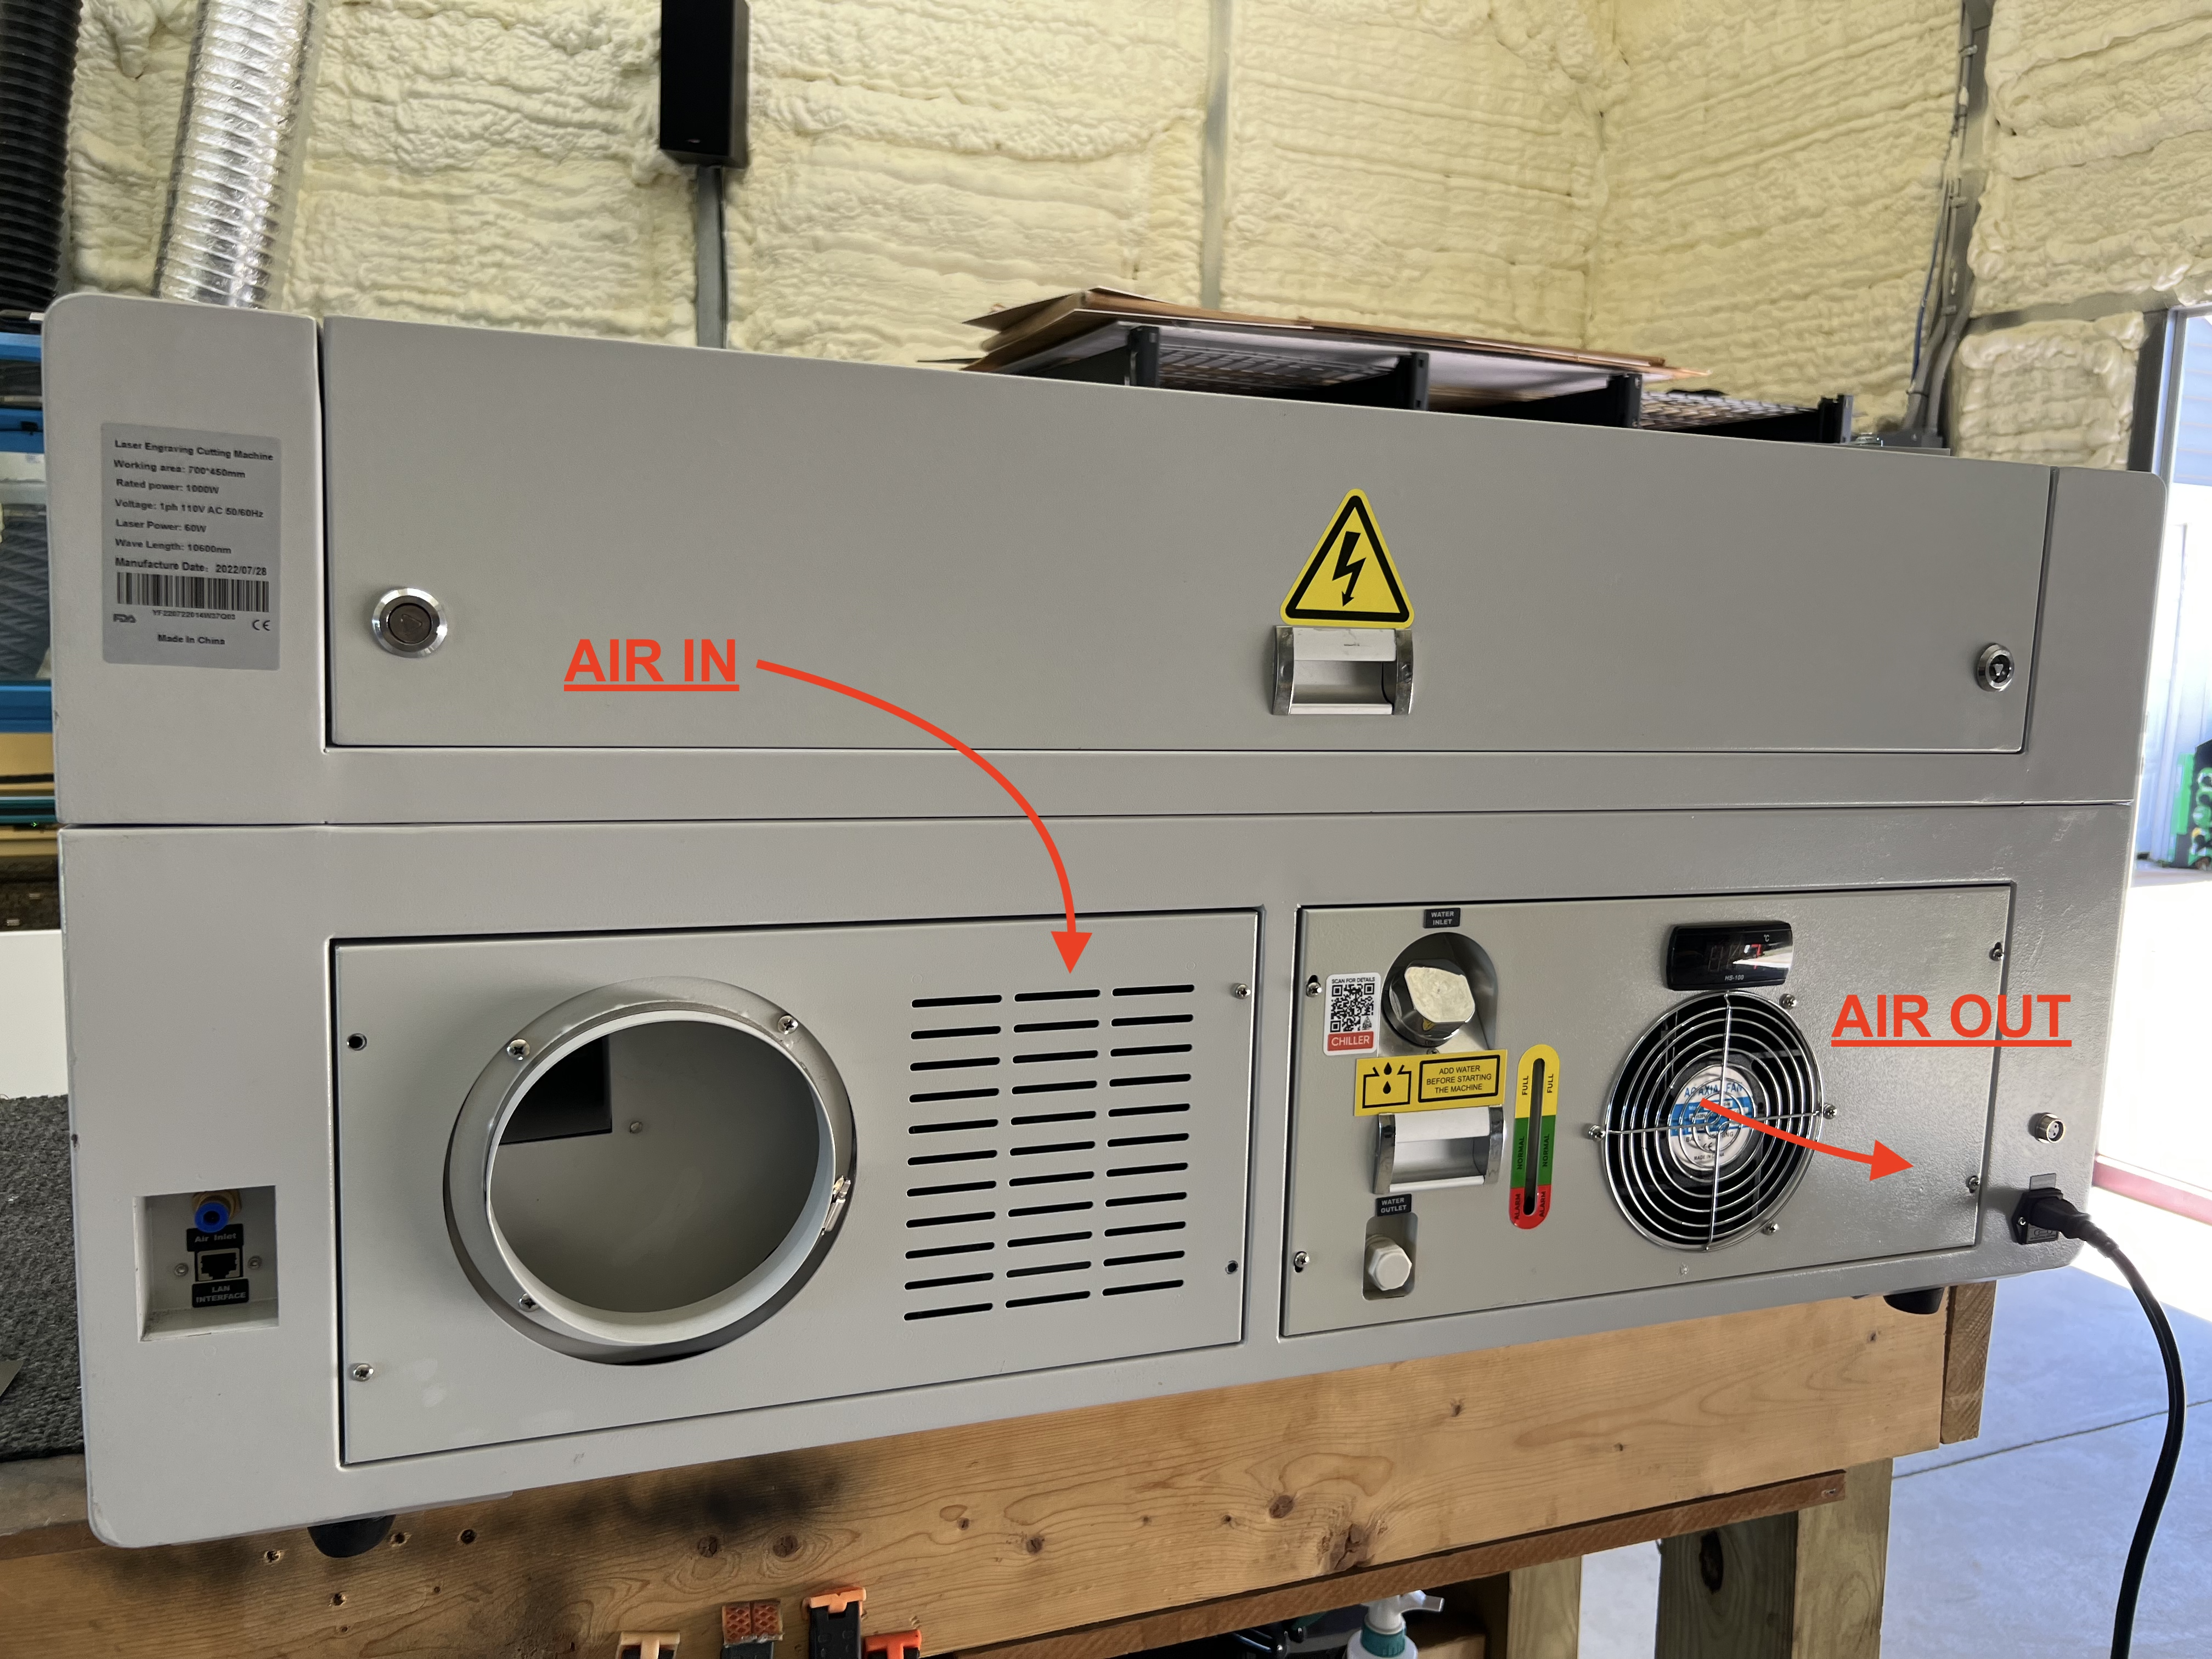
| Chiller in/out passing right over the HOT air pump, heated air is being pulled into the heat exchange, likely impacting tube efficiency. I don't see how a constant coolant temp could be maintained. | Diagram showing the cooling air flow |
Optics & Tube Info
Tube Mounts
Output Coupler & Beam Combiner/Mirror 1
Tube
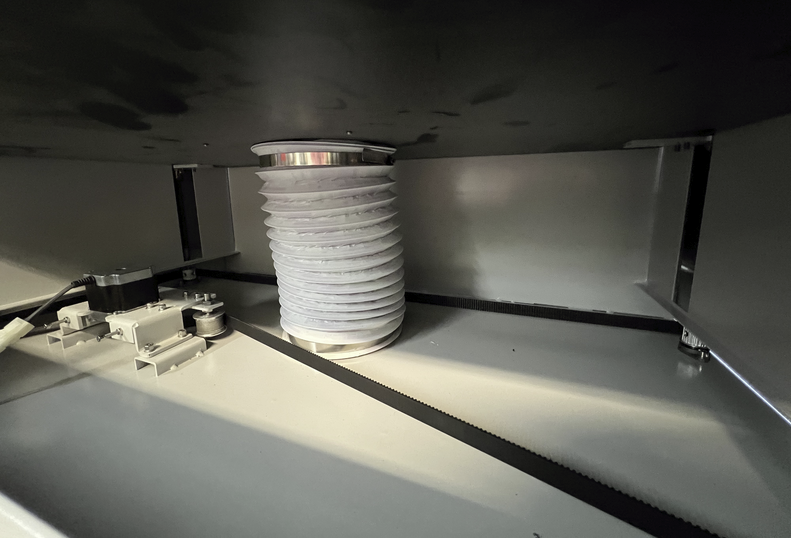
Vented Z w/o Blades or Honeycomb
Z Exhaust Connections
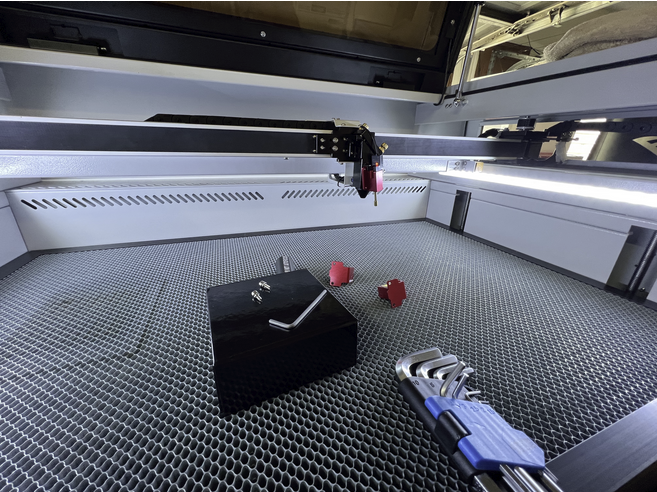
Head and AF Sensor
Lens Change Not an Easy Task
Example videos:
Start at 48 seconds and end at 56 seconds to see the simple swap process
Camera
HMI
Belt / Motor Adjustment
 |
|
| Note Plastic Tube mounts | Thunder provides a robust set of machined Aluminum adjustable mounts |
 |
|
 |
 |
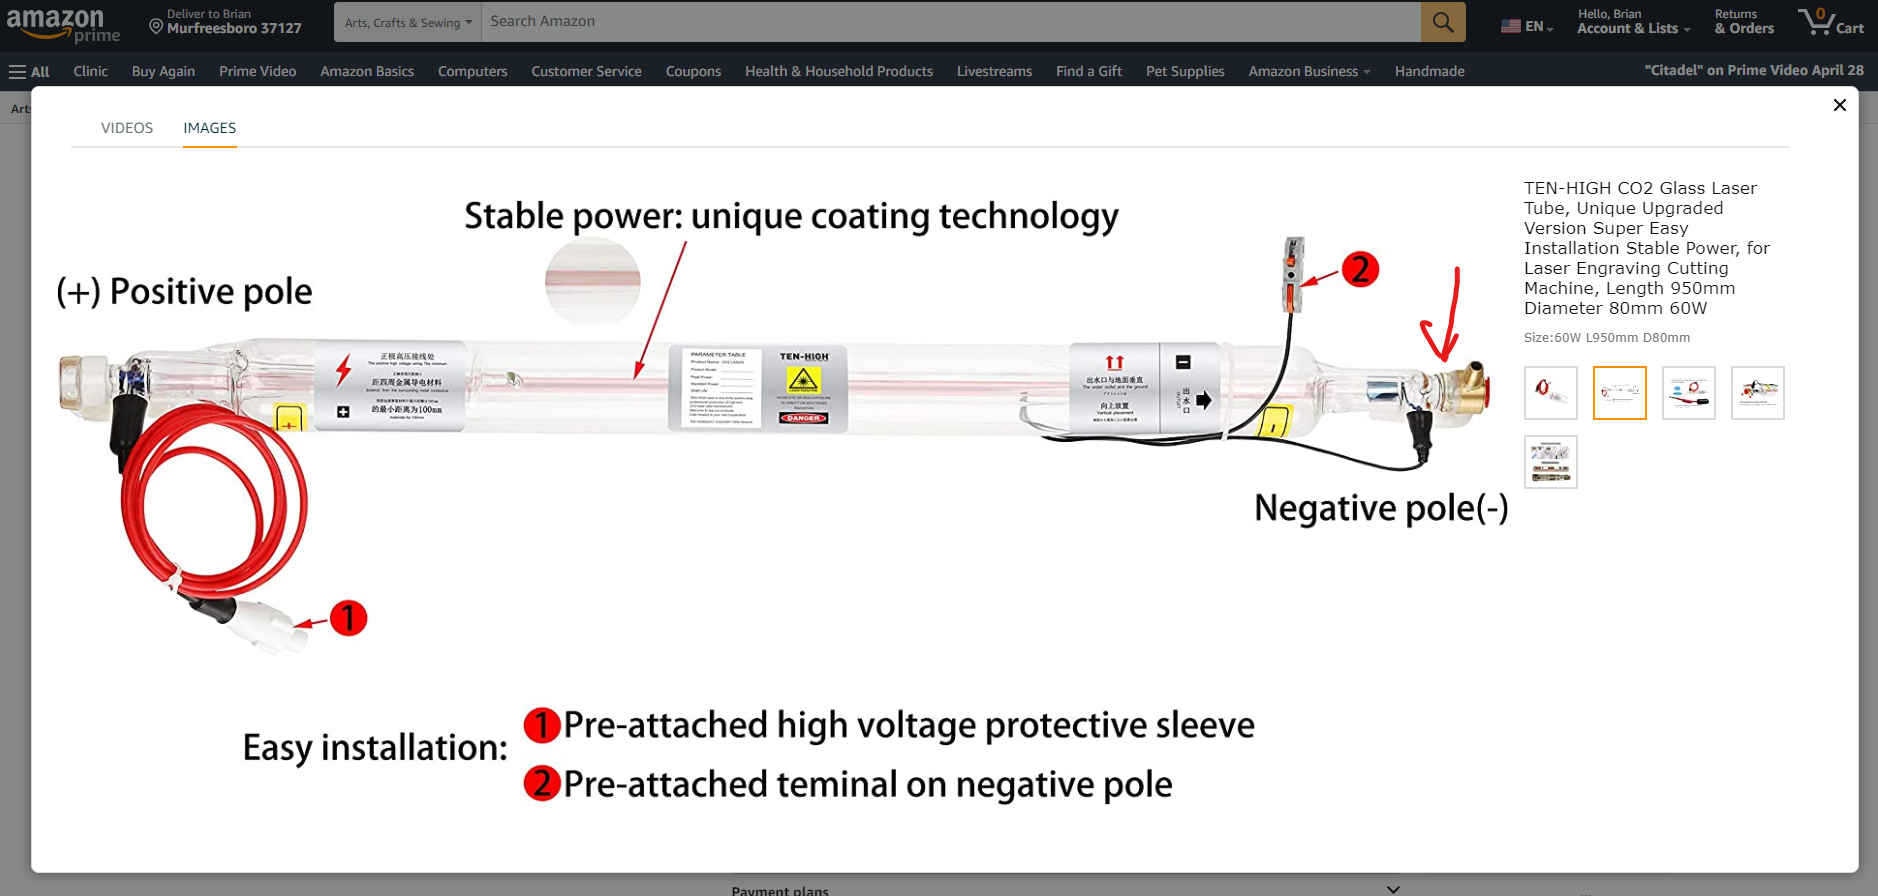 |
| Tube Label and Specs on the tube installed in this Aeon Mira 7 | Notice No testing info or actual peak power data recorded. Thunder Laser China tests every tube and rejects the ones that do not output 10% over the tube's nominal stated power output. | It appears to be a rebranded Ten-High tube maybe. Ten-High seems to be the only ones that have a few wraps of bell wire at the output coupler. Note the Reci appears to be an option in higher wattage machines and appears to have testing information. |
| Thunder 80w Reci Tube from a Nova 35 Testing Information |
|
| Thunder 130w SPT Tube from a Nova 63 Testing Information |
 |
|
 |
|
 |
|
| 6" duct runs to a hollow panel on the z table then below the machine. All exhaust is pulled from a hollow housing around the z bed. The exhaust connection and tubing is an additional failure point. | Thunder exhausts from under the Z bed and includes easy pull out crumb trays on the Nova lineup |
 |
|
 |
|
| Quite frustrating head design, two bolts, AF sensor have to be removed prior to getting to the lens. While the Thunder Odin does have a lens tray design with thumb screws, its autofocus sensor is built behind the head, allowing you to easily swap lenses out without the use of tools or removing accessories. Every time you remove the AF sensor assembly you run the risk of not installing it in the exact position it was in. |
| Lots of tools to swap that lens out. Time is money. | Compare to changing out the Lens on a Nova machine, quick knob, tool-less change. Loosen the Height Adjustment knob, release the air fitting, lower tube, swap in reverse. This article shows how easy it is to swap lens tubes. |
 |
 |
 |
|
 |
|
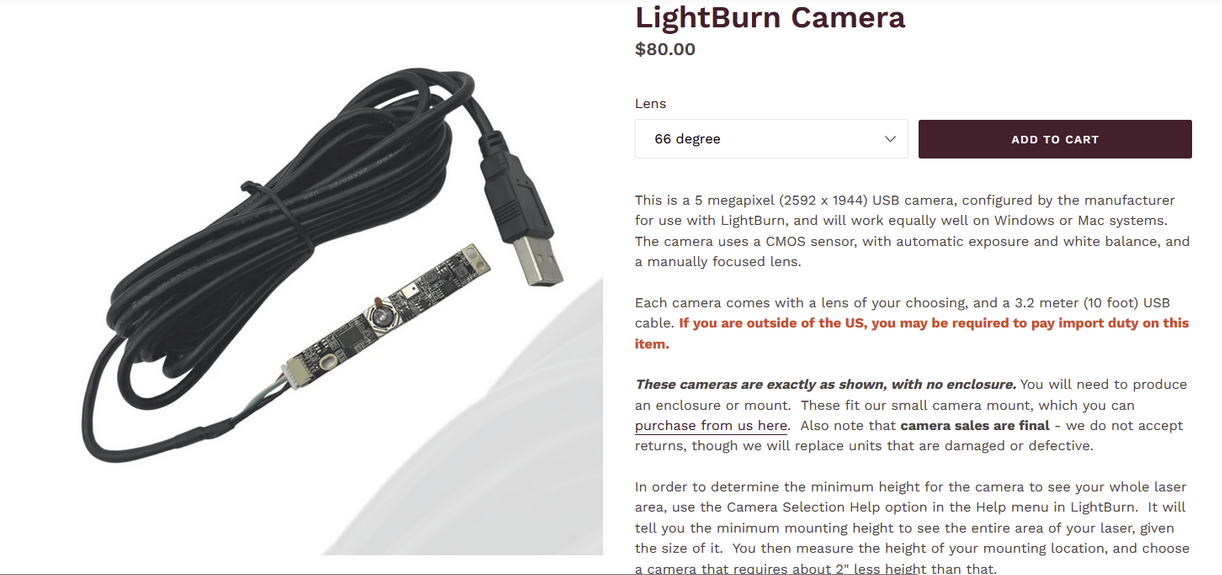
| It may come preinstalled but is it calibrated? Looks like the 5mp low res version? Thunder only sells the 8mp versions for better resolution, even for the Nova 24. | Thunder sells a complete kit that you can DIY install that is 8mp and now comes with a USB extender cable for longer distances. Custom designed mount is more robust than the stock mount and is a captive shell design meaning the clips cannot break on the cover which would allow the camera to fall out or come out of alignment. |
 |
|
| No z move buttons, Only available through the menu. Want to manually move the z.. you have to get into the menu to do so. |
 |
|
| Elongated jack bolt used for motor tension, can lead to deflection, bending etc |
Unexposed Linear Guide and Bearing
 |
 |
| They pack the linear guides in the cabinetry and inside the gantry (behind the belt) to help keep it clean. This may sound like a good idea and extend the PM cycle, but it also adds complexity to the maintenance as you have to disassemble parts to be able to access them. And eventually you will have to maintain them. | We use 12 sealed self-lubricating U-groove roller bearings in 3 sets that ride on steel rails that are pressed into the gantry. No maintenance or lubrication is necessary. If the bearings happen to need replacing, you can do it quickly and painlessly with no disassembly other than loosening the eccentric cams to release the tension and removing a shoulder bolt. |
6 Tumbler Rotary
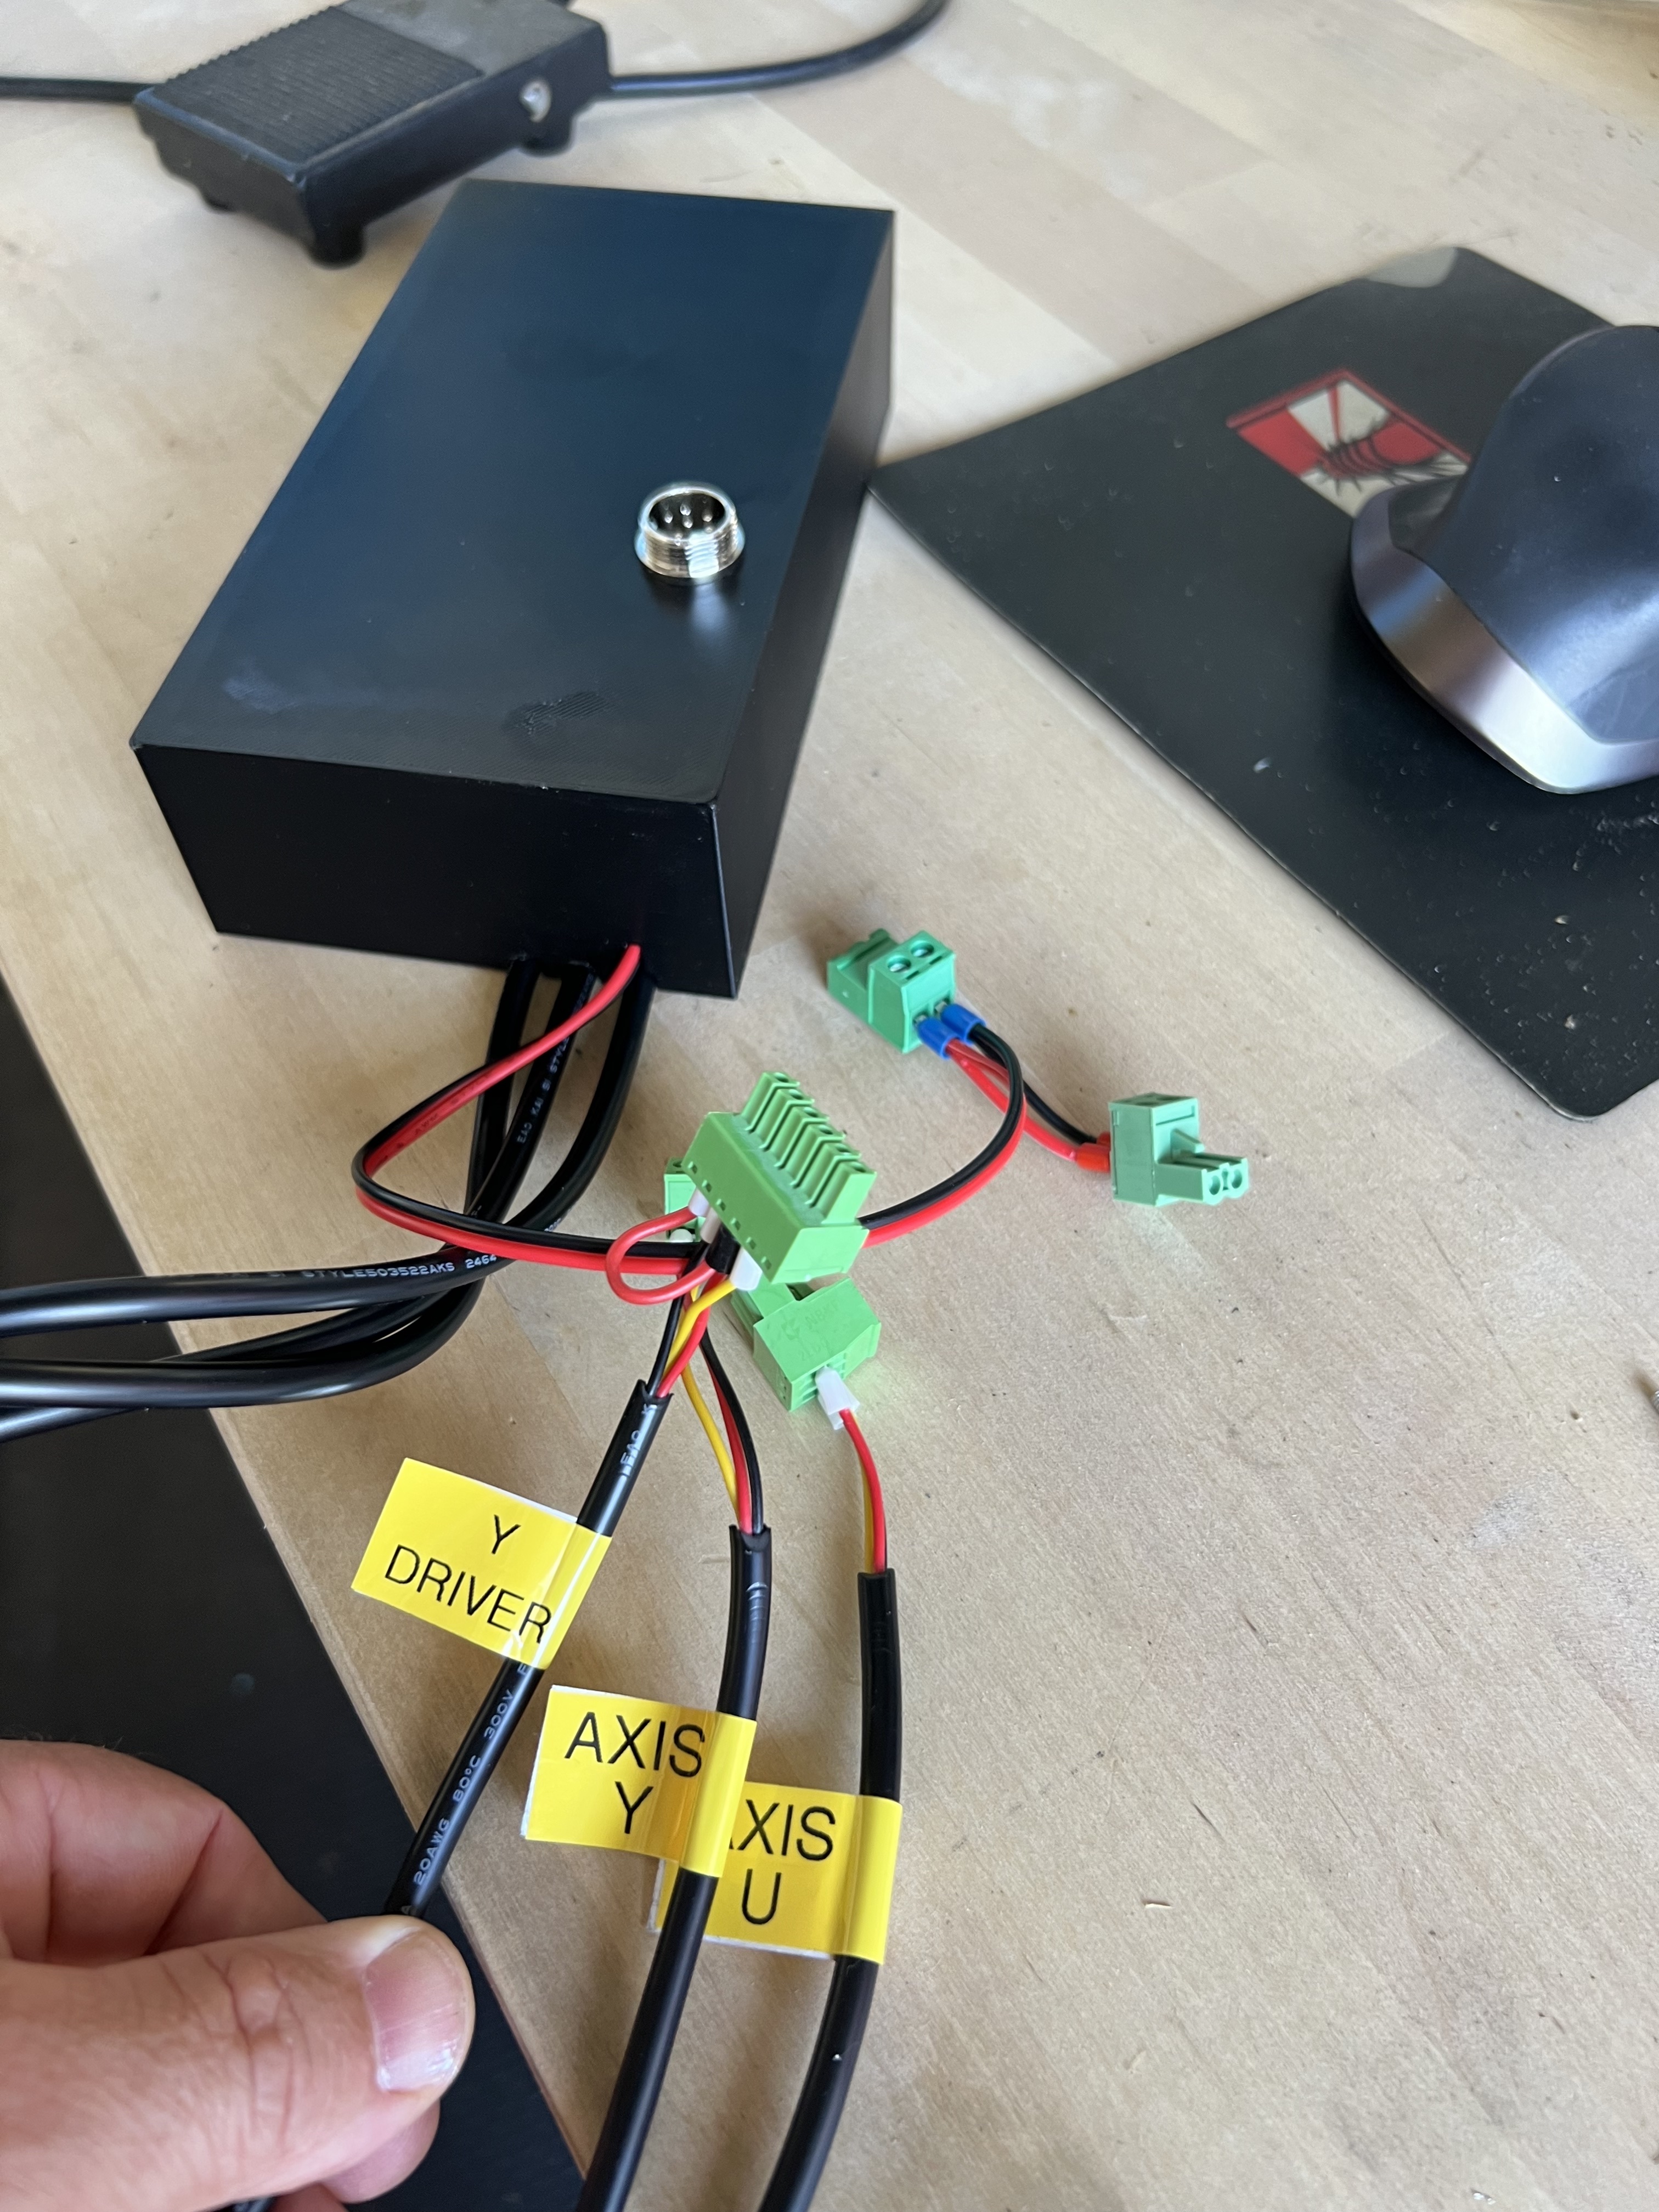
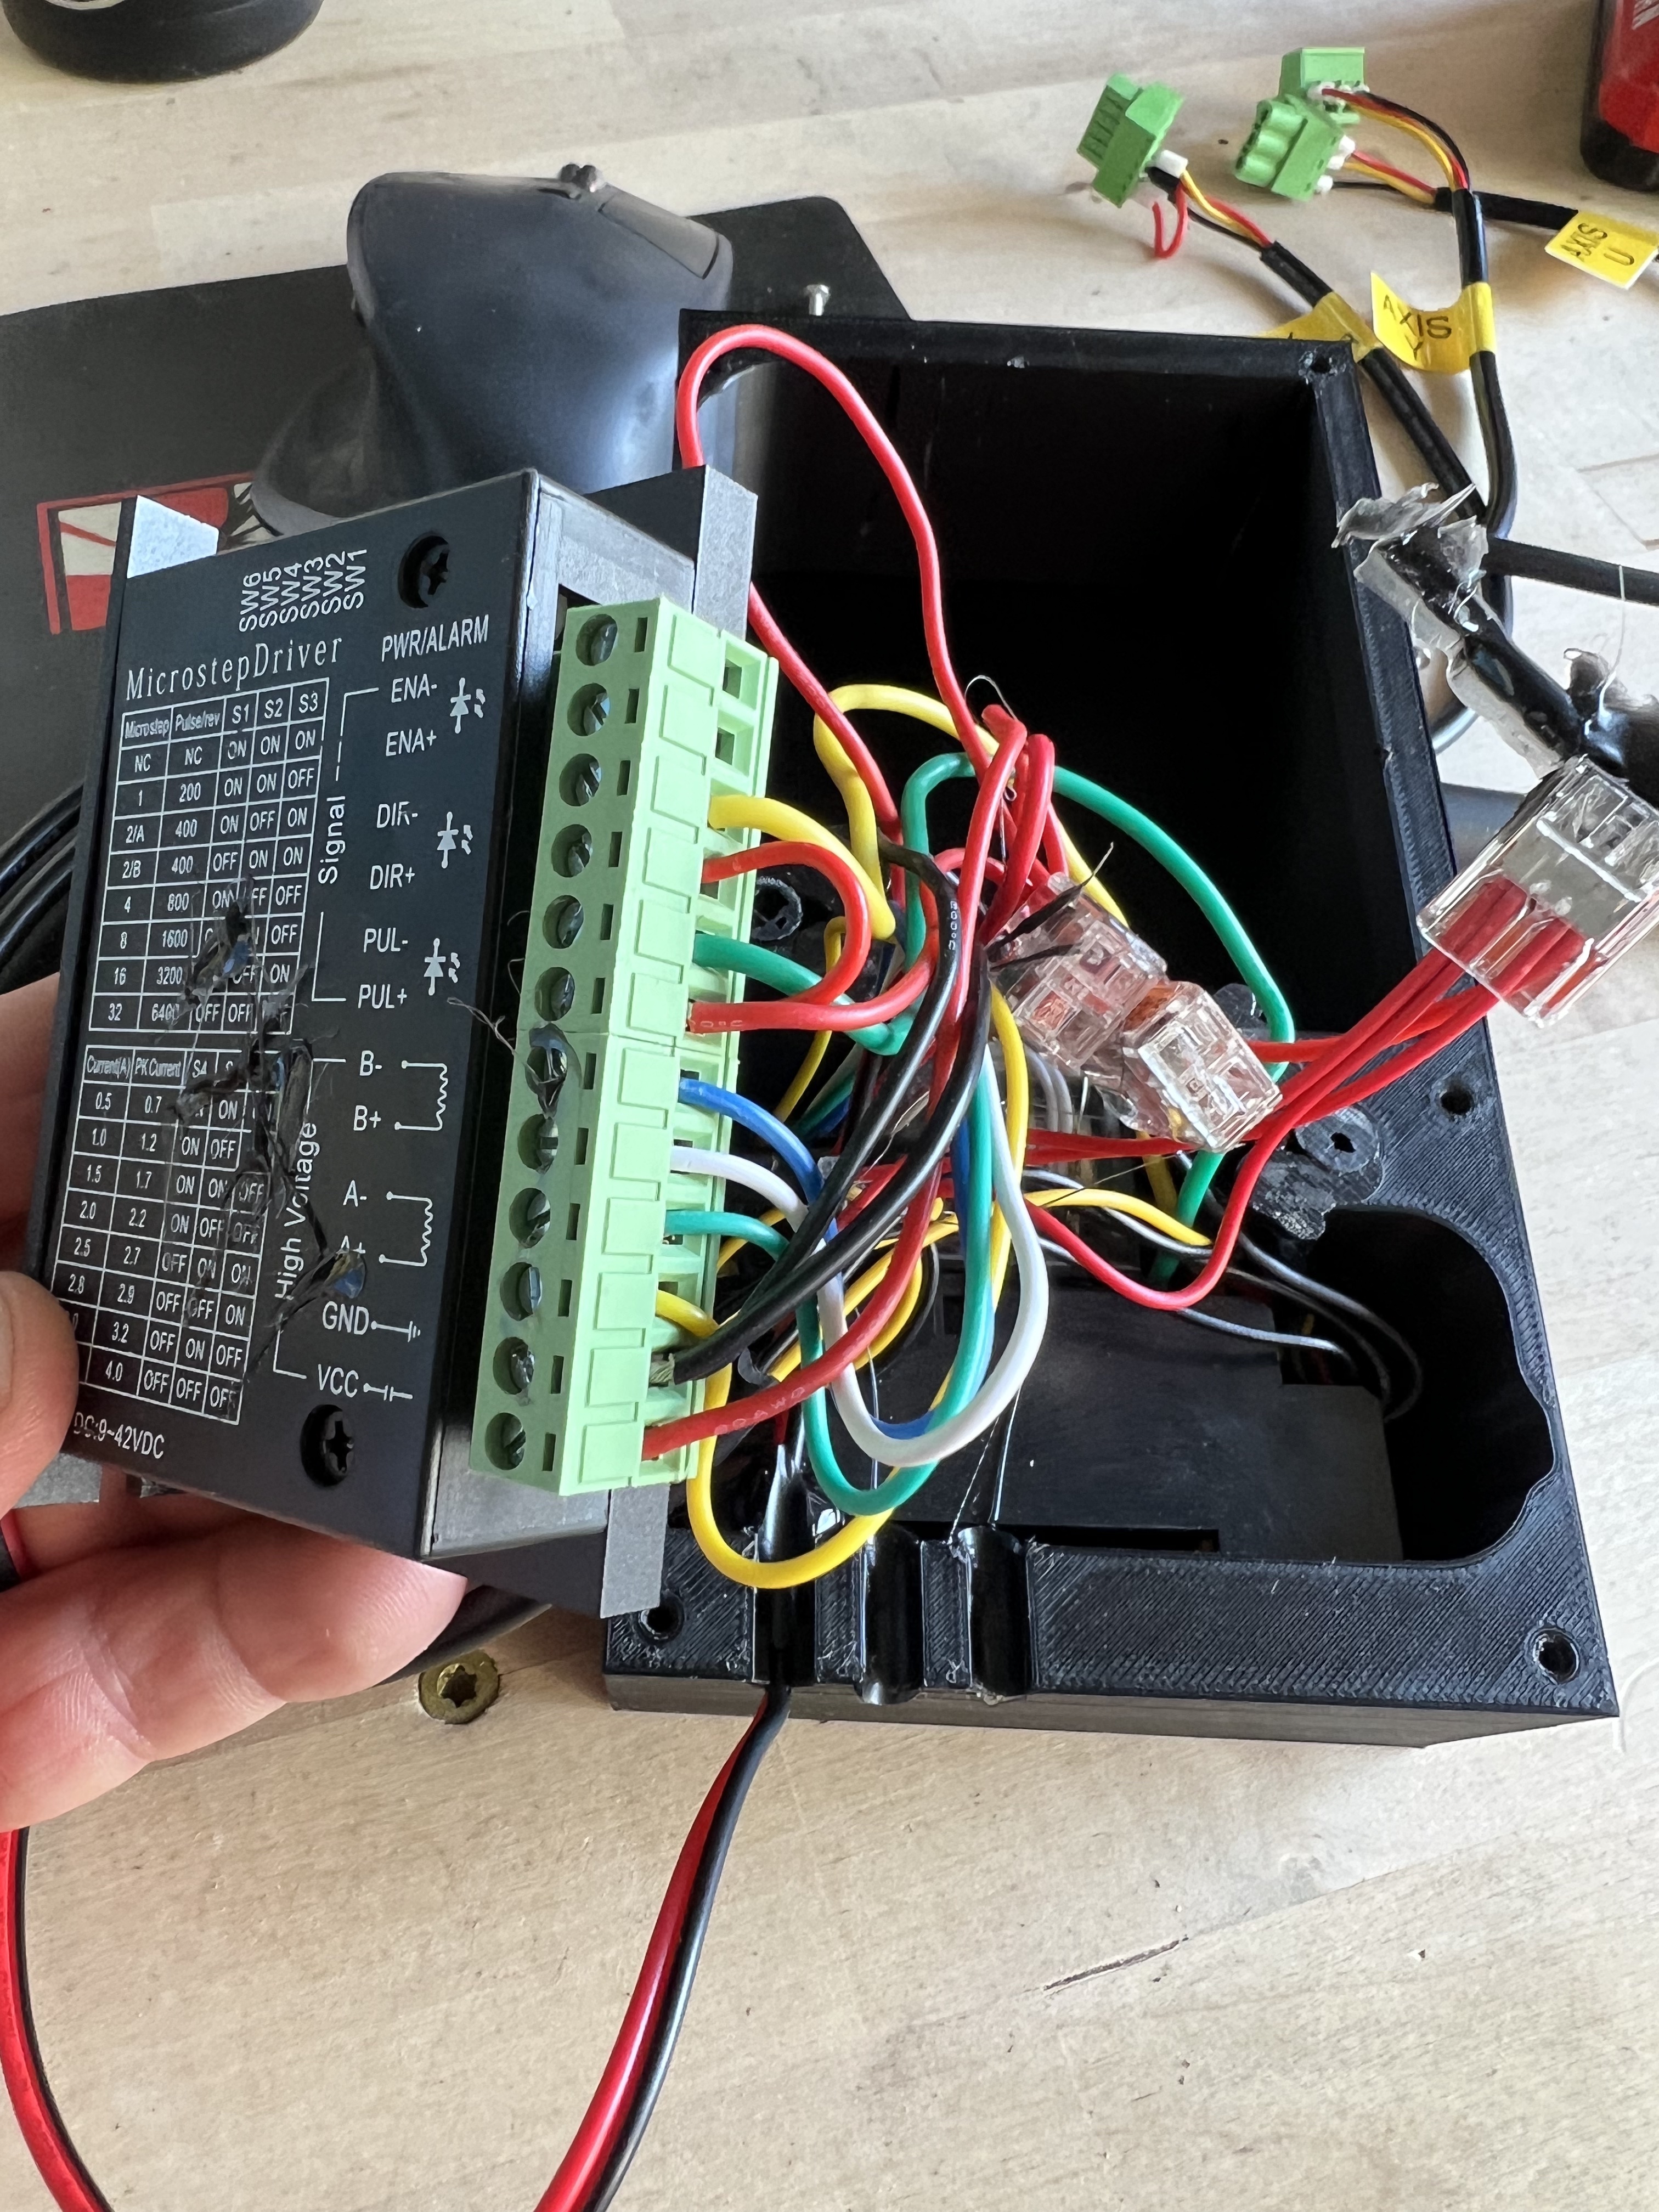
Multi roller rotary. Very cheap and flimsy design, extremely limited as to what type of tumblers, bowls and objects it will hold and spin properly. No option to make the objects level or compensate for taper. Feels like a risk of 6 tumblers when you hit the start button. Control box adds in unnecessary complexity since it involves the Y Axis wiring. A current Thunder laser uses the U axis natively, no switch or relay inline from the Y driver to the Y motor which are failure points.
Rotary Driver/Relay box
Wires are unlabeled, box is crammed full. Is there a schematic or drawing on the AEON Laser USA Knowledgebase for this?
 |
 |
 |
 |
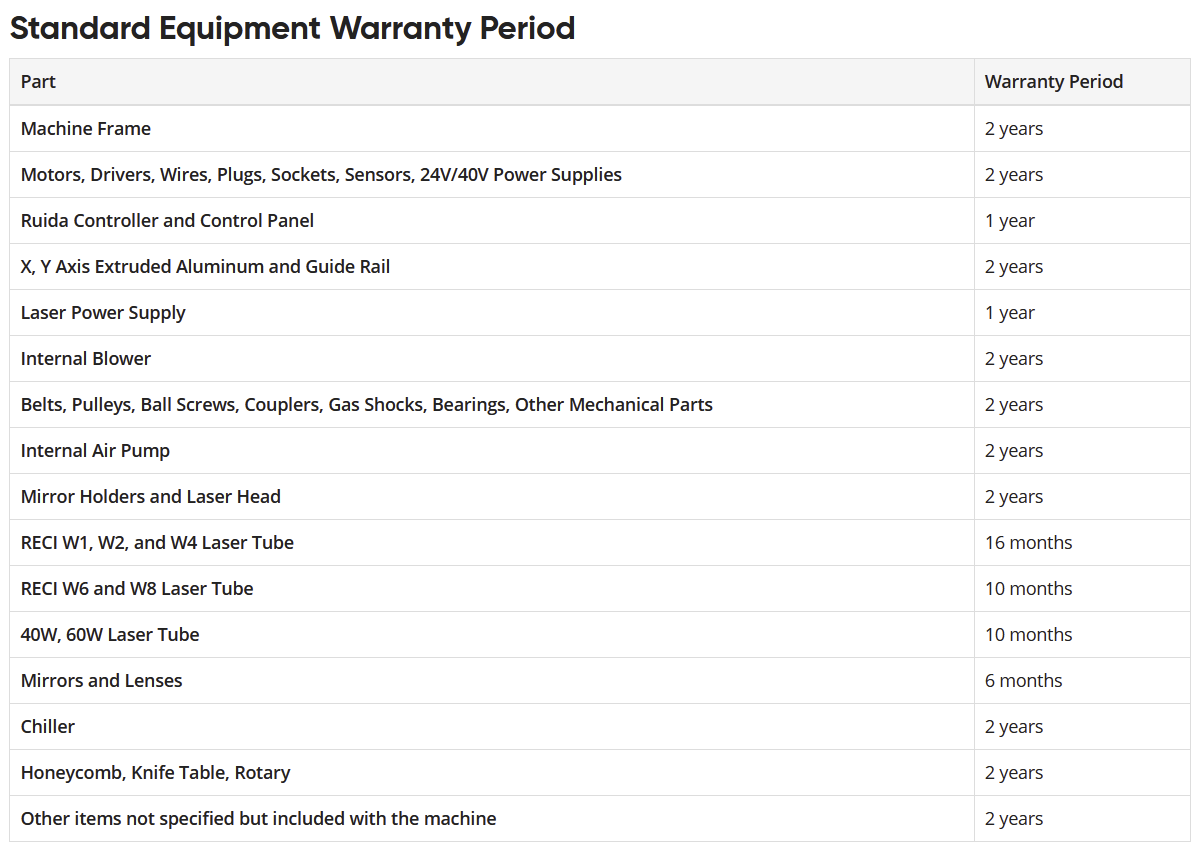
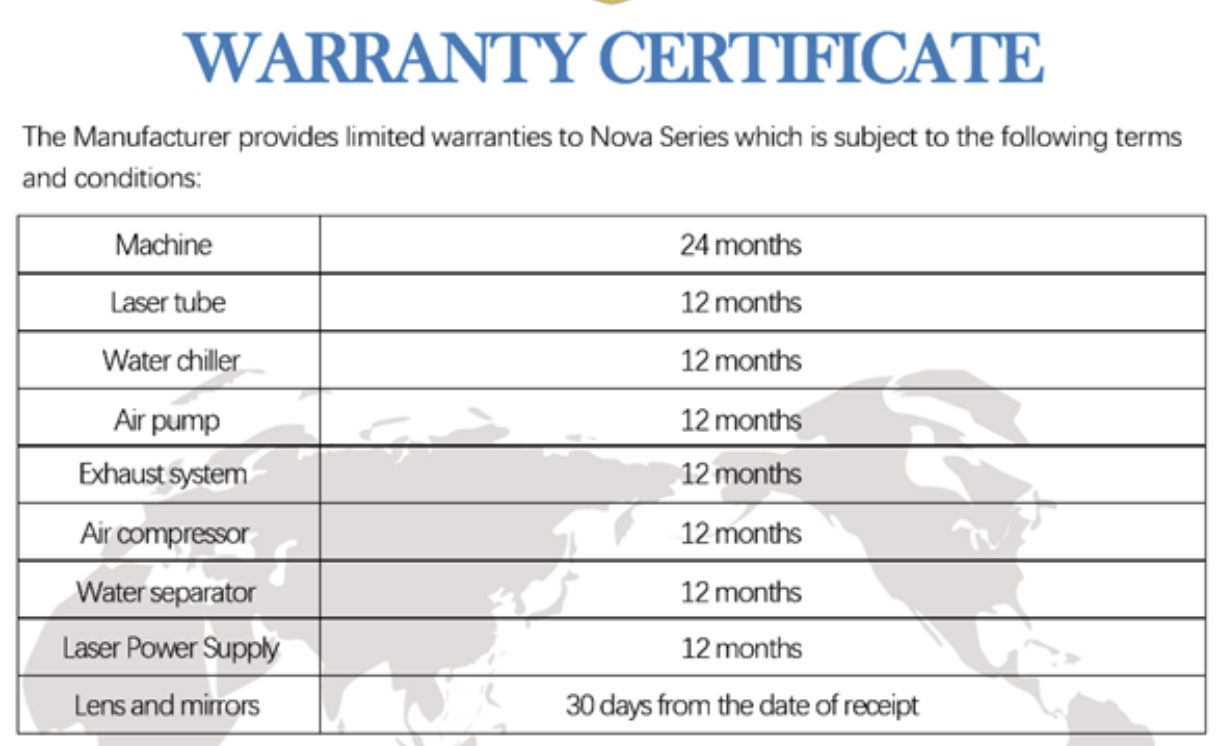
Warranty Comparison
 |
 |