
Aurora Chuck Rotary Functions, Tech Information, Default Settings and Adjustments Overview
Overview of the Aurora Chuck Rotary's default dip switch settings, steps, gearing, belt tension, and jaw/angle adjustment procedures.
Preface: This article covers some of the basics of the Aurora Chuck Rotary

Default Dip Switch Settings
- 1 ON (Steps bit 1)
- 2 OFF (Steps bit 2)
- 3 ON (Steps bit 3)
- 4 OFF (Steps bit 4)
- 5 OFF (CW\CWW)
- 6 OFF (Test Mode)
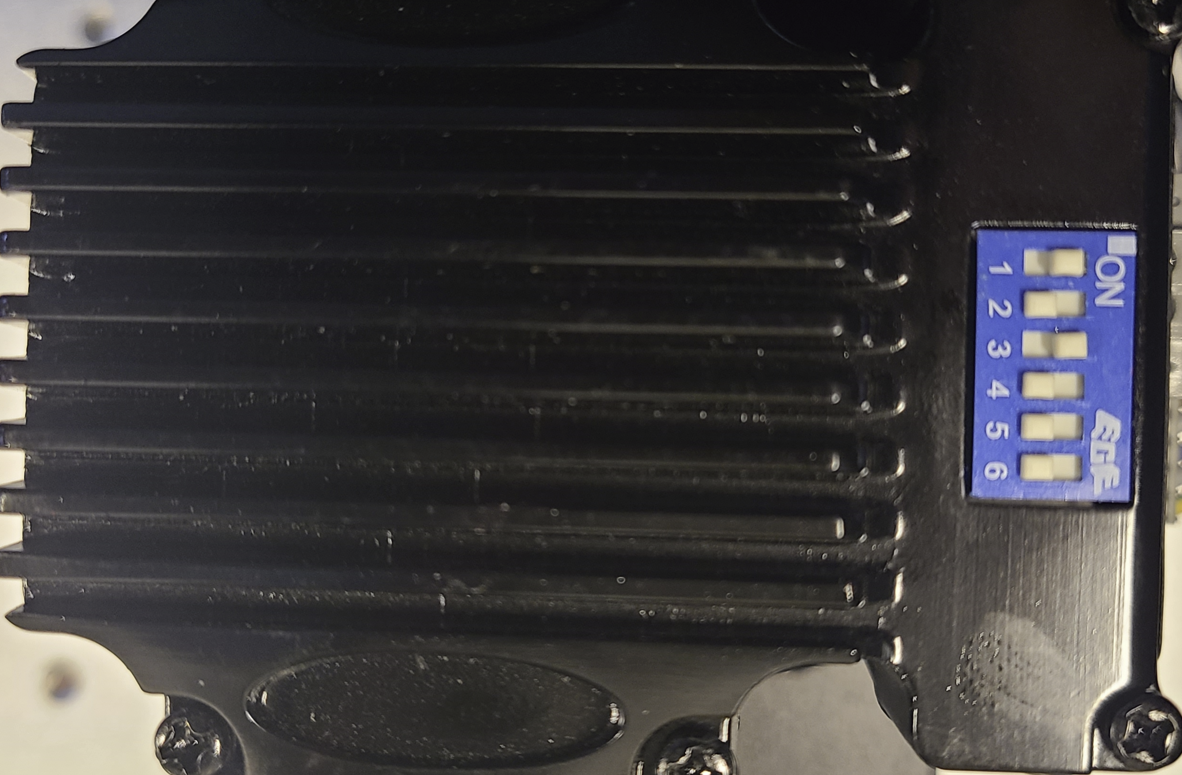
Dip Switch Settings and Steps Table

Default Steps
Default Motor Steps is 4000. Due to the Gearing of the pulleys, that yields a 3:1 ratio which means the steps you enter into the software will be 3x the motor steps, so 12000. See the above section for the Dip Switch settings for the required steps.
Gearing
- Motor Drive Pulley - 16 tooth
- Chuck Drive Pulley - 48 tooth
- Belt - 291-3m 10mm
- Results in a 3:1 ratio.

Belt and Tensioner
Adjust the tensioner so that the cog belt is not loose, it does not have to be banjo tight either. If you are experiencing slip, check the belt tension.

How to Open and Close the Jaws on the Chuck
Use the adjustment rods. Install one rod into the lock collar, the other into the silverish chuck collar.
Open
Rotate the lock collar Counter Clockwise

Close
Rotate the lock collar Clockwise

How to Change the Angle of the Chuck
Loosen the knob shown (There is 1 on each side), adjust the angle to the required position and then tighten the knobs back.

How to Adjust the 90° and 0° Stops of the Chuck
Each side of the chuck has 2 bolts and nuts, commonly known as Jack bolts in this configuration. You can adjust the jack bolts to get the desired position for 0° and 90° to account for any bed level issues etc.
