
Preface: This article will guide you to success with your Thunder Chuck Rotary.
NOTE* There are a few style Chuck rotary available through Thunder Laser, Please check HERE to verify yours! If different your steps may vary.
Chuck Rotary Setup in Lightburn
In Lightburn's top menu options click Laser Tools. The drop down menu will show Rotary Setup. Click this option to expand the Rotary Setup window. Follow the steps to set up your chuck rotary.
- Select Chuck Rotary Type
- Enable Rotary
- Steps per rotation should be 12,000 spr
- X or Y axis will be selected depending on how you lay out your rotary. (SEE IMAGE BELOW)
- The Object Diameter and Circumference represent your objects size in two different formats. You can enter one or the other.
- See below for detailed instructions on Split size and Overlap.

Note the motor speed settings. There should be no reason to adjust these. If the object is moving too fast on the chuck we can slow things down.
Chuck Rotary Placement and Alignment
You can install the rotary to use either the X or Y axis on a Fiber Laser.


Marking Parameter Setup in Lightburn
Split Setup
Galvo markers will run a portion of the job (a slice), rotate the object, run another slice, and so on. It is a good idea to keep the Split size and your Line interval to maintain your graphic resolution.
Split Size
The size of each slice is called the 'Split Size'. If your object is tapered, irregularly shaped, or not perfectly aligned with the rotary axis, using a small split size can help reduce gaps or misalignment of the splits.
A larger split size will reduce the time spent running the job, but can be harder to dial in the settings such that no overlaps or gaps are visible.
It is a good idea to keep the Split size and your Line interval to maintain your graphic resolution.
Overlap
To help eliminate visible gaps between slices, you can tell LightBurn to overlap them - specifying an overlap of zero means that each slice is run on its own. A non-zero overlap value will produce that much overlap on the ends of each slice, like this:

If you are removing paint, anodizing, or other surface coating, using a small overlap is recommended. If you are annealing or marking the material directly, adding overlaps could produce visible artifacts. See Image below
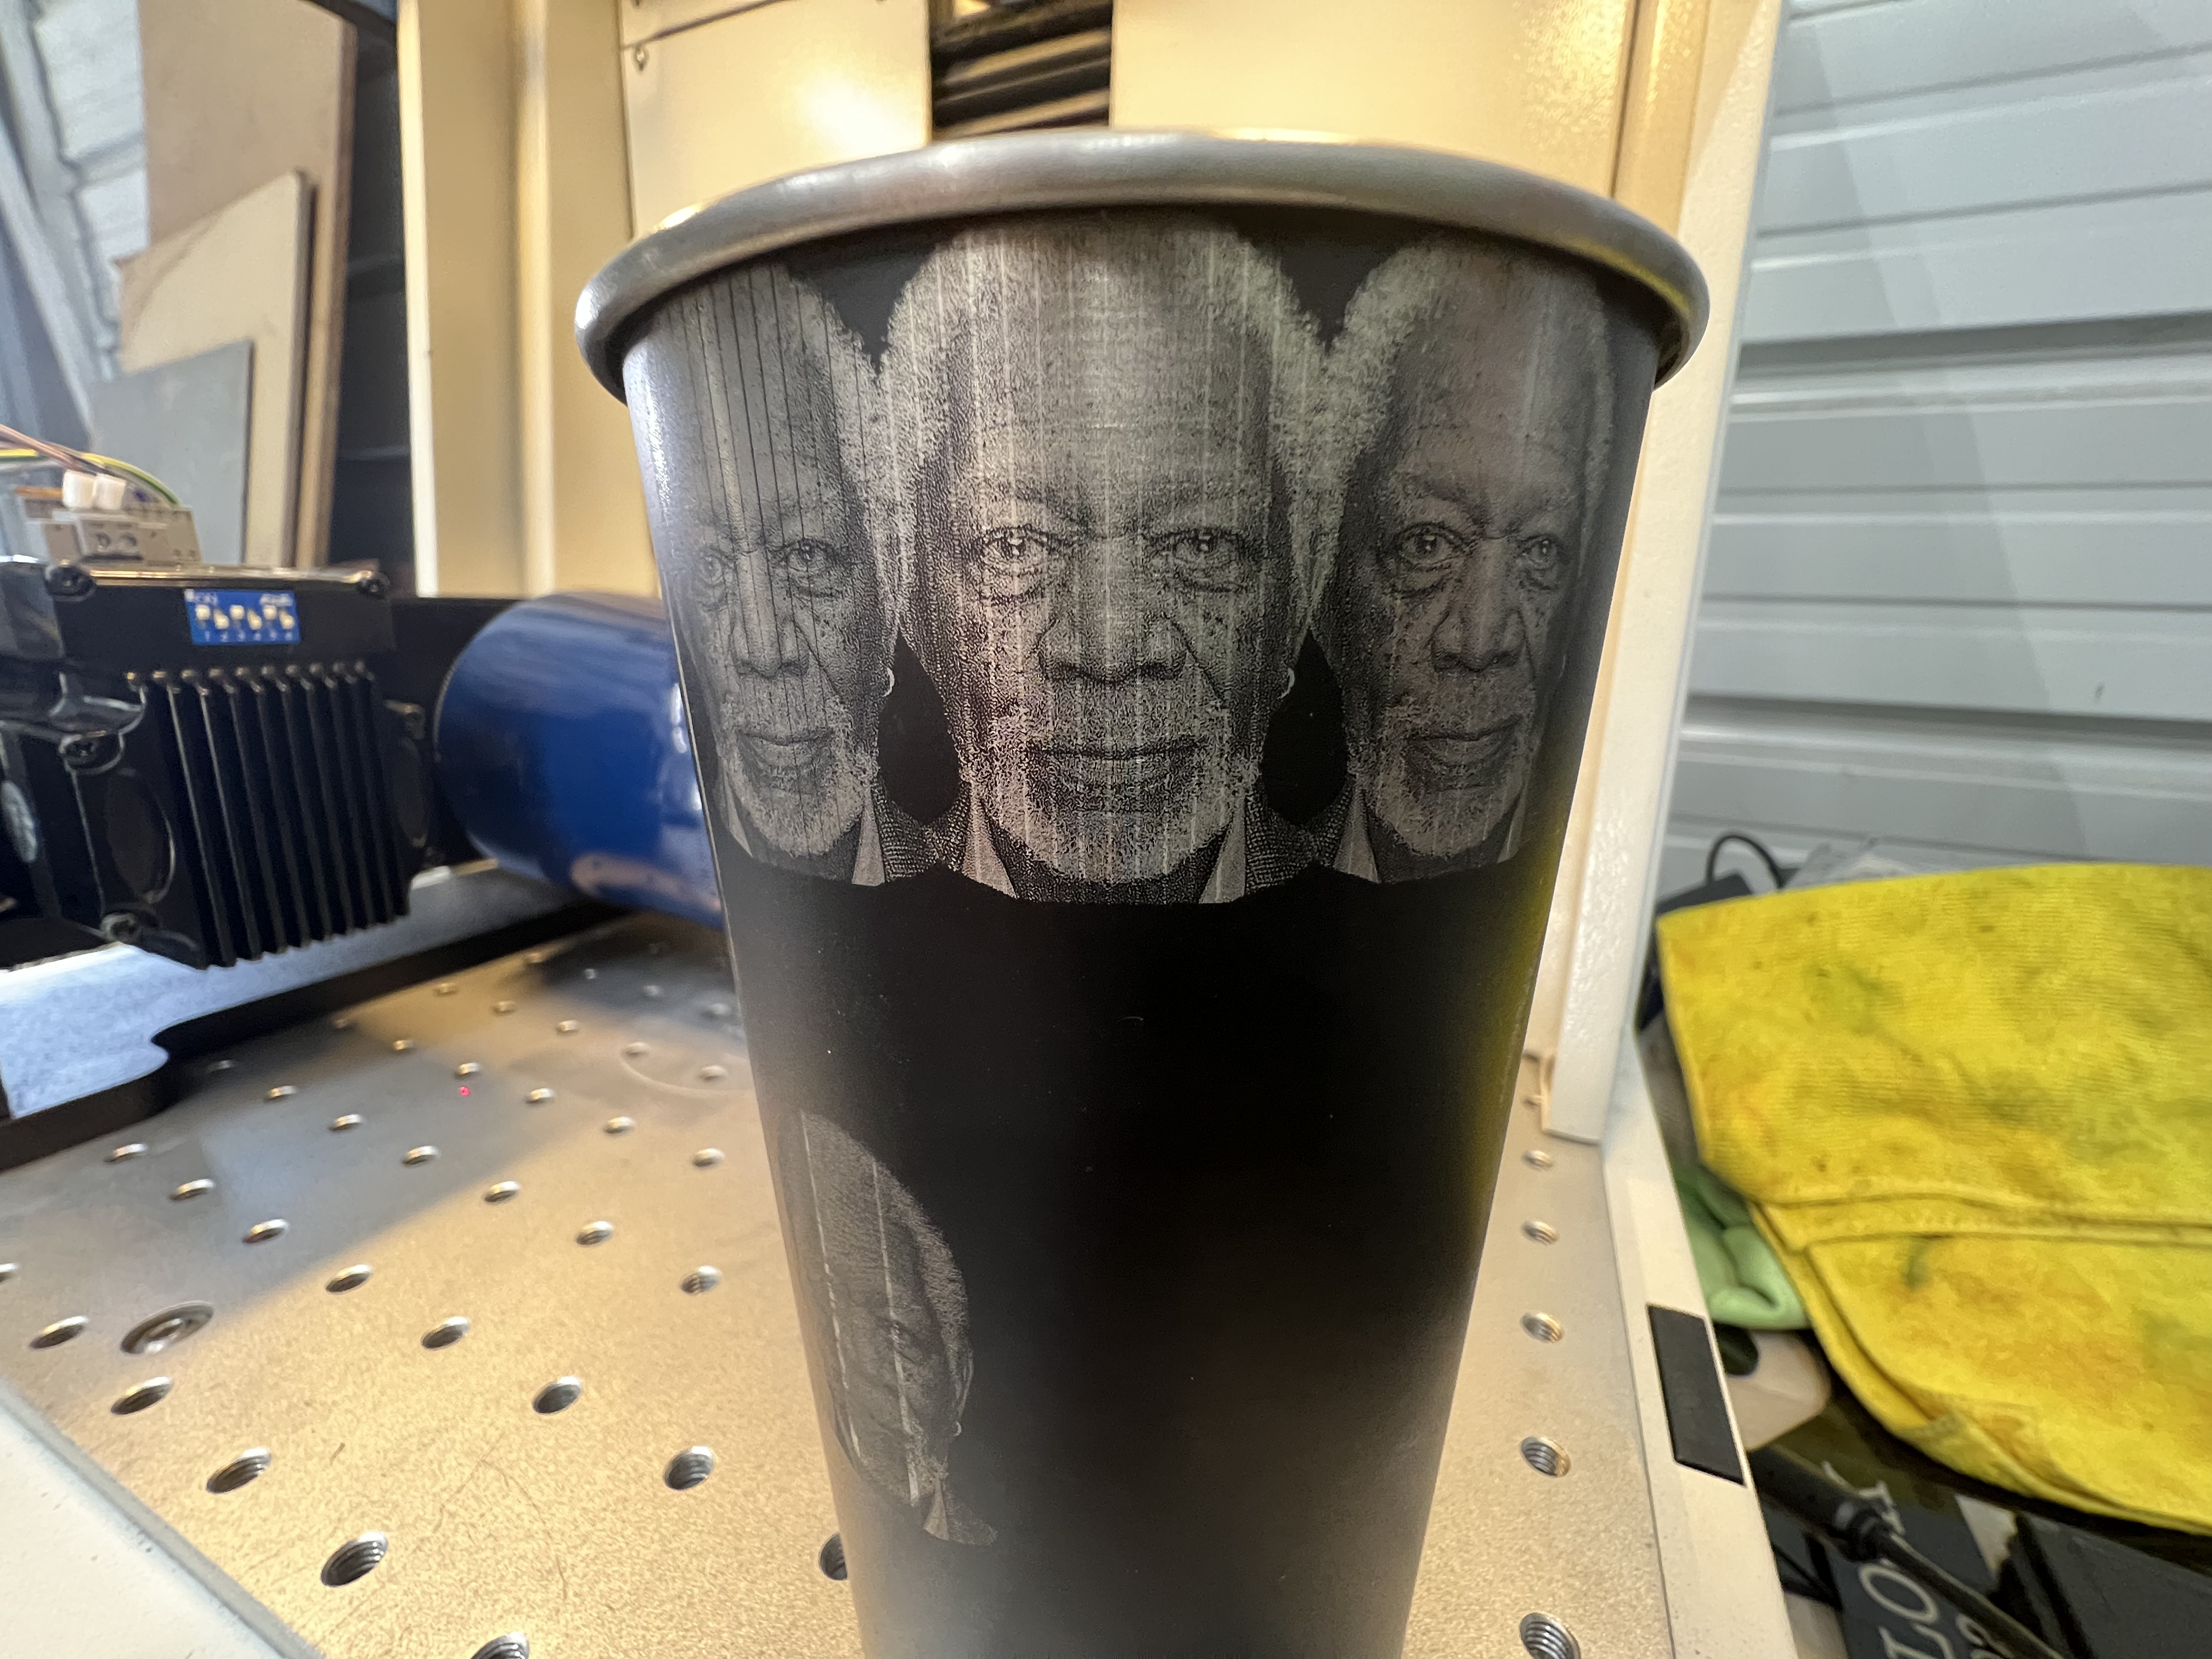
Notice the spacing and overlap of a tapered tumbler. This can be an issue to consider as the diameter at the top is larger than below. Also small changes to the overlap can seem drastic so testing is necessary.
Run Whole Shapes
When 'Run whole shapes, if possible' is turned on, LightBurn will attempt to create splits that keep shapes intact. This can produce a higher quality finish without gaps or misalignment within shapes.
Running the job
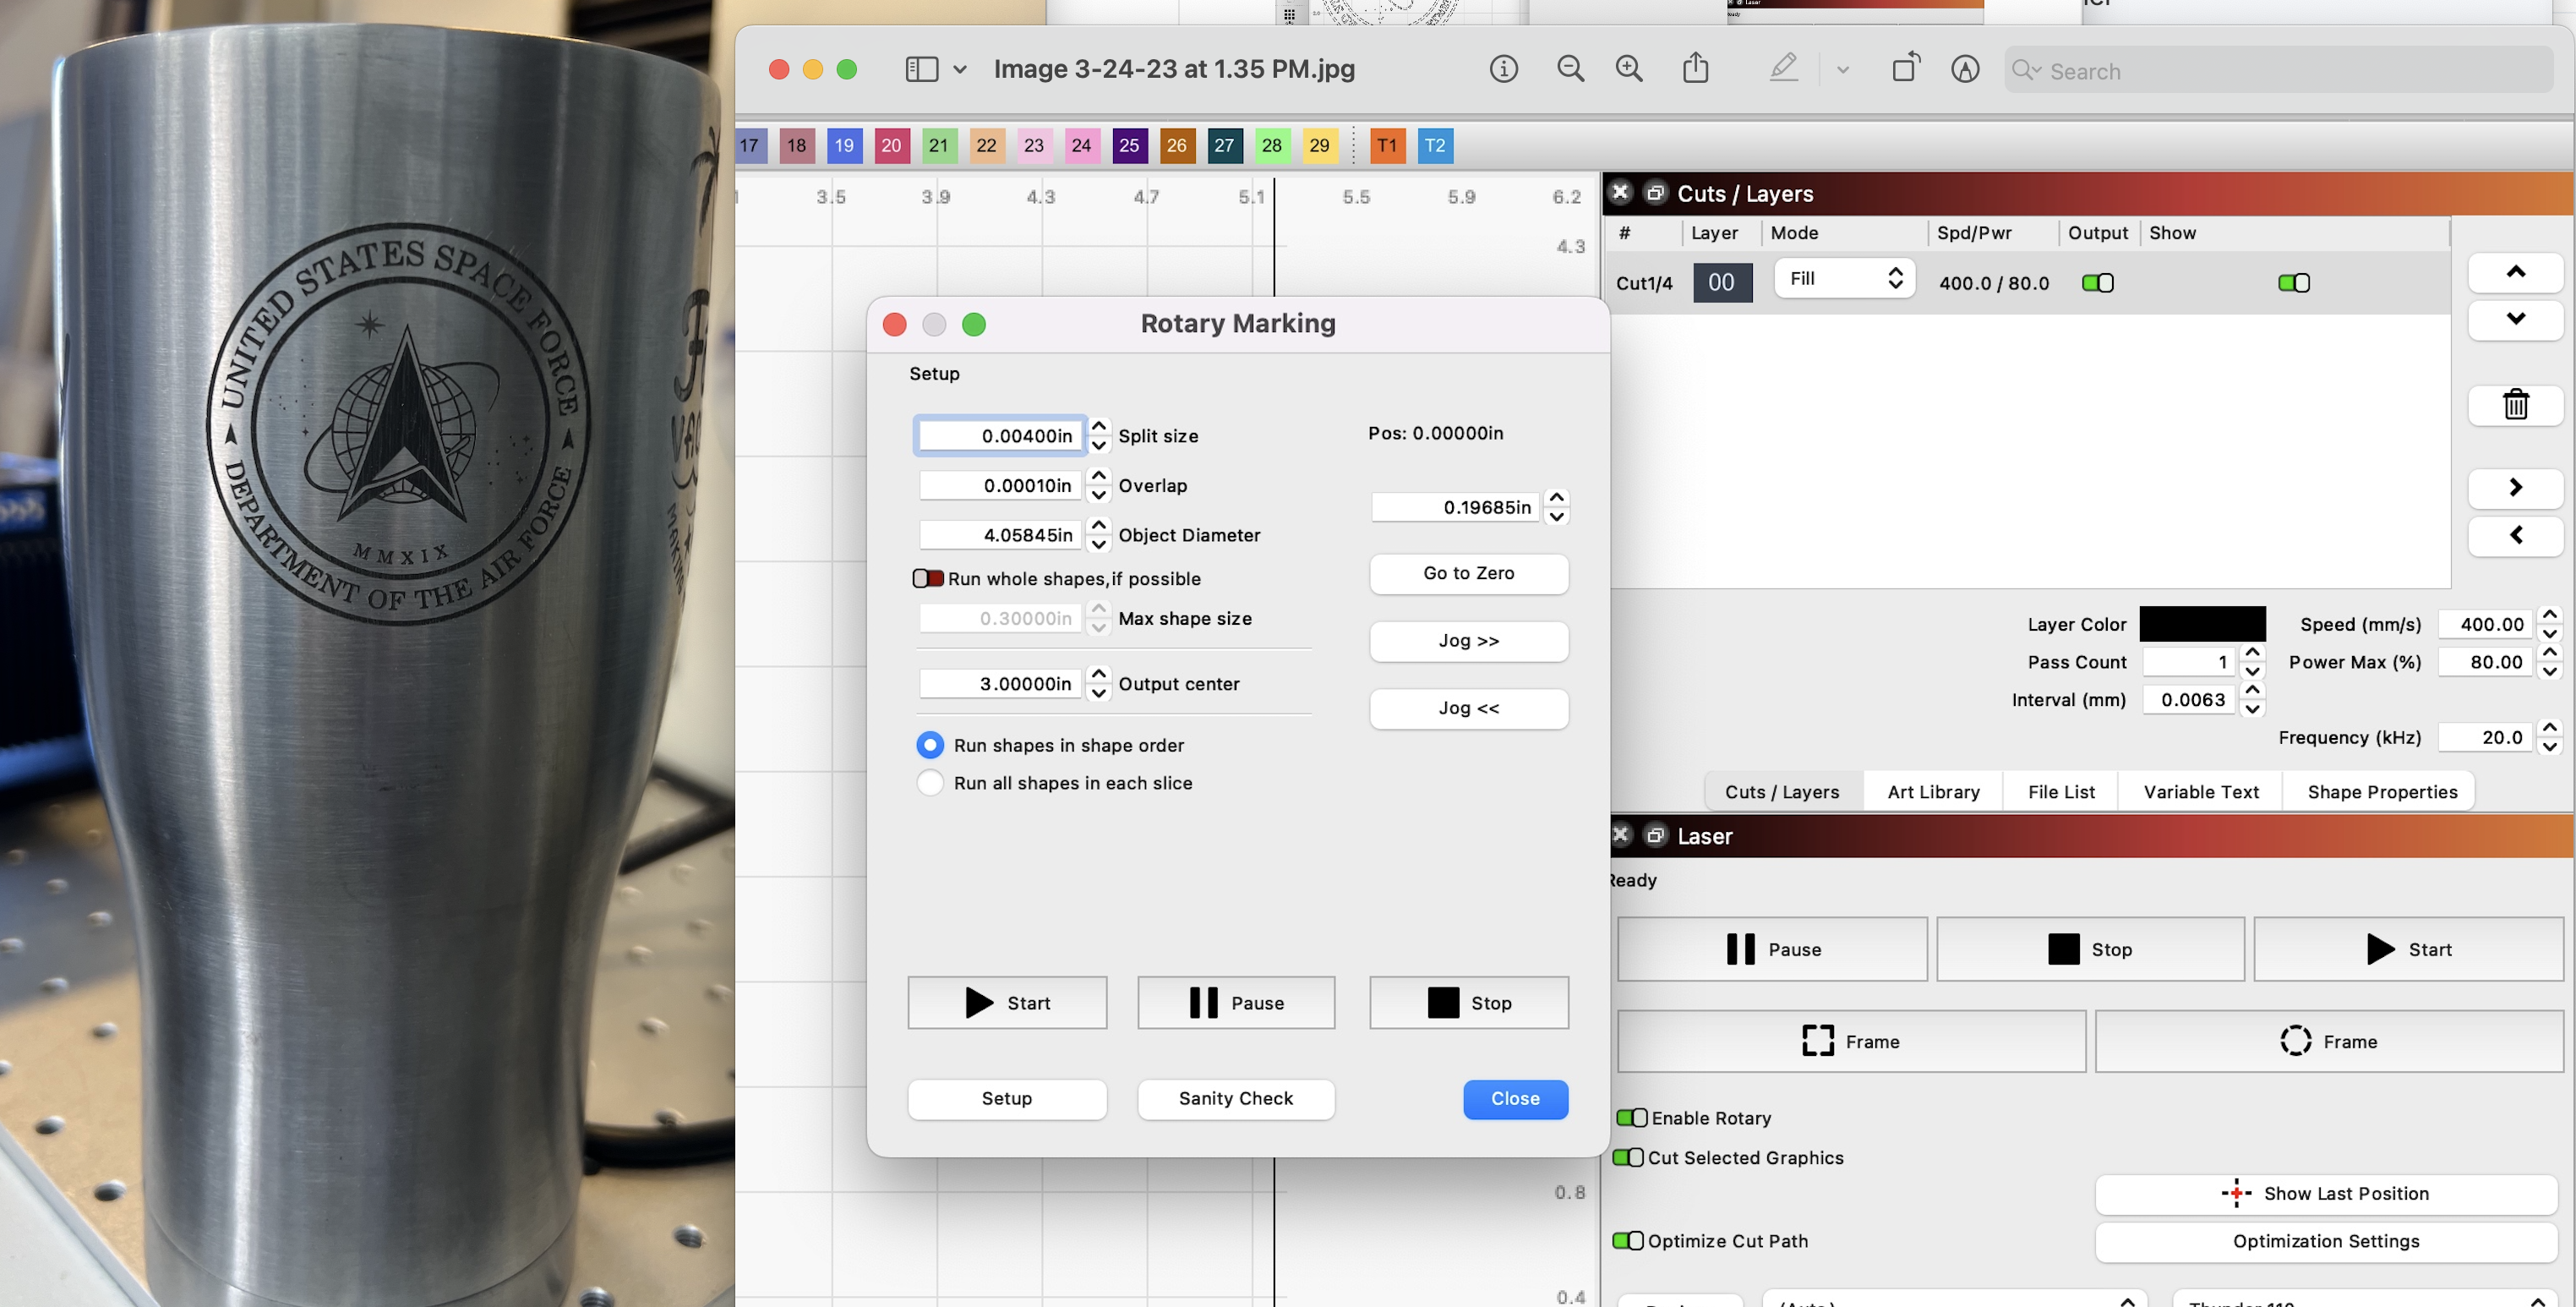
When rotary mode is enabled, pressing the Start button on the main window will bring up the Rotary Marking window, shown here:

From here you can tune the split size, overlap, and object diameter, as well as jog the rotary, and run the job. When running a rotary job, the center of your page is treated as the current rotary position when you clicked 'Start'.
Output Center
This setting allows you to shift the center position of your rotary output to compensate for the center of the rotary not lining up precisely with the center of the field. This value cannot be negative.
Example
Here is a photo of a SS tumbler that was engraved on the Aurora 8 20w, with the chuck rotary. Also note the settings of the LPI, Split and overlap. It is very difficult to avoid seeing the split lines, but through some testing and manipulation you can get excellent results.
Reference Videos
Still stuck?
No bots, no runaround. Talk to a U.S.-based laser tech who knows your Aurora inside out.