
How to Connect Titan IP Cameras to Lightburn
This article covers building the network stream URL for each IP camera on a Thunder Laser Titan and adding it to Lightburn as a network camera. LaserMaker finds these cameras on its own; in Lightburn you enter each camera's URL by hand.
Overview
Each Titan camera streams over the machine's network connection. Lightburn can show any of them once you give it the camera's full stream URL. The URL is built from four parts: the camera login, the machine's IP address, the port for that camera, and the stream path.
Before You Begin
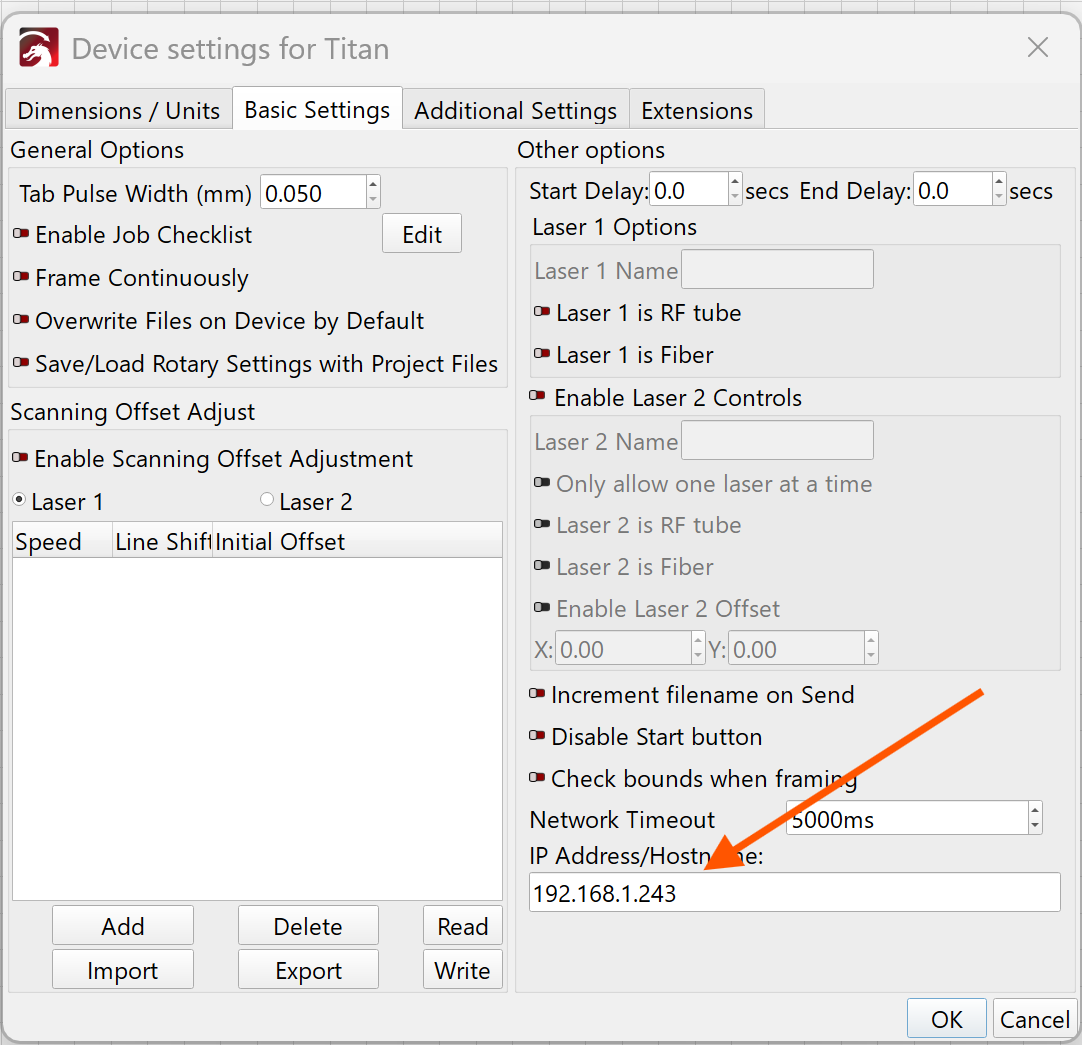
The Titan is connected to your network and you know its IP address (for example, 192.168.1.243). Find the IP address in your device settings in Lightburn.
Your computer is on the same network as the machine.
You have the camera login. The default is username admin, password admin.
You know which cameras your machine has. Depending on model, a Titan has up to five cameras (see the port table below).
Step 1: Build the Camera URL
Every camera URL follows this pattern:
http://<username>:<password>@<machine IP>:<port>/?action=stream
Part | What to enter | Example |
|---|---|---|
Username | Camera login name (default admin) | admin |
Password | Camera password (default admin) | admin |
Machine IP | The Titan's IP address on your network | 192.168.1.243 |
Port | The port for the camera you want (see the next table) | 8089 |
Stream path | Always /?action=stream | /?action=stream |
Put together, the example becomes:
http://admin:[email protected]:8089/?action=stream
Camera Ports
Each camera position uses its own port. Find your Titan model below. N/A means that model does not have a camera in that position. Ports are assigned in order based on which cameras are installed and where they connect on the Wi-Fi card, so your machine may differ. The ports used are always in the range 8089 to 8094.
Camera | Titan 27 | Titan 35 | Titan 51 |
|---|---|---|---|
Overhead | 8089 | 8089 | N/A |
Overhead Left | N/A | N/A | 8089 |
Overhead Right | N/A | N/A | 8090 |
Head Camera | 8090 | 8090 | 8091 |
Lid Open | 8091 | 8091 | 8092 |
Live View | 8092 | 8092 | 8093 |
For example, the Head Camera on a Titan 35 at IP address 192.168.1.243 is:
http://admin:[email protected]:8090/?action=stream
Note: Replace 192.168.1.243 with your machine's IP address. If you changed the camera password, use your password in place of the second admin.
Note: If a port shows a different camera than expected, try the other ports from 8089 to 8094 until you find the view you want, then contact Support so we can check your machine's configuration.
Step 2: Test the URL in a Web Browser (Optional)
Open a web browser on the computer that runs Lightburn.
Enter the camera URL without the login, for example
http://192.168.1.243:8089/?action=stream.If asked to sign in, enter the camera username and password.
Confirm the live camera view appears. If it does, the URL will work in Lightburn.
Step 3: Add the Camera in Lightburn
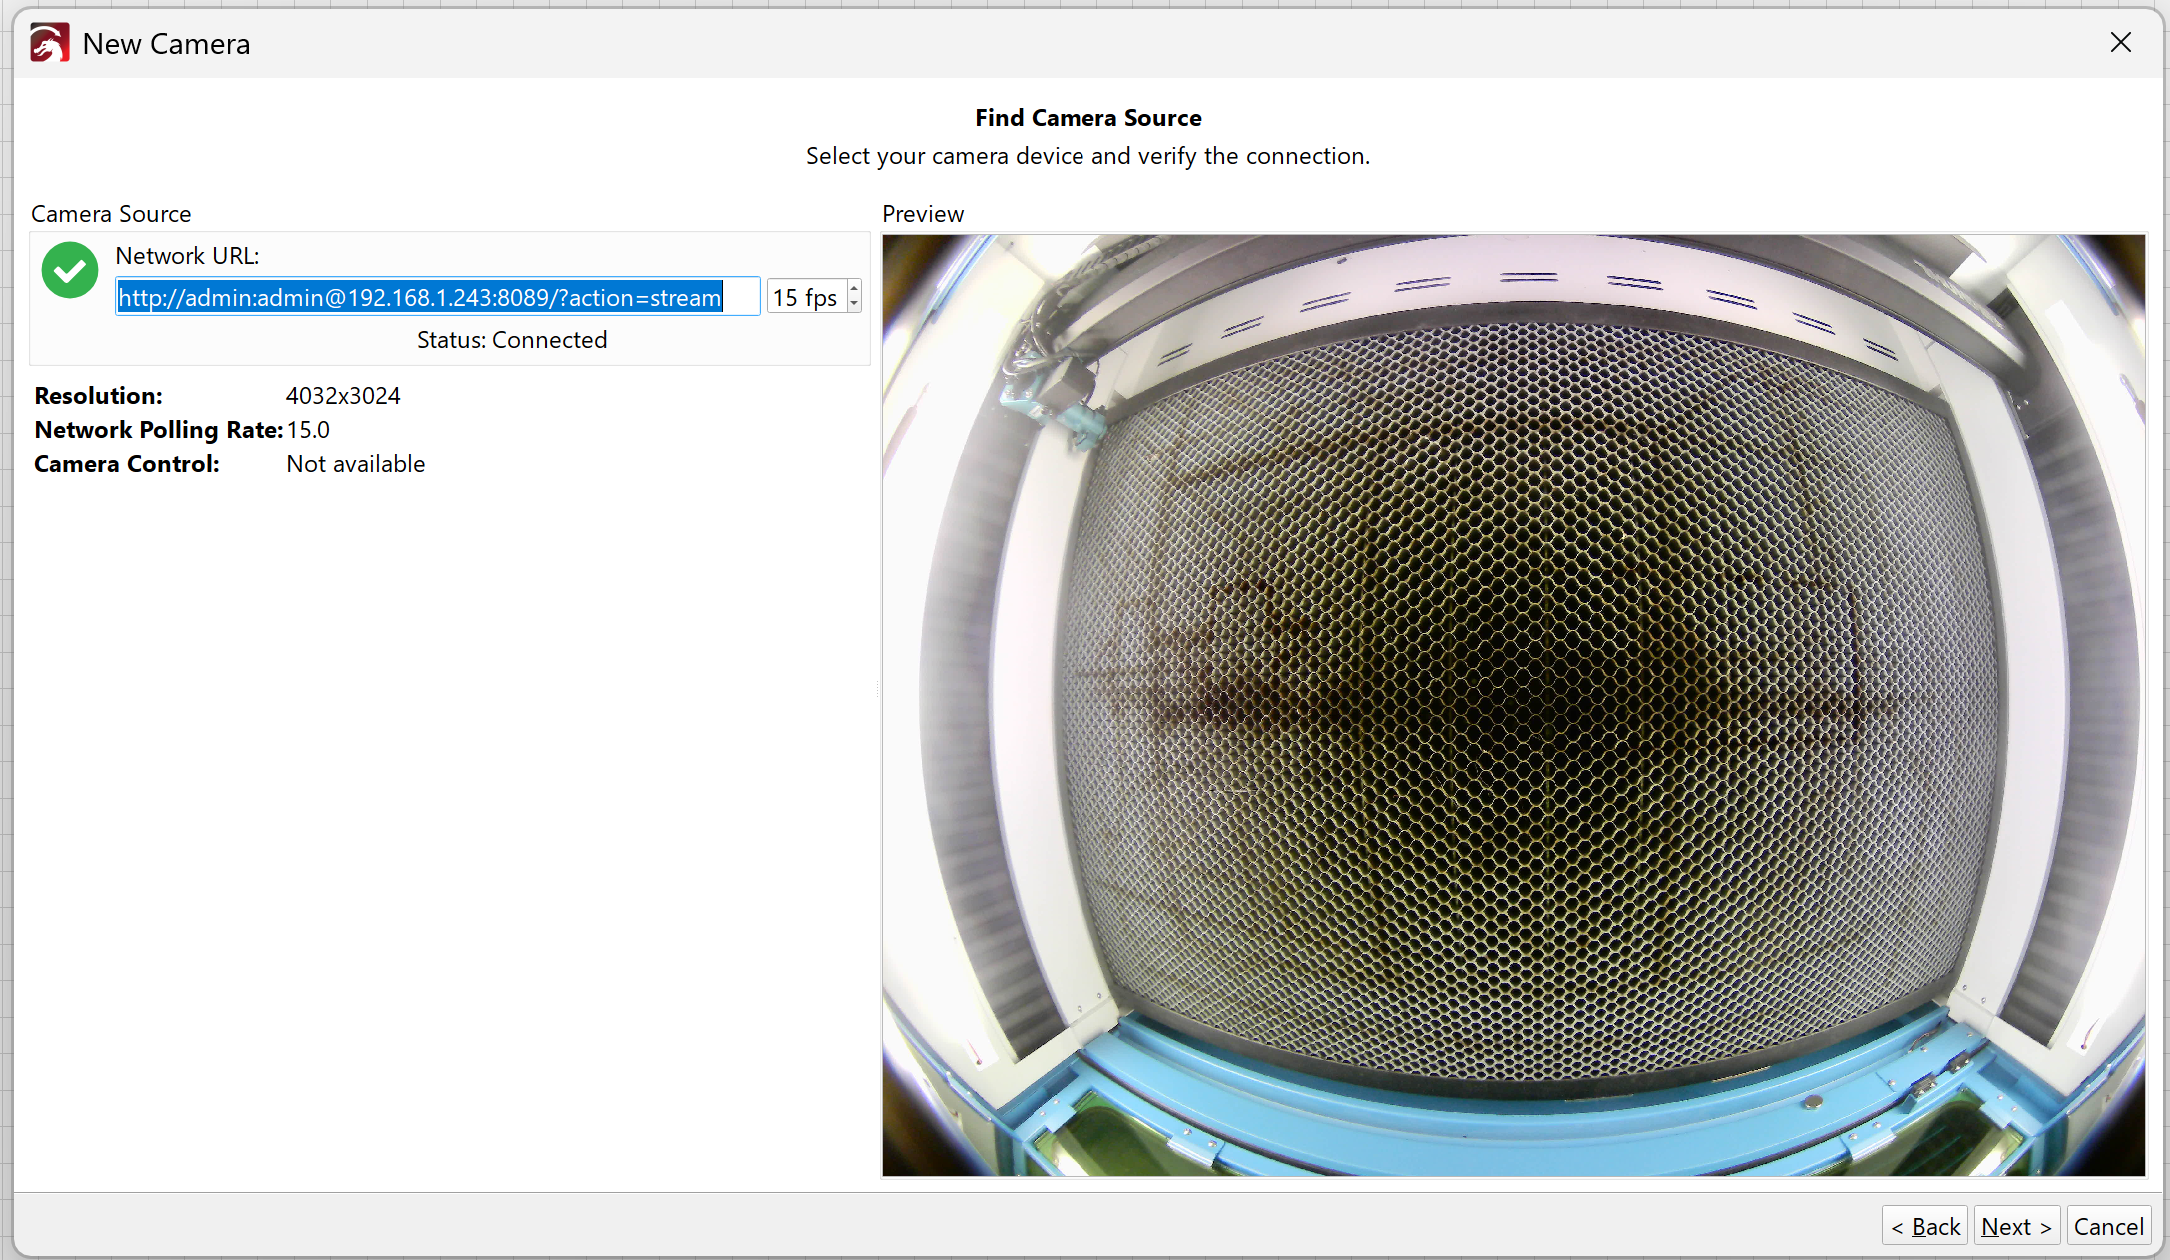
In Lightburn, start adding a new camera. The New Camera window opens on Find Camera Source.
In Network URL, paste the full camera URL, including the login.
Leave the frame rate at 15 fps unless you have a reason to change it.
Confirm Status shows Connected, a green check mark appears, and the Preview shows the camera image.
Click Next and finish the remaining setup steps.
Find Camera Source — connected Titan camera |
|---|
 |
Repeat this step for each camera you want to use in Lightburn.
Note: The overhead cameras use wide-angle lenses, so the raw image looks curved. Run Lightburn's camera lens calibration and camera alignment for each overhead camera before using it to place artwork.
Troubleshooting
Problem | What to check |
|---|---|
Status does not show Connected | Check the IP address and port for typing errors. Confirm the computer and the machine are on the same network and that you can reach the machine from the computer. |
Login or authorization error | Check the username and password in the URL. If the password contains special characters such as @, : or /, change it to one without them, or test in a browser first. |
Wrong camera appears | The port is for a different camera position. Check the port against the Camera Ports table. |
Camera worked before and stopped | The machine's IP address may have changed. Find the current IP address and update the URL in Lightburn. A reserved (static) IP address for the machine on your router prevents this. |
Need Help?
Contact Thunder Laser USA Support at [email protected].
Still stuck?
Fastest response times in the industry from our US-based support team.