
Watch the walkthrough
Applies toOdinTopicMaintenance & Calibration
Preface: This article covers the steps required to set up the Air Assist protection feature on your laser machine
Things you will need:
- Computer that can run RD Works
- Ability to configure RDworks to communicate with your laser
Steps to Enable Air Assist Protect
Verify that the Wiring is completed
Shot Pin on the green CN2 Connector on the Ruida Controller
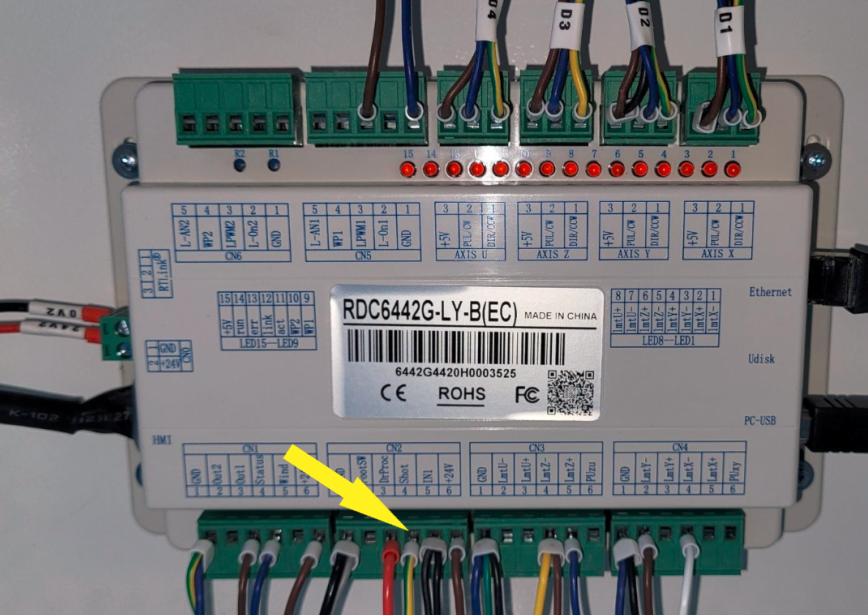
Verify the P1 Setting on your Sensor

Check that the PE setting on your sensor is set to .1 PSI (you may have to convert your Units to PSI)

Connect to laser and Edit Vendor Settings
(Video at bottom of Article shows the steps)
If you do not have RDworks, check the USB that was included on your machine or download RD Works For Thunder Laser.
In RDworks select File > Vendor Settings

Enter RD8888 for the Vendor Password:

Select the Other Tab in the Vendor Tools:

Click to Read The Current Settings:

Check the box for Enable air protect and then Click the Write button.

Test On Machine
- Load a short job and set up the origin and frame such that it is not actually going to laser onto any material.
- Remove the air inlet tubing from your Pump/Compressor on the back of the machine.
- Start the job. After a few seconds, the machine should pause and you will receive an error message on the Machine Display.

Reference Videos
Still stuck?
No bots, no runaround. Talk to a U.S.-based laser tech who knows your Odin inside out.