
Preface: This article covers the steps for changing the wiring on the NOVA Plus for the affected machines.
Warning: Before performing this operation, ensure that the power supply of the device is completely cut off. Unplug the machine from the wall power and allow the power supply to dissipate.
This process should take about 15 minutes to complete. The change is to move the cooling fan power and speed signal wires from the Fan Control board over to the Laser tube itself. This change is reflected in the latest schematics.
Machine Wiring Differences
Please take note of which wiring setup your machine has. There are two setups possible on your machine. If you do not have the black 2 pin connector inline in the wiring from the fans to the fan board, please contact [email protected] to get the lever nuts shipped to you.
| Wiring Layout 1: Machines with Black 2 Pin Connector | Wiring Layout 2: Machines that do not have a Black 2 Pin Connector |
|---|---|
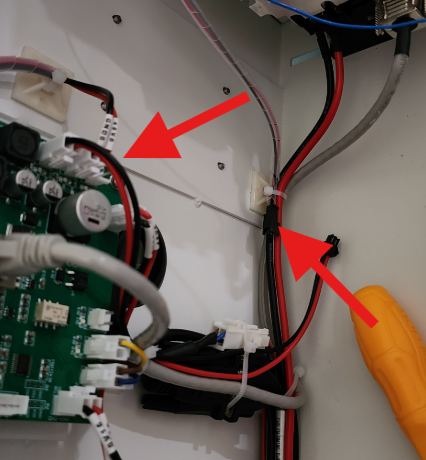
This wiring version is ready to be modified with the original parts that were sent. Please see Wiring Layout 1 Directions below. |

This wiring version requires additional hardware (contact [email protected] to get yours) and steps to complete. Please see Wiring Layout 2 Directions below. |
The Net Change
The net result of the change is to move the power and speed control from the fan board to the RF Tube itself.
| Before | After |
|---|---|

|

|
Wiring Layout 1 Directions
Tools/Supplies Needed
-
Three cables from Thunder (Will be shipped to you)

-
Phillips screwdriver

-
Flat-head screwdriver

-
Wire Strippers

Procedure
-
Step 1: Unplug the cable that goes from the Fan Board to the Tube Cooling Fans Assembly as shown. If you do not have the black 2 pin connector, you will need Lever Nuts. Please contact [email protected] and we will get them shipped to you.

-
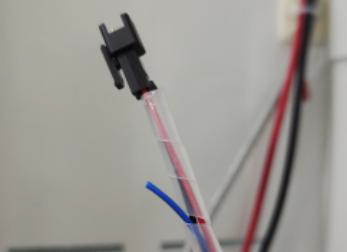
Step 2: Fish the blue wire from the cable wrap.
On the cable that is still plugged into the Fan Tube Cooling assembly, fish the blue wire out of the cable wrap.
-
Step 3: Strip the insulation of the blue cable to expose approximately 5mm of metal wire.

-
Step 4: Use a Flat-head screwdriver to loosen the screw of the white 2 pin terminal connector.

-
Step 5: Insert the stripped cable end of blue wire into terminal, then tighten the screw to secure the wire.

-
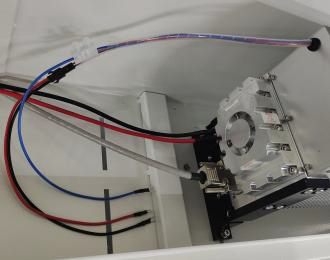
Step 6: Connect the new black and red wire harness to the Tube Fan wiring harness.

-
Step 7: Use a Phillips screwdriver to loosen the three screws on the Laser Tube.

-
Step 8: Refer to the image below and connect the black, red, and blue wires in order, then use a Phillips screwdriver to tighten the screws.
Note: When sliding the fork terminals onto the screws, the black barrier plastic is narrower at the top and bottom, so you have to remove the screws completely, place the forks by sliding in (they should now be retained a little since they cannot be pulled up or down, only out) and then screw them back tight. A magnet on the end of your screwdriver will help keep the small screw in place.

Wiring Layout 2 Directions
Please use the video below to complete the install if you have a Wire Layout that matches Layout 2.
Still stuck?
Fastest response times in the industry from our US-based support team.