
Preface
This article will guide you through upgrading the Fiber Module version for TITAN machines.
Note: Since the firmware update software doesn't have an English version, you'll need to pay close attention to the Chinese characters on the buttons you need to click.
Please follow the red boxes highlighted in the tutorial's images to proceed.
Steps to Follow
-
Please download the file via the link below and unzip it.
Upgrade Fiber Module Firmware

-
Prepare a DB9 male-to-USB cable to connect the Fiber Module to the computer.

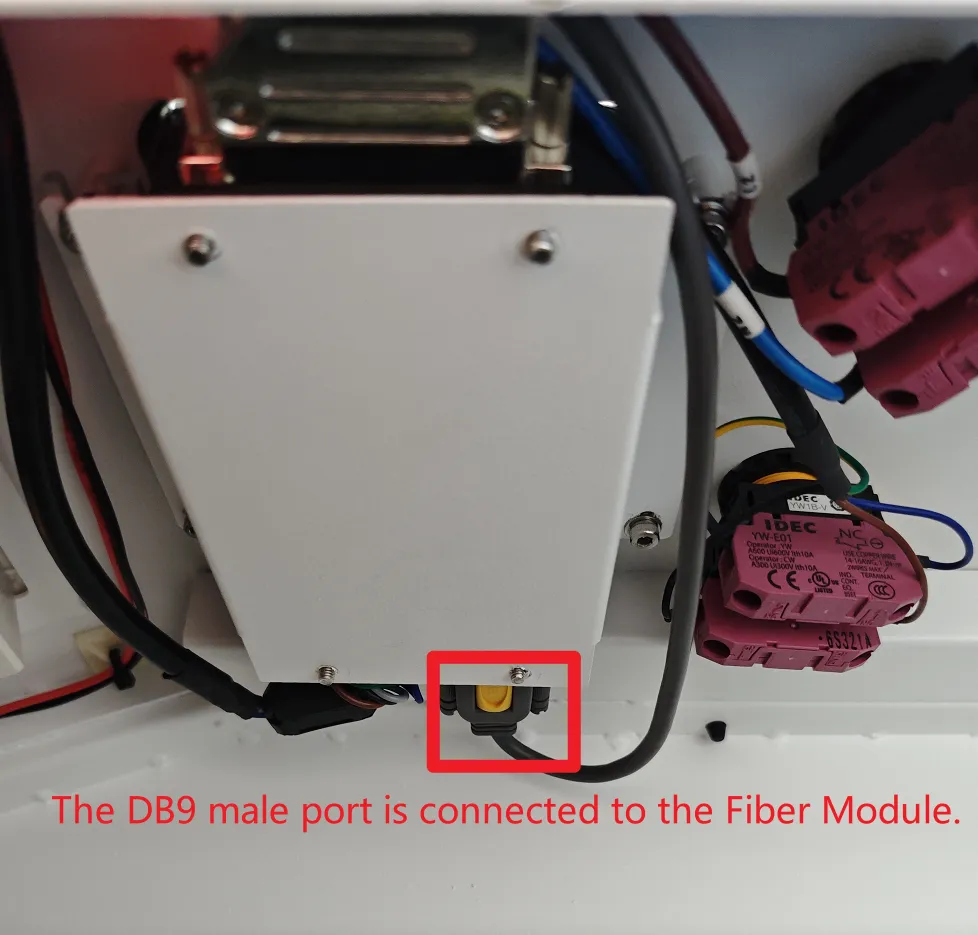

If the DB9 male port cannot be directly connected to the Fiber Module, use a 3mm Allen wrench to remove the four screws and washers from the Fiber Module.

Then connect the Fiber Module using the DB9 male port.

-
Open the "PL2303driver (Windows+Linux)" file and install the driver according to your computer's operating system.

This article uses Windows computers as an example. Click "Windows > Windows 8.x-10-11 > Extract PL23XX_Prolific_DriverInstaller_v408", then install the PL23XX-M_LogoDriver shown in the image below.

-
Open Device Manager and check the installed driver ports.

-
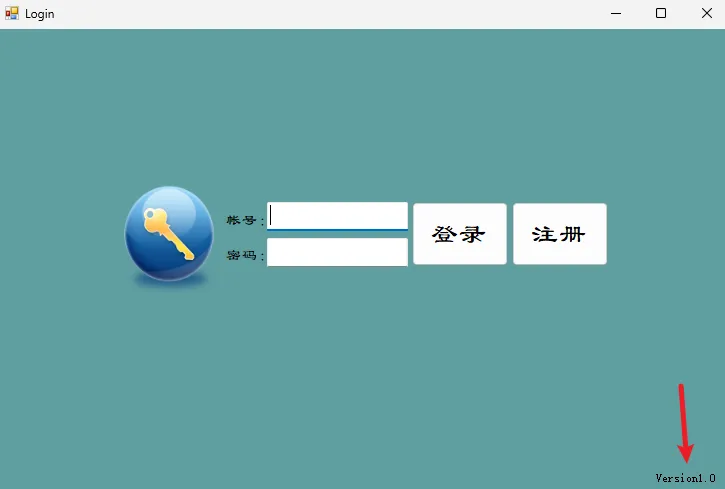
Open the "V2_IAP_UPDATA.exe" software, click the position of 'Version 1.0' to enter the main interface.

Select the correct drive port you found in step 4 - COM8, then click "打开" which means that you have opened the port, click "浏览" to browse for the firmware file, select "RDACC-FIBER-V1.8.bin".


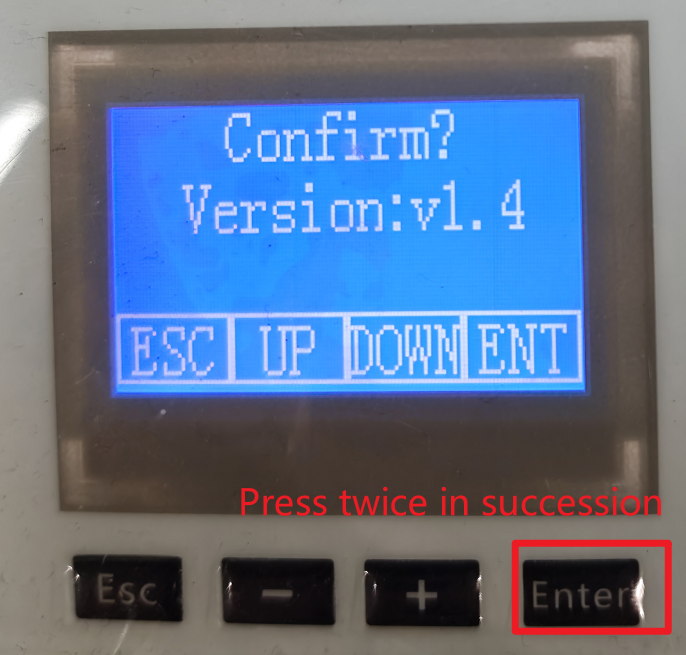
Then press the ESC button on the Fiber Module to switch to the Menu interface.
Find Sys Upgrade using the Down button. Press the Enter button twice to upgrade the Fiber Module.

Finally, click "开始" button to start upgrading the Fiber Module.
When the progress text displays "单片机升级...100%", the upgrade is successful.
You can turn off the software and wait for the Fiber Module to restart to check the firmware.


-
Use a 3mm Allen wrench to reinstall the Fiber Module. Then unplug the USB cable connected to the computer.
Put the USB cable through the Fiber Module mounting plate, then through the rubber rings.


Secure all signal cables with zip ties to prevent the Y-axis motor from contacting the signal cables when the laser head moves.

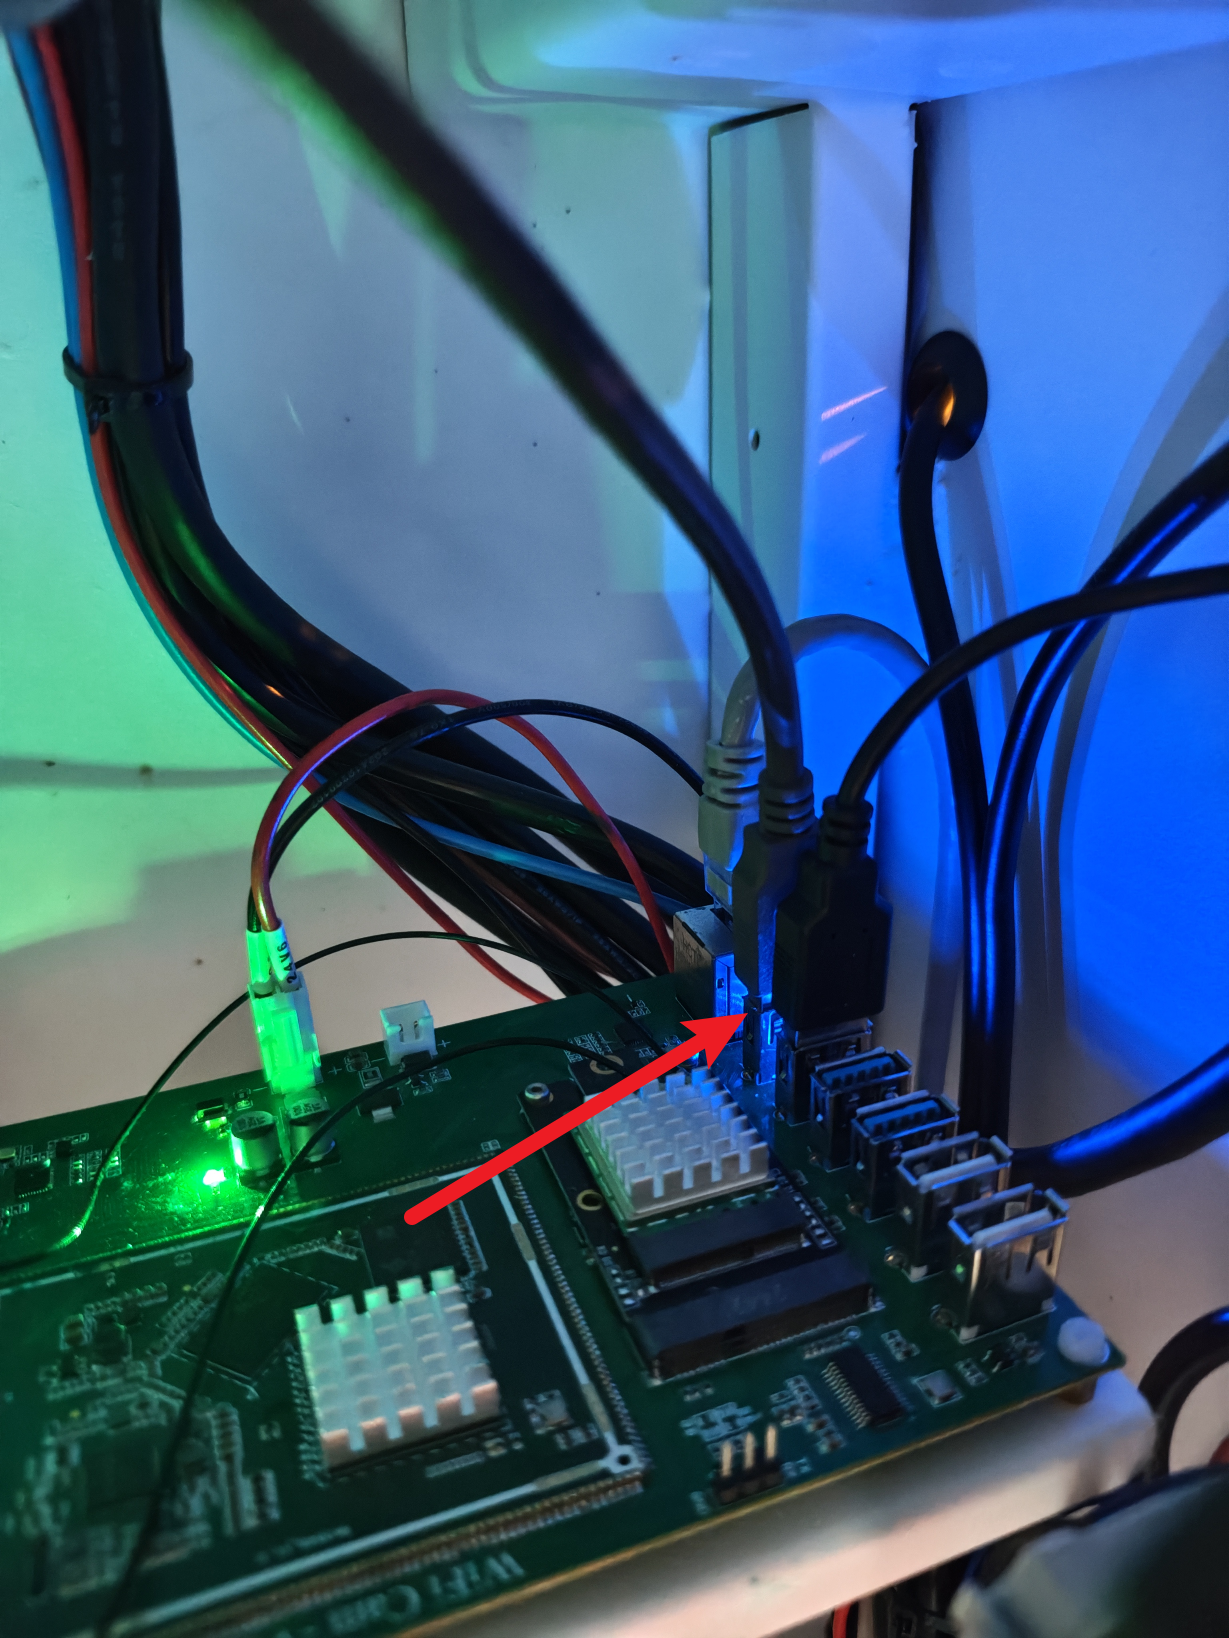
Finally, plug the USB cable into the USB port on the WiFi board.

END.
Still stuck?
No bots, no runaround. Talk to a U.S.-based laser tech who knows your machine inside out.