

Here are some important things to remember:
-
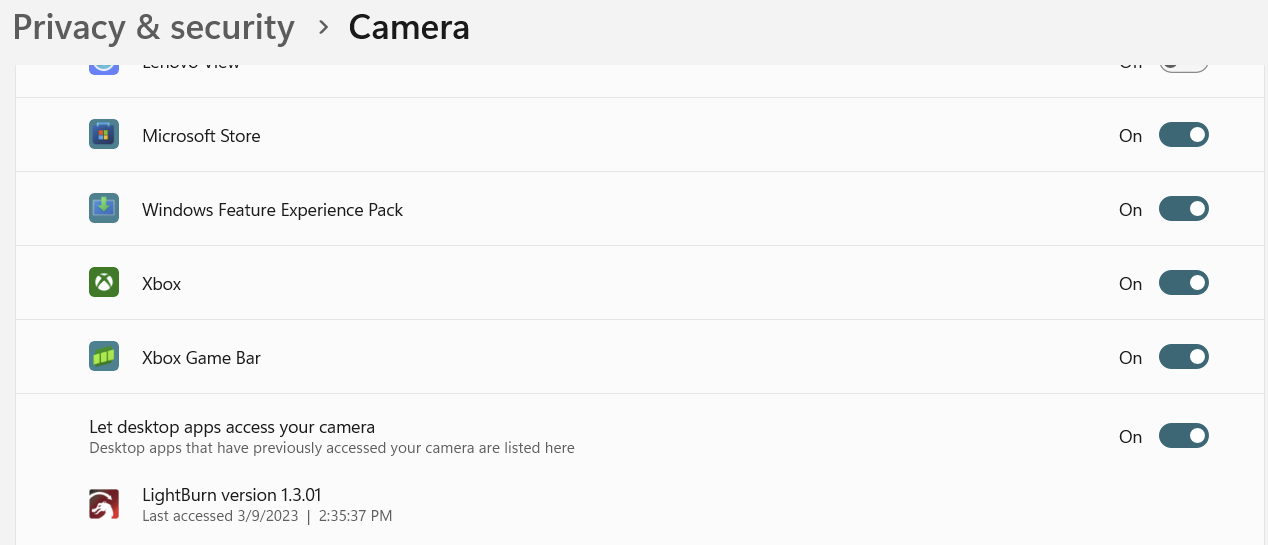
Many systems use protocols to block the camera from being used by non native software i.e. virus software and system security measures may need to be turned off. See the bottom of this article for more on this for both Windows and MAC OS
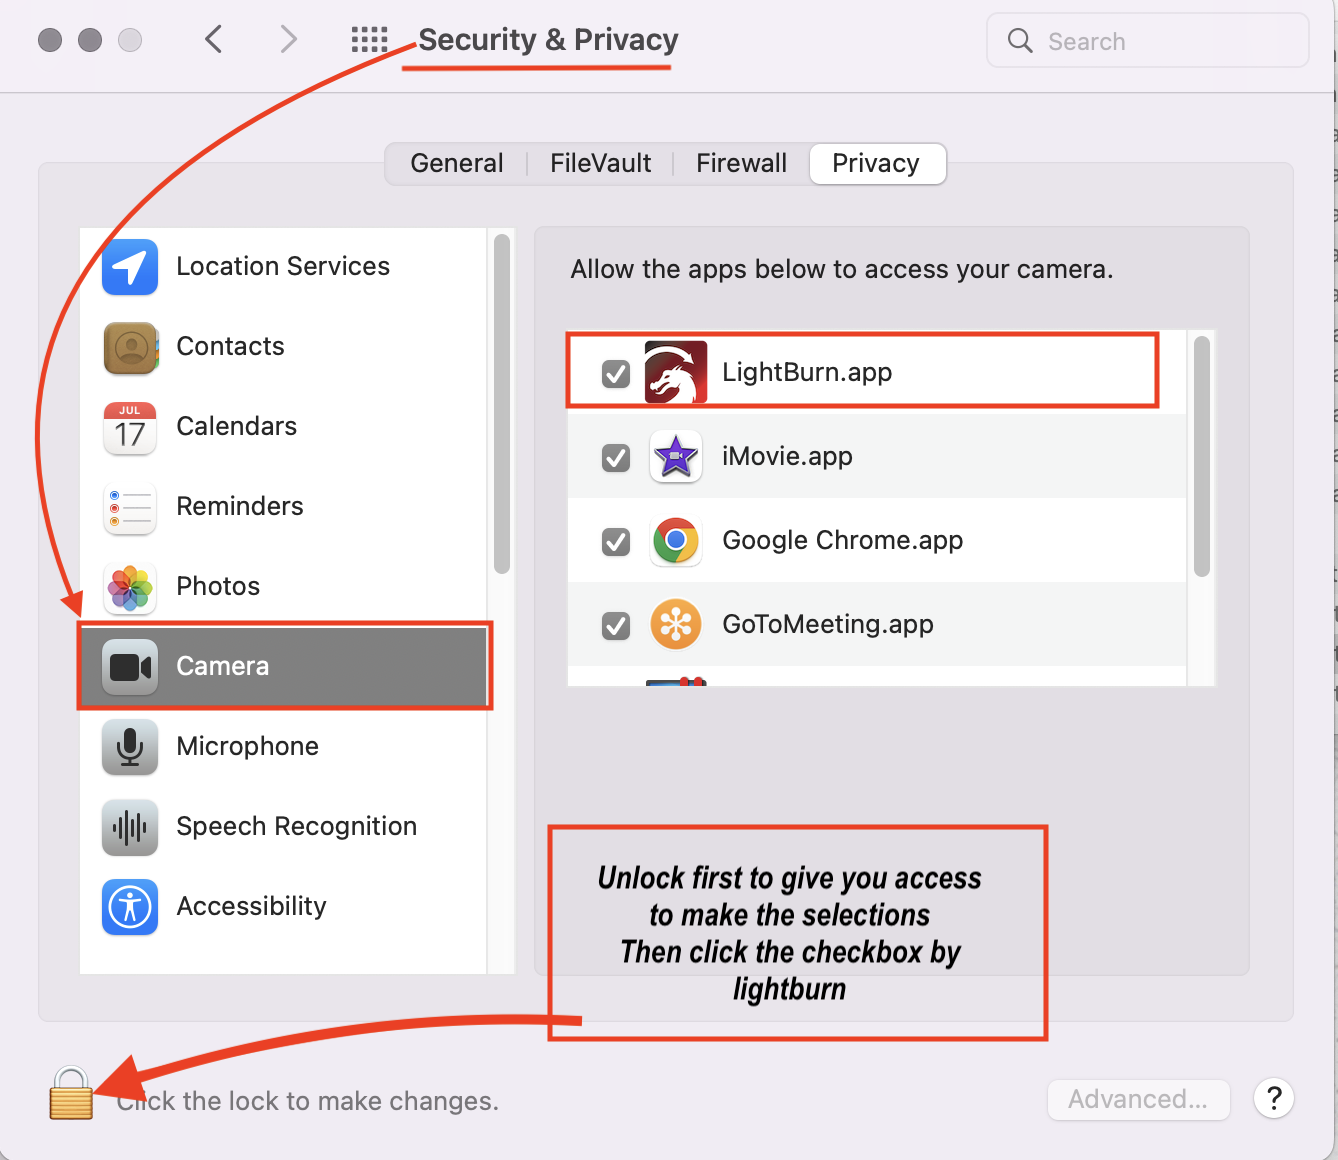
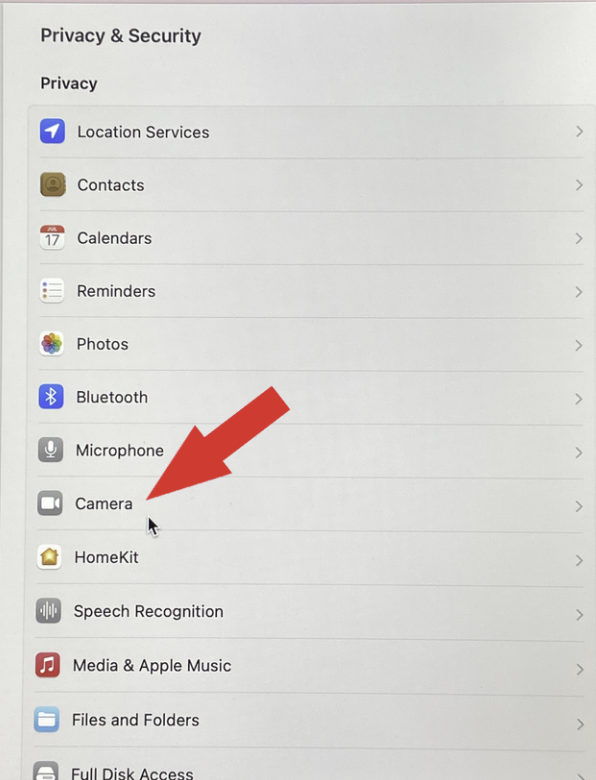
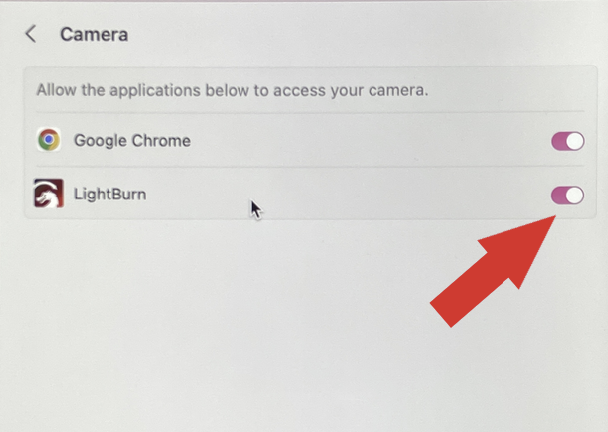
- On newer Mac OS systems you will have to allow LightBurn access to your camera. System Preferences/ Security & Privacy Select Camera and check LightBurn.
-
The camera function is tied to the computer, LightBurn software, and camera itself. The camera does not directly interface with the laser or DSP that controls the laser. The laser is oblivious to the cameras existence
-
The USB cable carries a HUGE amount of data and can only be so long, so any extender used should be an active amplifying USB 2.0 rated cable or twisted pair extenders that use modems in each dongle. Using a passive extension will not work. here is one solution if you need it longer:
USB Active Repeater
-
A USB To Ethernet option exists as well:
USB TO Ethernet TO USB
(some users have reported issues with connecting while others have had great success)
- The focal point of the substrate in relation to the camera must not change or else it will be necessary to recalibrate the camera to the bed. The easiest way to facilitate this is by autofocusing when doing cam alignment and use autofocus whenever you use the camera. you can autofocus the material then adjust the focus manually from there if you need to so you don't move the substrate from the autofocus point
- It is important to capture an image that goes a little bit beyond the extents of the bed
- On Nova 51 and 63 machines the bed extends past the hinge line so the rearmost portion of the bed will not be in play but the camera can still be used with the visible areas
-
The Mini 60 has a fixed bed which may affect calibration because the focal point will change with material thickness as there is not movable Z axis in a Mini60. See here:
Basics Of Focus
-
Check the Image Focus:
ThunderCam Focusing the Image and Proper Setup
Kit Contents:
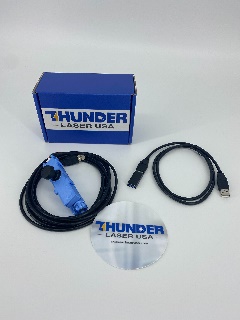
Camera Mount
Camera USB Cable
USB Coupler
USB Cable
Mounting Accessories - Zip Ties and Sticky Backs
Camera Mounting & Cable Routing:
The camera should be mounted to the lid, centrally located above the bed. The camera USB cable can be routed through the glass retaining clips across and down the right side of the lid then through the existing grommet that accesses the main electronics bay. Some wire ties and adhesive mounting pads are included to help secure the cabling.
ThunderCAM mounts:
Thunder mounts come ready to mount, no modification needed.
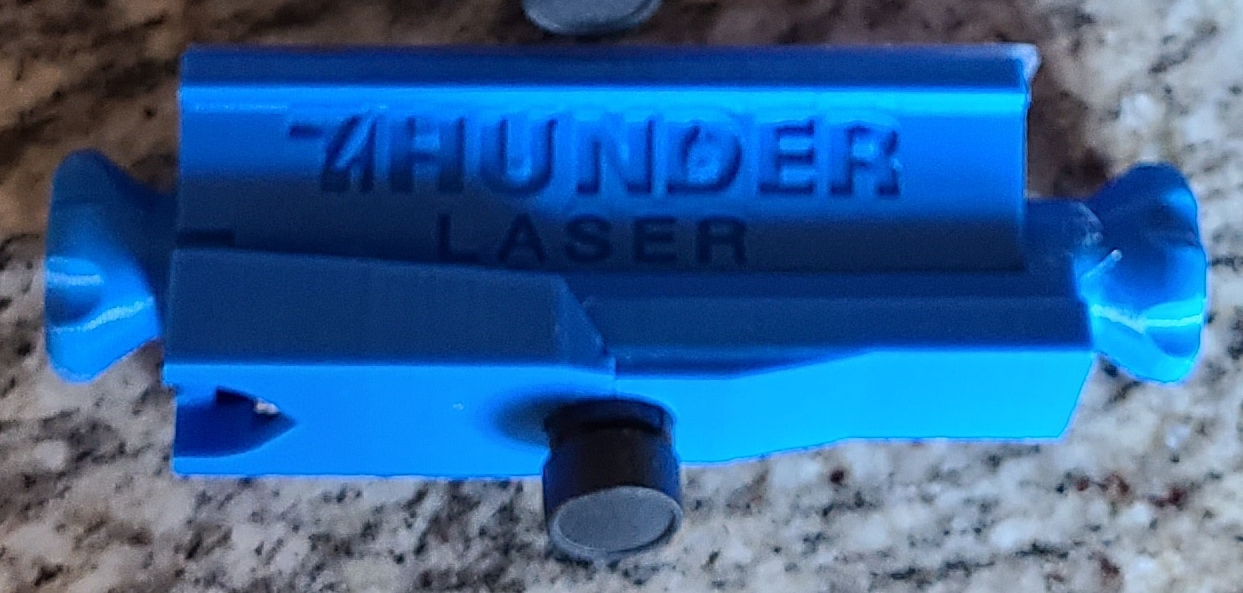
LightBurn Mounts
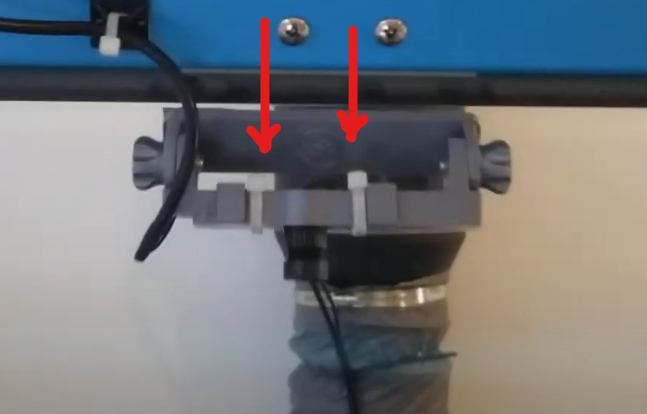
Make sure you apply 2 wire ties, as shown below, before doing the camera alignment (and don't touch the cam anymore after it's in place), to maintain accuracy and fix a known issue with mount and cam module tolerances. This is a long-term solution to lateral module movement, etc...
Interfacing The U-Disk Port:
This will allow the camera to utilize the U-Disk port on the side of the machine to neatly get the camera connected to your computer without drilling holes or finding an existing exit point. If you use the U-Disk port under normal conditions you may need to modify this approach. The end goal is to connect the USB camera directly to the PC.
CLARIFICATION ON THE USB CONNECTIONS:
How to run the Cable from the Camera to your Computer:
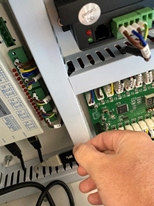
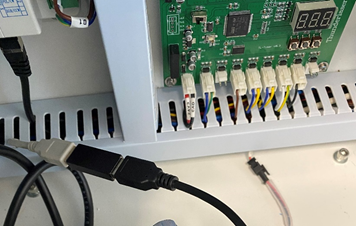
Remove the U-Disk USB cable from the DSP controller U-Disk Port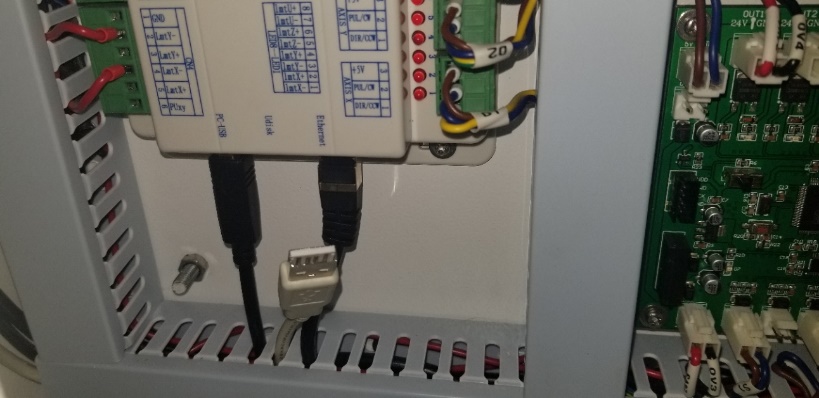 Connect the adapter to the DSP U-Disk Cable
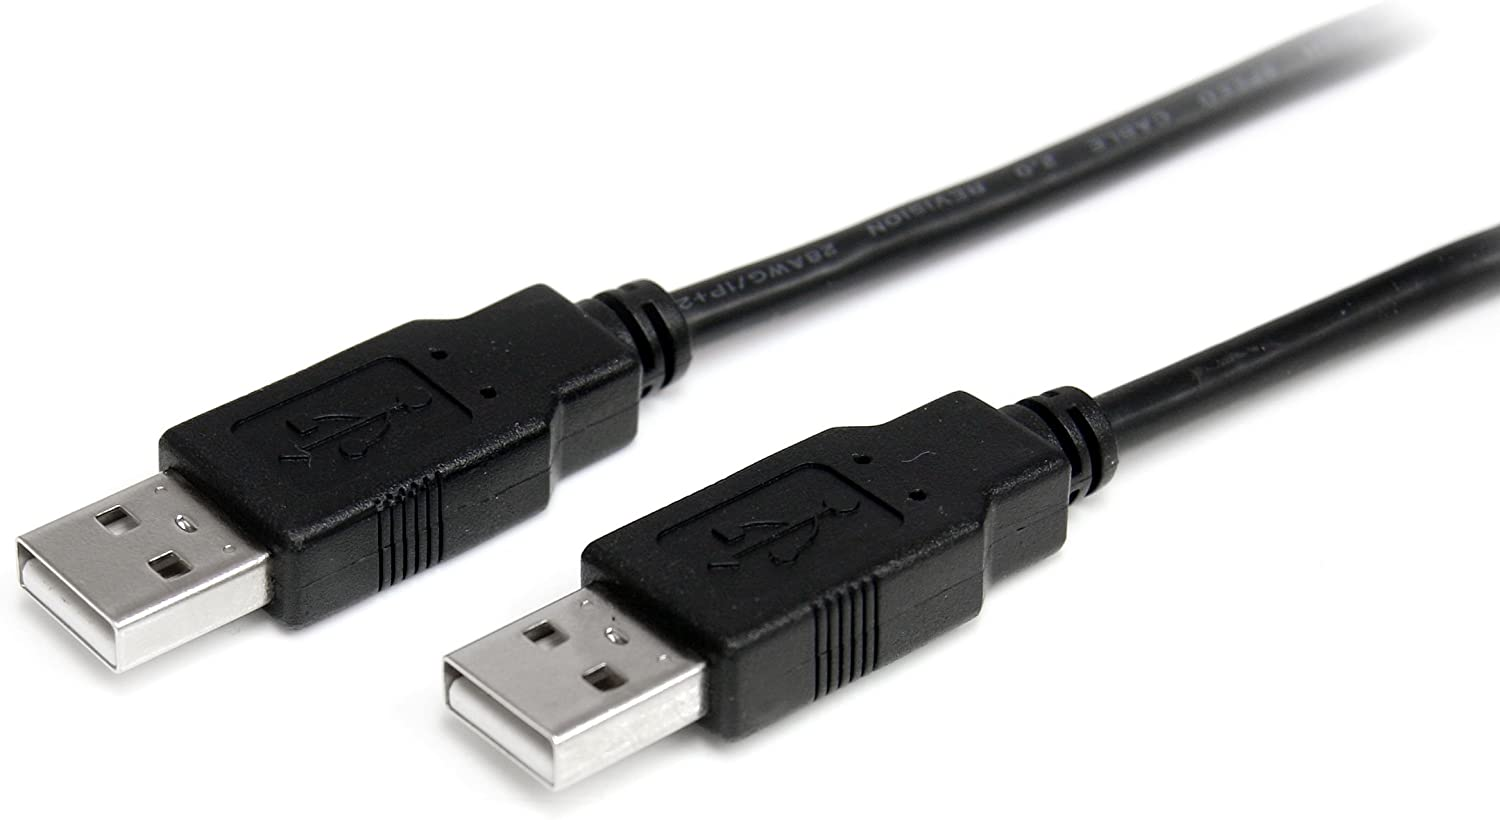
Connect the LightBurn camera to the U-Disk cable via the USB adapter
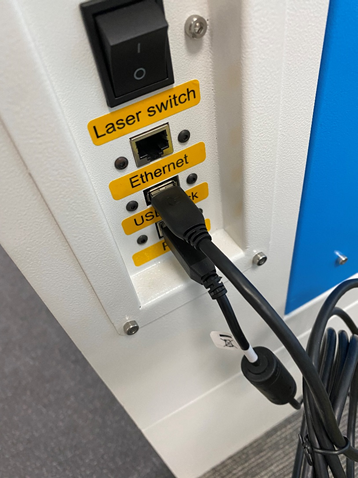
Connect the USB cable from the U-Disk port on the outside panel of the laser to your PC
Calibration and alignment procedures are a function of LightBurn:
NOTE: On the Nova 51 and 63 series with the 120 camera, the small area of the bed in the back that extends past the hinge line of the lid will not be visible. This is known and it does not cause any issues. You will still be able to use the entire work area, you just wont be able to use the cam on that very back portion.
Here are some handy resources:
YOU CAN PICK THE CORRECT PRESET FOR YOUR THUNDERCAM AND SKIP THE MANUAL LENS CALIBRATION:
The 85 and 120 FOV presets can be found here:
85 and 120 FOV LB Cam Lens Correction Values
IF YOU DO NOT SEE THE PRESETS FOR THE LENS CALIBRATION, PLEASE SEE THIS:
The 85 and 120 FOV presets can be found here: 85 and 120 FOV LB Cam Lens Correction Values
https://github.com/LightBurnSoftware/Documentation/blob/master/Using_a_Camera.md
https://forum.lightburnsoftware.com/t/lightburn-camera-setup-and-calibration/701/1
And some tips and tricks on the calibration:
The 4K-W95 and the 4K-W110 are both standard lenses and not fisheye.
Here is the actual workflow on a Nova 24 (sorry about the audio):
And a redo on the same machine to dial it in even more:
And everything you wanted to know about the ThunderCAM: ThunderCAMs vs. LightBurn & Other USB Webcams
Is your Windows or Mac Operating System blocking the camera?
For Windows 11:
For Older Mac OS:
Newer Versions of Mac OS:
Windows 7 Drivers:
Still stuck?
No bots, no runaround. Talk to a U.S.-based laser tech who knows your machine inside out.