
Applies to: Nova Plus | You'll need: 1.5 mm Allen wrench, manual focus tool, LightBurn (screenshots from v2.0.5 — other versions may look different), consistent flat material (e.g., MDF)
Before You Begin: Back Up Machine Settings
Take a backup of your current Machine Settings before making any changes.
- In LightBurn, go to Laser Tools > Machine Settings (or Edit > Machine Settings on older versions).
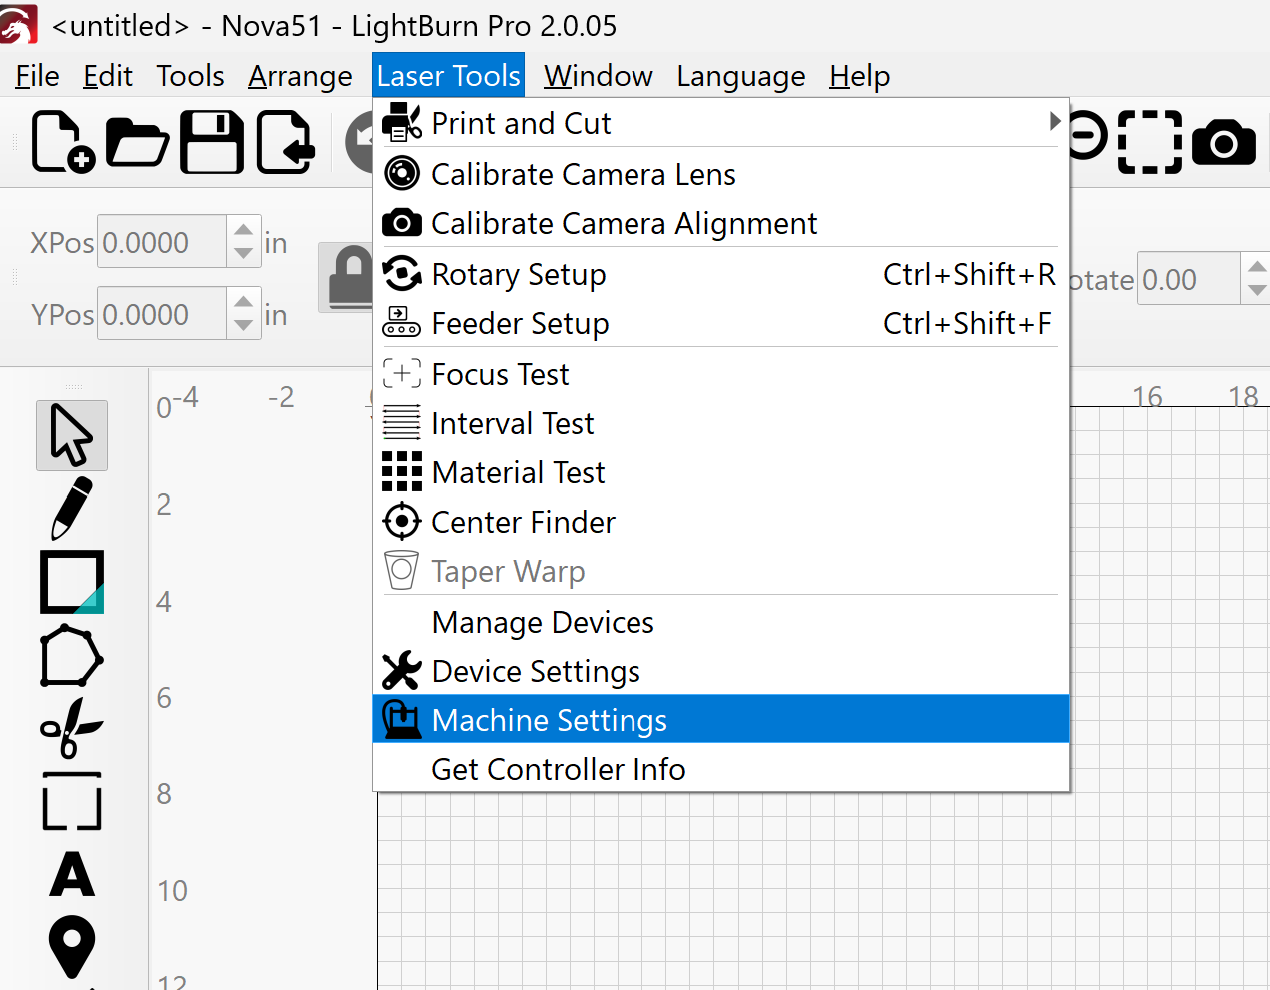
- Click Save to File and save the file to your preferred location. Append _Original to the filename so it is easy to identify later.
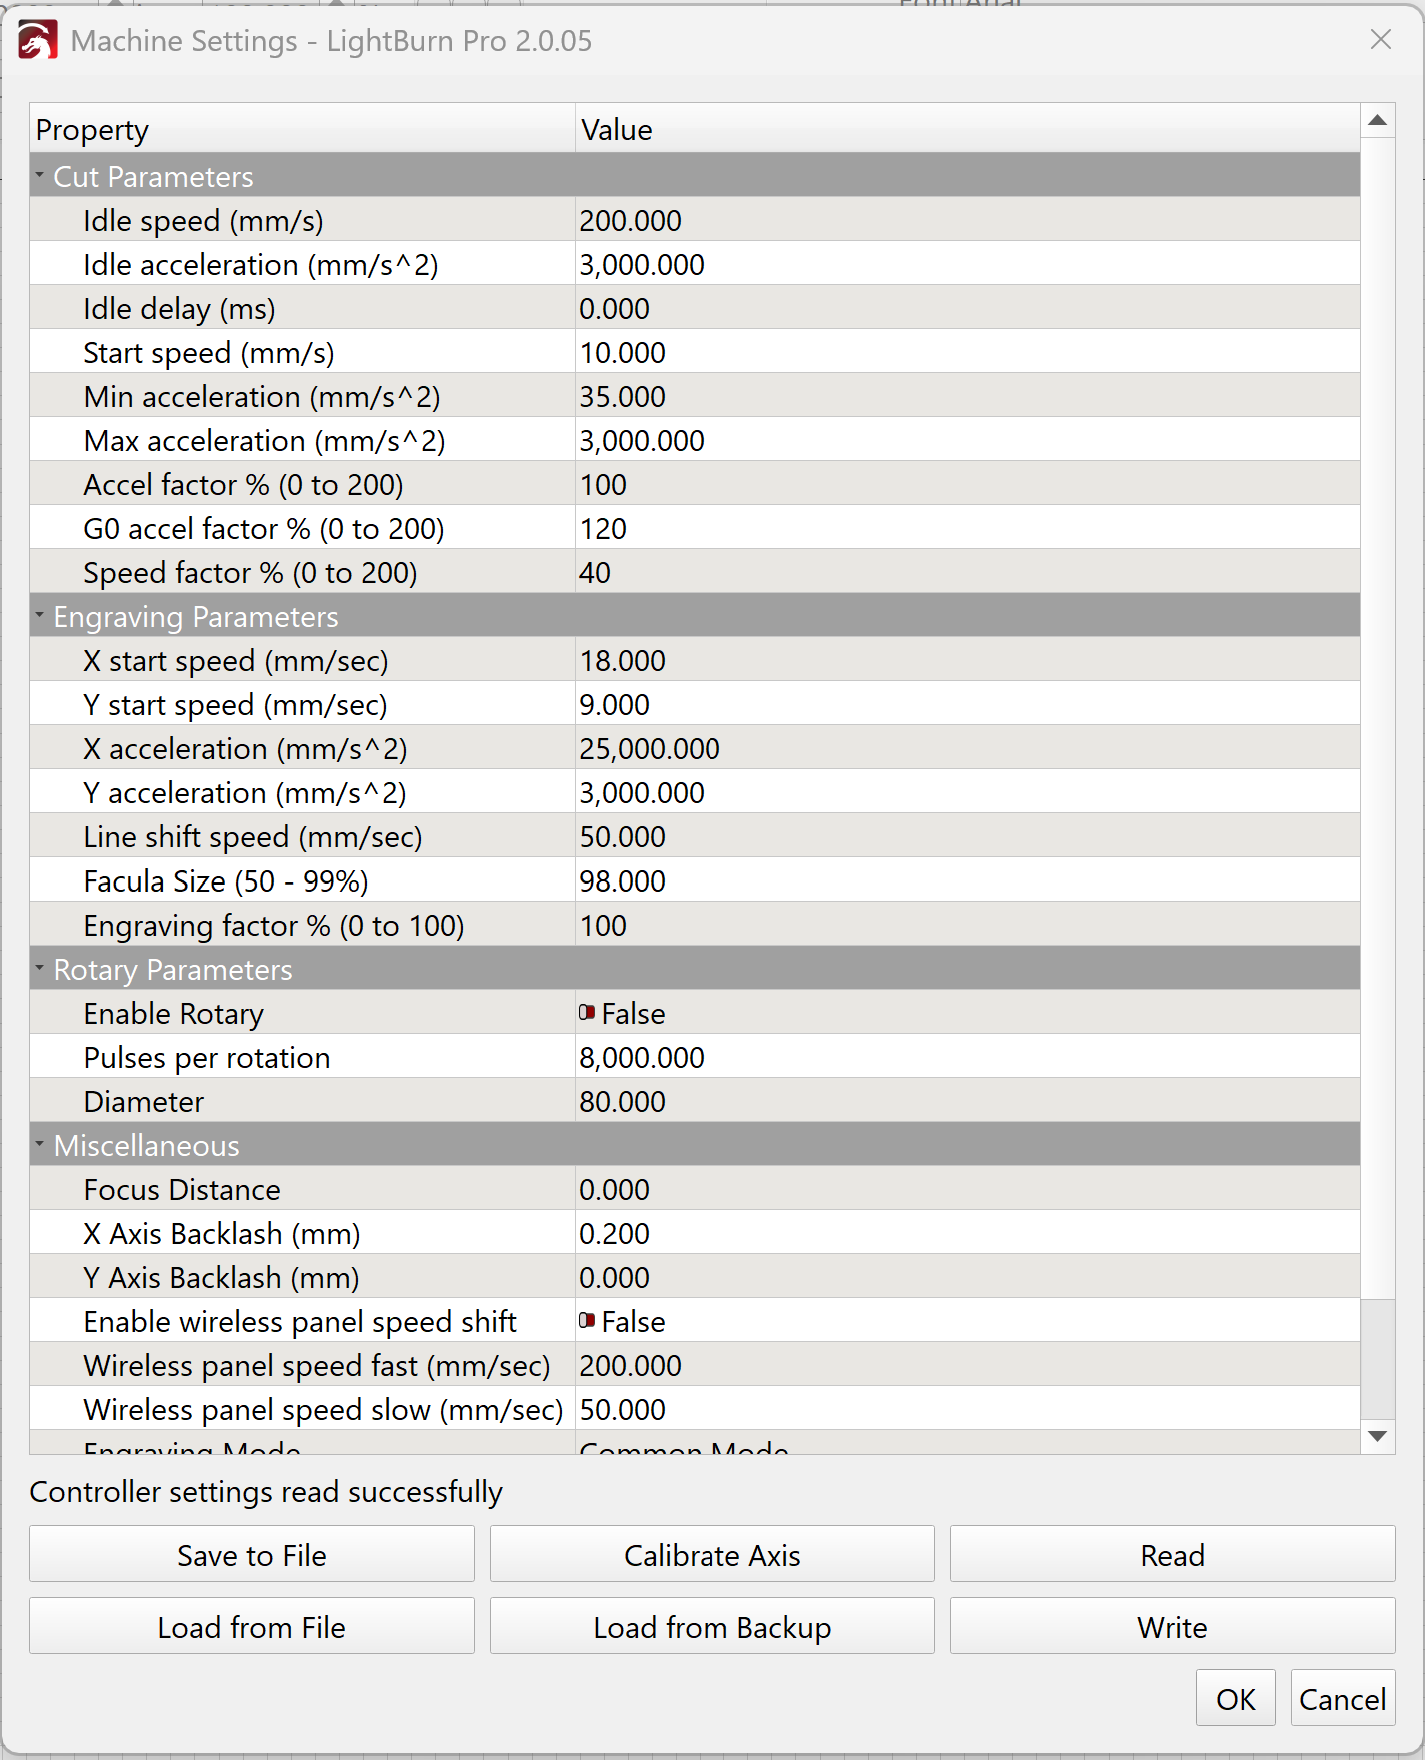
- Do not close the Machine Settings window — you will use it in Step 1.
For more detail on backing up settings, see: Backing Up Machine and LightBurn Settings

Step 1: Reset the Focal Length
In the LightBurn Machine Settings window:
- Scroll down to find Focal Distance. Write down the current value. Set it to 0.00 mm and click Write to send the change to the controller.

- Scroll down to find Home Offset (mm) under the Z axis settings (in the Vendor settings section). Write down the current value. Set it to 3.00 mm and click Write to send the change to the controller.

- Click OK to close Machine Settings.
Step 2: Enable Z Moves in LightBurn
Z moves must be enabled so the honeycomb table position can change during the ramp test.
- In LightBurn, click the Wrench and Screwdriver icon to open Device Settings.
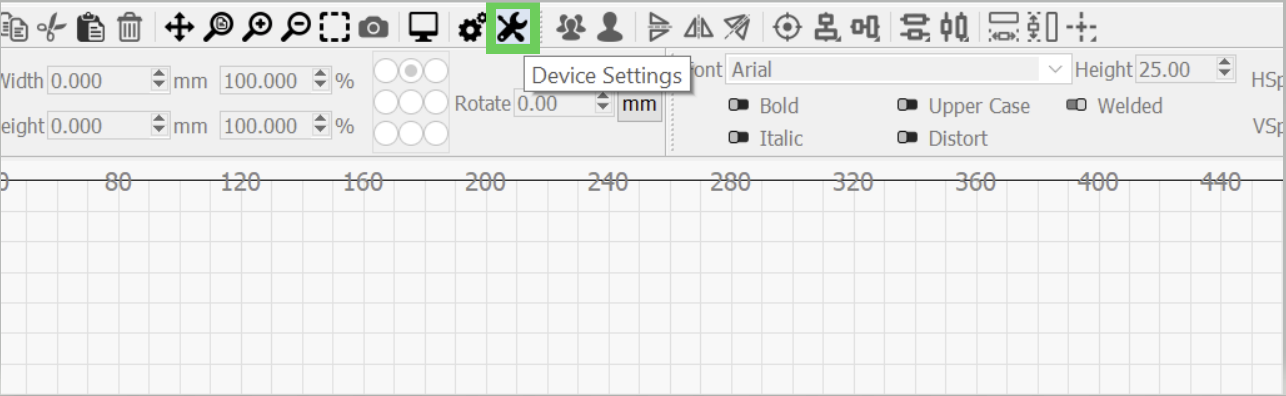
- Under the Z Control section, enable (set to green) all three options:
- Enable Z Axis
- Relative Z moves only
- Optimize Z moves

Step 3: Perform the Coarse Ramp Test
- At the machine, jog the laser head so the red dot pointer is over your test material.


- Set the Origin on the machine control panel.

- Select Auto Focus from the machine menu. The machine will raise the material to the Auto Focus position with the 3.00 mm offset, leaving a small space between the material and the laser head tip.

- Back at your computer, set LightBurn to User Origin with the Top Left radio button selected as the assigned relative location.

- Open the Focus Test tool from the Laser Tools menu in LightBurn.

- Configure the test using the Start Z, End Z, and steps values as shown below. Set your own Speed, Max Power, and Min Power as appropriate for your material.
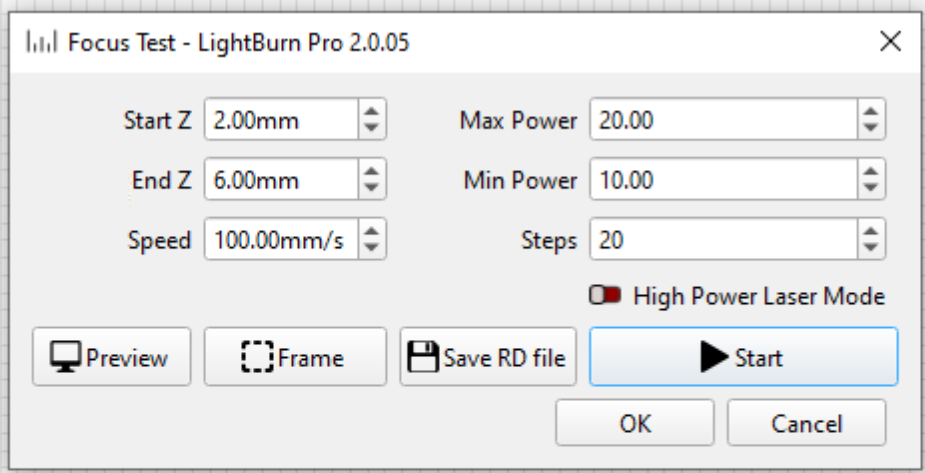
- Preview the test job.

- Frame the Focus Test job from the Focus Tool prompt and verify the frame lands on your material. If it does not, jog the head and set a new origin, or reposition the material. Work near the center of the bed — stay away from the edges of the honeycomb.

- Start the job using the Start button in the LightBurn Focus Tool prompt.

- Observe the results. Identify the finest (sharpest) line. Note that value — it will be used as the center point for the Fine Ramp Test.

Example: The 3.8 and 4.0 readings look similar and best. Use 3.9 mm as the median value for the next test.
Step 4: Perform the Fine Ramp Test
- Using the median value from Step 3 (3.9 mm in this example), configure the Focus Test with a narrower range — for example, 3.4 mm to 4.4 mm with 20 steps.

- Preview the test. Note: LightBurn does not display the 0.05 mm increment between steps — the same number may appear to repeat, but the actual sequence is 3.5 mm, then 3.55 mm, then 3.6 mm, and so on.
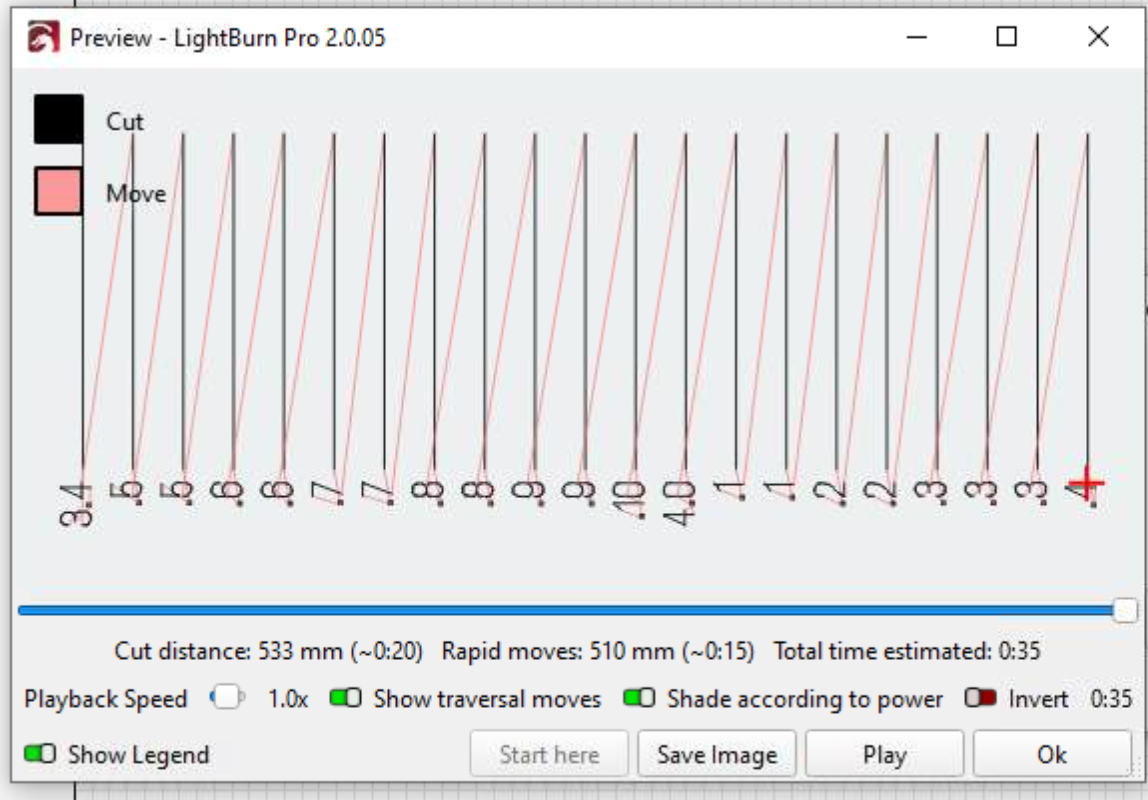
- Run the job and observe the results.

Example: 3.9 mm is the most crisp and will be used as the Focal Distance for the 2.5" lens on this machine.
Step 5: Write the New Focal Distance to the Machine
- In LightBurn, go to Edit > Machine Settings and scroll to Focal Distance (currently 0.00 mm).
- Enter your new value (3.9 mm in this example) and click Write to send it to the laser machine.
- Do not close the Machine Settings screen yet — you will need it in Step 6.

Step 6: Back Up the Updated Machine Settings
- Click Read, then Save to File to save a copy to your computer. Add something to the end of the filename to differentiate it from the original backup you saved earlier.

Step 7: Disable Z Moves in LightBurn
- In LightBurn, click the Wrench and Screwdriver icon to open Device Settings.

- Under the Z Control section, disable (set to red) all three options:
- Enable Z Axis
- Optimize Z moves
- Relative Z Moves Only

Step 8: Calibrate the Manual Focus Tool
- Place your material under the laser head and run Auto Focus.
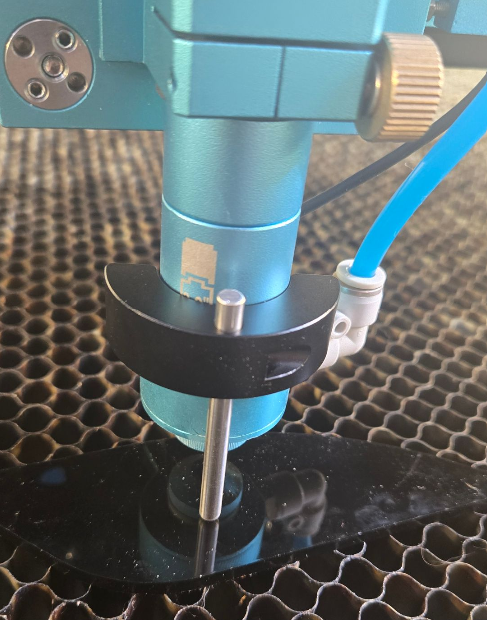
- Place the manual focus tool on the laser head and check the distance to the material surface.

If the tool does not touch the material (or is pressing too hard), it needs adjustment.
- Remove the focus tool from the head. Use the 1.5 mm Allen wrench to loosen the set screw on the manual focus tool shaft.

- Reinstall the manual focus tool. Let the shaft rest on the material surface, then tighten the set screw to lock the shaft in place.
Reference: Focal Distance vs. Home Offset
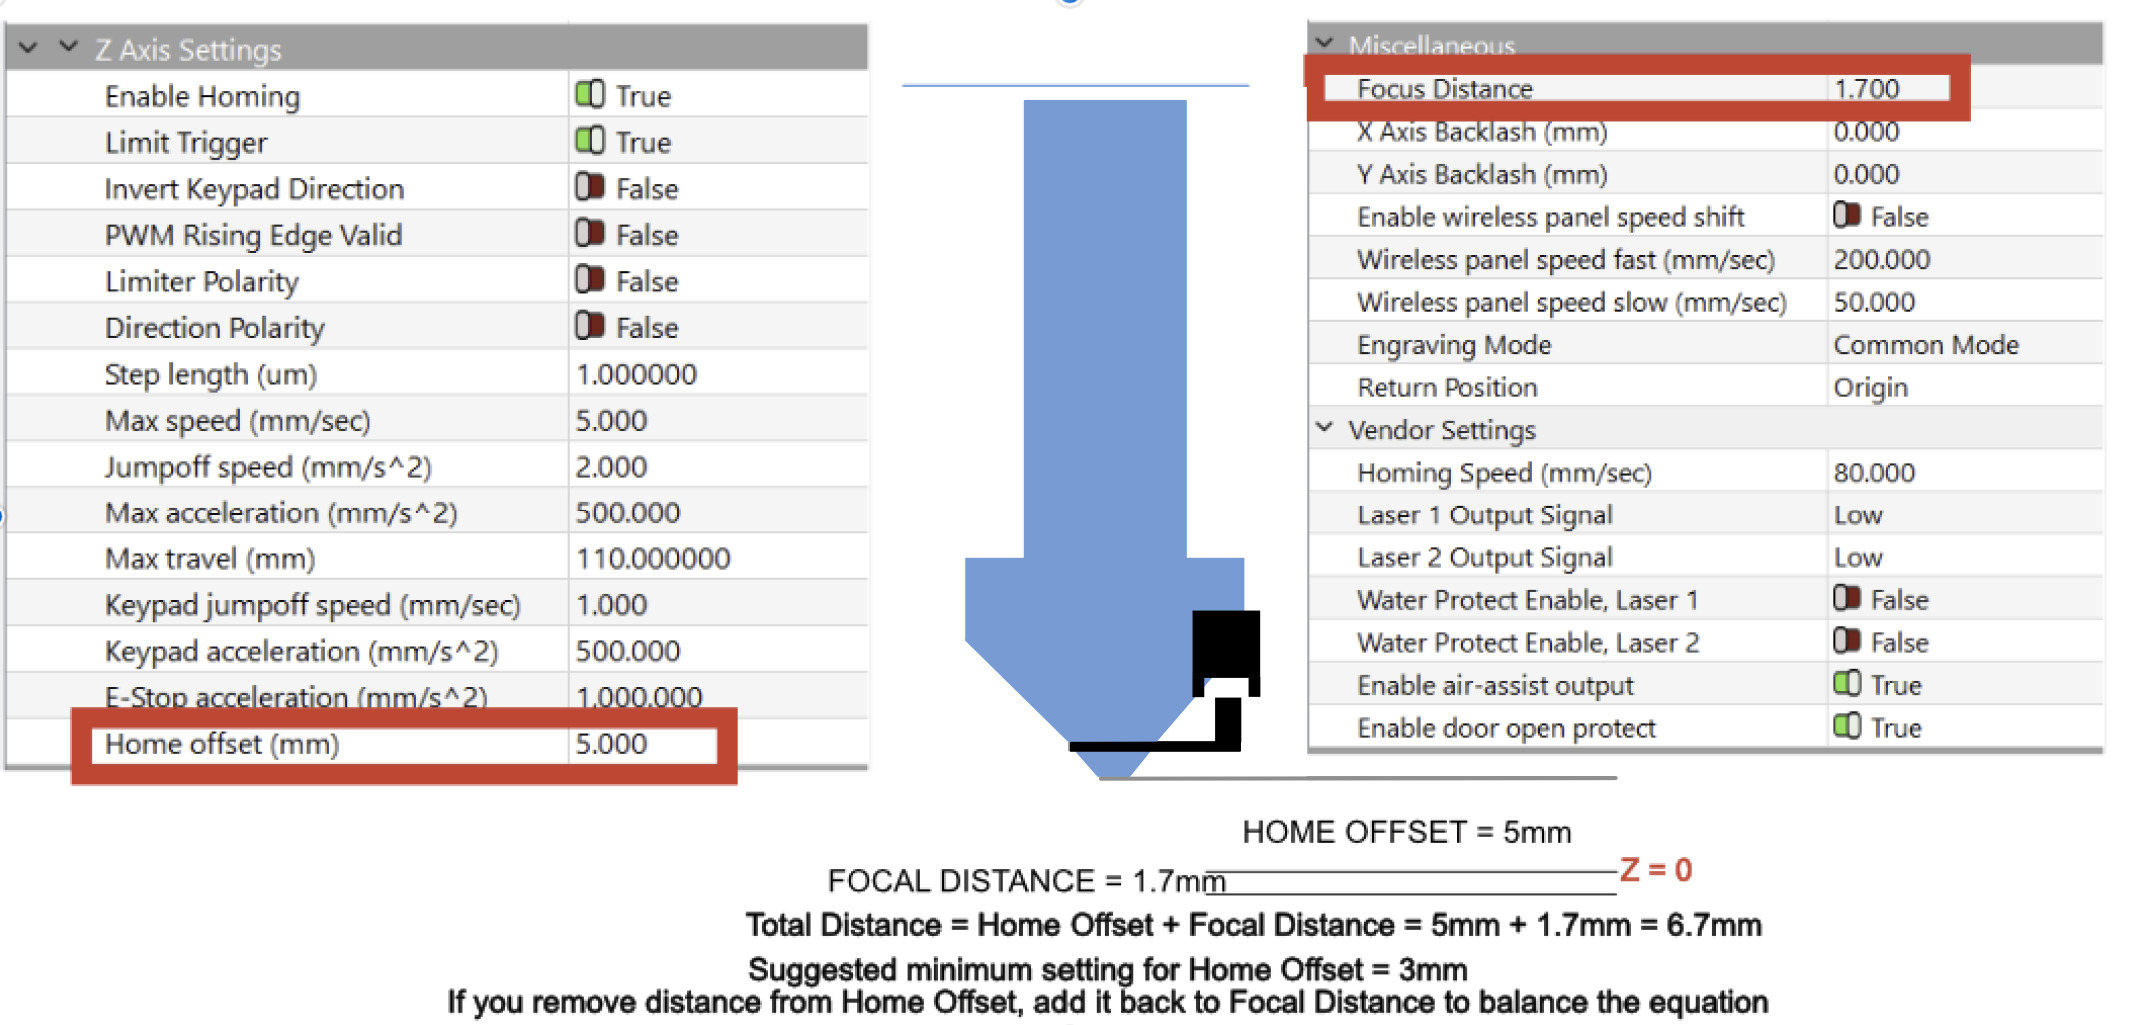
If you find that the correct Focal Distance value would need to be negative, you can adjust the Home Offset value downward and redistribute the adjustment between the two settings. The two settings work together to determine the total distance from the laser head tip. If you remove distance from one, add it to the other — then make your final correction so that Focal Distance is always 0 or greater.
Example: if Home Offset is 5.0 mm and Focal Distance is 1.7 mm (total: 6.7 mm), you could split this as 3.0 mm Home Offset and 3.7 mm Focal Distance. After completing the ramp test, set the new Focal Distance from there.
Still stuck?
No bots, no runaround. Talk to a U.S.-based laser tech who knows your Nova Plus inside out.