
Disconnect the equipment from the main power before performing this repair. Be careful of sharp edges and screw points.
You will need a #2 Philips head screwdriver and something to snip a wire tie or 2, and a few wire ties to replace the ones snipped during the repair.
-
Remove and retain all screws and nylon washers securing the top cover. Then remove the fill port cap and remove the cover.

-
Remove and retain 4 screws and 2 fan guards held by those 4 screws. The fans will still be attached to the back plate.

-
Remove and retain the 4 screws holding in the 2 fans. Both fans need to be detached from the back plate. Also note the mounting direction of the fan, with the label facing out.

-
Carefully flip the chiller to access the underside, while supporting the loose components. Then remove and retain the 2 screws and metal washers securing the back panel to the bottom panel.

-
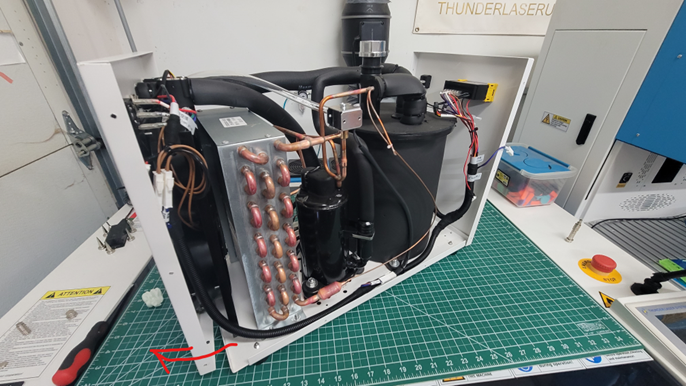
Carefully upright the chiller while supporting the back plate and loose components. Then carefully separate the back plate just a bit to gain better access, paying close attention not to damage, pull, pinch, etc.... any wiring or tubing.
-
Carefully gain access to the 4 screws on the inner side of the fan and remove the screws to release the fan(s). There are 4 screws, 2 securing each fan.

-
Remove the ground strap on the housing of the fan, retaining the screw, etc...

-
Remove the connector(s) on the brown power wires for the affected fan(s). You may have to snip a cable tie or 2 to free the fan power wires. If so, re-securing those wires again after replacement is a good idea.

-
Remove the fan(s) noting their mounting direction (with the label facing out of the back plate). There should be a direction arrow on the fan housing showing direction of airflow. It should point out the back.

-
Install the new fan(s).
-
The rest of the reassembly is the reverse of disassembly.
Still stuck?
No bots, no runaround. Talk to a U.S.-based laser tech who knows your machine inside out.