Laser Engraving Stone: Materials, Contrast & Safety Guide
Why some stones mark white and others grey, which ones crack, how to handle irregular pieces, and the dust hazard that gets overlooked.

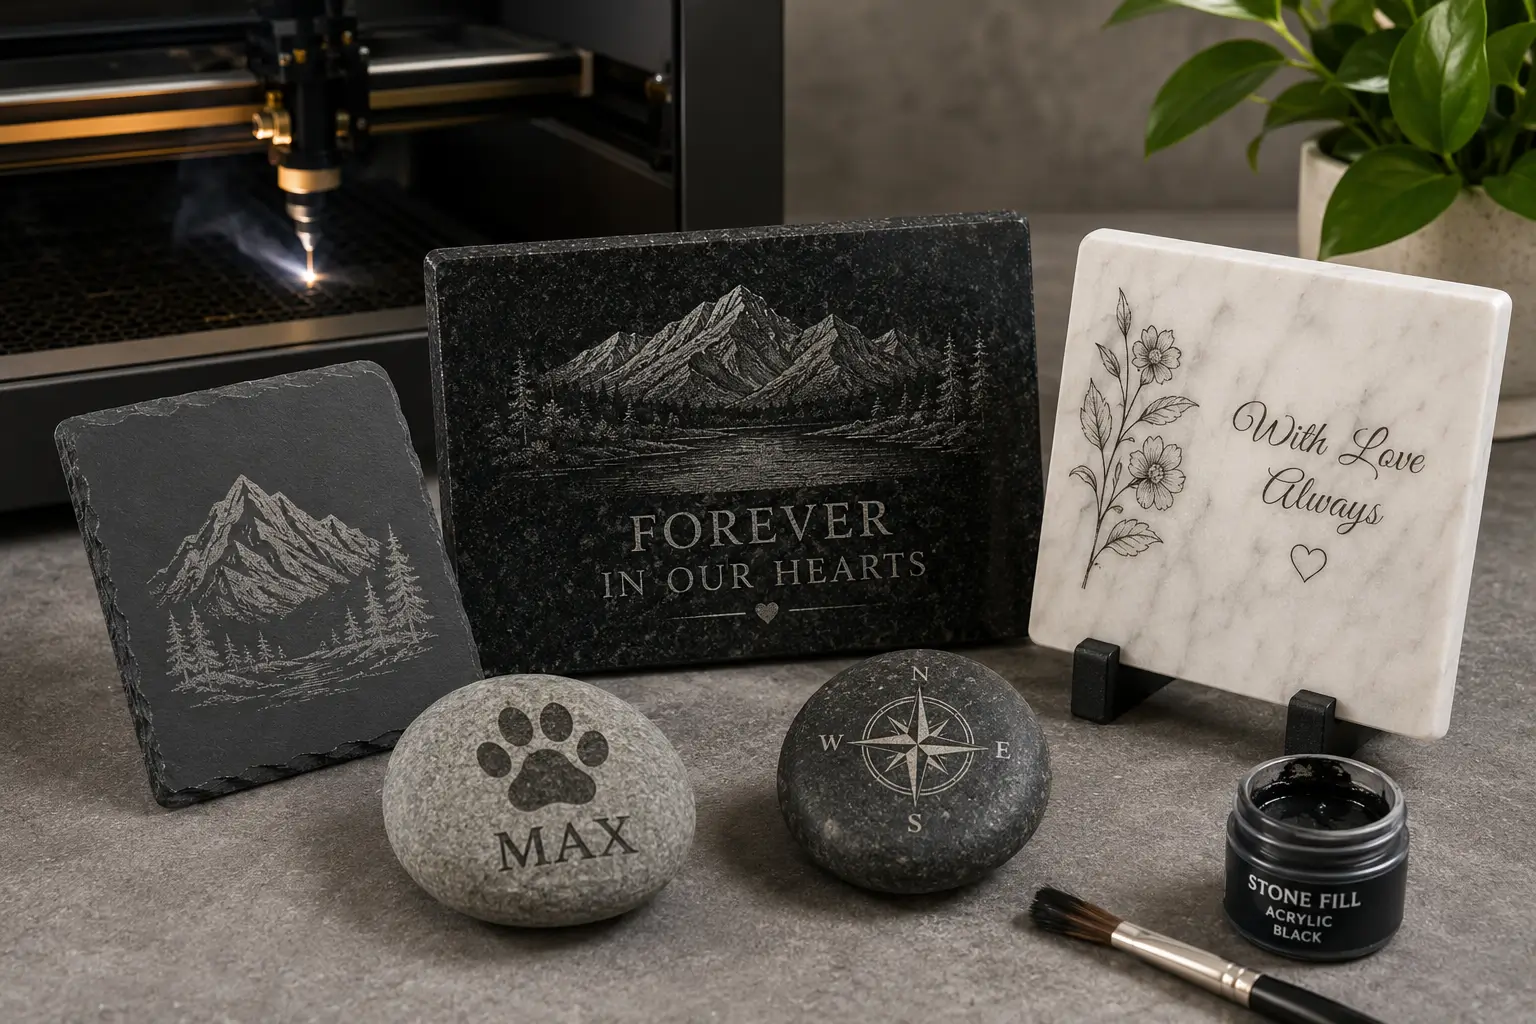
A CO2 laser marks stone by heating the surface until it either changes chemically or micro-fractures, leaving a lighter mark against the darker stone. It cannot cut stone and does not carve deep relief, so laser stone work means surface marking and shallow engraving. Contrast depends on mineral composition: carbonate stones like marble frost white, silicate stones like granite mark grey, and slate reveals a lighter layer beneath. Never engrave damp stone, since trapped moisture flashes to steam and can crack the piece. Stone dust contains crystalline silica, so extraction and a rated mask are not optional.
Key takeaways
- CO2 is the right laser for stone. Both silicate and carbonate minerals absorb 10.6 microns well. Diode works on dark stone with more passes; fiber is a specialist option for dense dark stone.
- Mineral chemistry predicts your contrast. Carbonate stones frost white, silicates micro-fracture to grey, layered stone reveals a paler layer. Knowing which you have tells you the result before you test.
- A laser cannot cut or carve stone. Depth is typically a fraction of a millimetre. Deep relief and sculptural work still belong to sandblasting and hand carving.
- Never engrave damp or freshly sealed stone. Trapped moisture flashes to steam under the beam and can crack or spall the surface, occasionally throwing fragments.
- Stone dust contains crystalline silica. This is a genuine respiratory hazard with long-term exposure. Run proper extraction and wear a rated mask when cleaning finished pieces.
Stone is one of the most satisfying materials to run on a CO2 laser. The mark is permanent in a way few materials manage, the process is contactless so nothing chips under pressure, and a slate coaster or granite plaque carries a perceived value well above its material cost.
It is also the material where expectations most often miss the mark, in both directions. People assume a laser can carve stone, which it cannot. And they assume a stone that looks promising will give good contrast, which depends entirely on what the stone is made of. Both problems are solvable before you cut anything, and that is what this guide is for.
What Laser Stone Engraving Actually Is
The beam heats a very small area of the surface almost instantly. Depending on the mineral, that heat either drives a chemical change, fractures the crystalline structure at a microscopic level, or removes a thin top layer. In every case the result is a lighter, textured area that reads against the surrounding stone.
What it is not is carving. Typical engraved depth on stone is somewhere in the range of a tenth to half a millimetre. You get a mark you can just feel with a fingernail, not a recessed letter you could fill with lead.
A laser cannot cut stone. Stone is too dense and too heat-resistant for a laser to cut through in any practical sense. If a project needs stone cut to shape, that is a wet saw or waterjet job. The laser handles what goes on the surface after the stone is cut.
This matters commercially because of memorial work. Traditional headstone lettering is sandblasted through a rubber stencil, which is how you get deep, weather-durable inscriptions. Lasers are used alongside that process for portraits, fine artwork and photographic detail, which sandblasting cannot achieve. Understanding the division of labour there saves a lot of misdirected effort.
Why Some Stones Mark White and Others Grey
This is the single most useful thing to understand about stone, because it lets you predict a result before you run a test. Contrast comes from what the mineral does under heat, and there are three broad behaviours.
Mineral Type | Example Stones | What Happens | Typical Result |
|---|---|---|---|
Carbonate | Marble, limestone, travertine | Calcium carbonate decomposes to calcium oxide, leaving a porous, light-scattering surface | Frosted white or pale, high contrast on dark stone |
Silicate | Granite, basalt, quartzite | The crystalline structure micro-fractures rather than changing chemically | Lighter grey; good on dark granite, weak on light |
Layered | Slate | The top mineral layer is removed, exposing a different-coloured layer beneath | Reliable, consistent contrast with little effort |
The practical consequence follows directly. A dark stone with a strong colour change gives you contrast for free. A pale carbonate stone frosts white on a background that is already near white, so the mark barely registers. A light silicate granite micro-fractures to grey against grey, which is worse still.
If a stone is both light-coloured and silicate-heavy, do not expect it to work without a finishing step. That is not a settings problem and no amount of power will fix it. It is a materials problem, and the answer is a colour fill.
Stone-by-Stone Reference
Stone | Behaviour | Contrast | Notes |
|---|---|---|---|
Slate | Layered | Excellent | The most forgiving stone. Reliable results with minimal tuning. Natural slate varies in thickness and flatness |
Dark granite | Silicate | Very good | The memorial standard. Fine grain holds detail well |
Light granite | Silicate | Poor to fair | Grey on grey. Usually needs paint fill to read |
Dark marble | Carbonate | Excellent | White frosting against dark stone. Use conservative power, marble cracks more readily than granite |
Light marble | Carbonate | Poor | White on white. Colour fill essentially mandatory |
Basalt | Silicate | Good | Dense and even. Popular for whiskey stones and small decorative pieces |
River rock / pebbles | Varies | Unpredictable | Mineral content varies piece to piece. Test each batch; irregular shape needs fixturing |
Soapstone | Soft | Fair | Very soft, easy to over-engrave. Scratches easily after marking |
Travertine | Carbonate | Fair | Natural pitting interrupts fine detail. Bolder designs work better |
Sandstone | Silicate, porous | Weak | Porous surface absorbs residue and gives low natural contrast |
Limestone | Carbonate | Fair | Soft, weathered look. Suits rustic signage |
Coated stone blanks | Coating | Excellent | You are removing a coating, not marking stone. Predictable and high contrast |
Coated blanks deserve a note. Pre-coated or painted stone products behave completely differently from raw stone, because the laser is clearing a surface layer rather than altering minerals. Results are more consistent and contrast is stronger, which is why they are a sensible starting point for anyone new to the material. They are also the reason some lower-powered machines appear to handle stone better than they really do.
Granite is the entry worth expanding on, since the dark and light varieties behave almost like two different materials. Our full guide to laser engraving granite covers the settings, workflow and commercial side in detail.
Stones to Avoid, or Test Very Carefully
Damp or freshly sealed stone. The most important entry on this list. Moisture inside the surface flashes to steam under the beam, and the pressure has nowhere to go. The stone can crack, spall, or throw fragments hard enough to damage the lens. Allow stone to dry fully after cleaning, ideally a day or more, before it goes near the machine.
High-quartz rock. Quartz-heavy stone tends to fracture along internal crystal lines rather than marking cleanly. Cracks can propagate well beyond the engraved area. Test a low-power pass in a corner and watch for hairline movement before committing.
Anything with visible veining or internal fractures. Thermal stress finds existing weaknesses. Even granite will split along a hairline crack you did not notice.
Concrete and brick. Markable, but the rough inconsistent texture limits you to shallow etching. Expect a logo that reads up close rather than crisp text.
Very porous stone. Sandstone and similar absorb smoke residue into the surface, which can stain around the design and is difficult to clean off afterwards.
The Dust Hazard Nobody Mentions Enough
Stone dust contains crystalline silica. Granite, sandstone, slate and quartzite all contain crystalline silica, and lasering them produces extremely fine airborne particulate. Repeated unprotected exposure is associated with serious, irreversible lung disease. This is a recognised occupational hazard in stone trades, not a theoretical concern, and the particle size a laser produces is exactly the fraction that reaches deepest into the lungs.
None of this makes stone unsafe to run. It makes dust control a requirement rather than an upgrade, and the same principles apply across every material — see our guide to laser engraver safety for the wider picture.
Run real extraction, not a fan. Stone generates more fine particulate than almost any other laser material. A proper extraction system pulling from the enclosure is the baseline.
Wear a rated mask when handling finished pieces. An N95 or better when wiping down parts and cleaning the machine, which is when settled dust gets airborne again.
Wet-wipe rather than blowing out the machine. Compressed air re-suspends everything you were trying to remove. A damp cloth captures it.
Clean the machine more often than you would for wood. Stone dust is abrasive and gets into rails, bearings and optics. It shortens component life if it is left to accumulate.
Extraction serves the machine as much as the operator here, since settled dust on the focus lens degrades cut quality and eventually damages optics. The Thunder Air fume extraction system is built for this kind of high-particulate work.
Which Laser Works on Stone
Laser | On Stone | Notes |
|---|---|---|
CO2 | Excellent | 10.6 microns is absorbed well by both silicate and carbonate minerals. The standard choice, and the only one worth buying specifically for stone |
Diode | Workable on dark stone | Lower power and needs multiple passes. Struggles on light or reflective stone. Fine for coated blanks |
Fiber | Specialist | Works on dense dark stone, particularly with galvo or MOPA configurations, but the beam is optimised for reflective metal rather than porous mineral |
For stone, CO2 is not just the best option, it is the obvious one. The absorption is efficient across the mineral types you will actually encounter, and the power range that suits stone sits comfortably in normal CO2 territory. If stone is a significant part of your work, buy the CO2 and do not overthink it.
On power: very low wattage struggles with dense hard stone and forces slow multi-pass work. Mid-range CO2 handles the great majority of desktop stone projects comfortably. Higher power buys speed for production volume rather than fundamentally different results, because you are marking a surface rather than removing bulk.
Setting Up the Job
Flat Stone
Slate tiles, cut granite blanks and stone coasters are the easy case. Clean the surface, set focus, position the design and run. The main thing to watch is that natural stone is rarely perfectly flat, and a slab that rocks slightly will drift out of focus across the engraving.
Irregular Stone and River Rocks
Curved and uneven pieces are where most people struggle, and there are two techniques that solve most of it.
Defocus deliberately. Set the focal point slightly above the highest point of the stone rather than on the surface. Two to four millimetres is a common starting point. This spreads the usable focal range across the height variation instead of having it sharp in one spot and soft everywhere else. You trade a little crispness for consistency across the whole design.
Bed the stone in modelling clay. Press the piece into a small mound of clay so the engraving face sits level and stable. Clay conforms to any shape, holds the stone firmly, and lets you adjust the angle until the face is square to the beam. Double-sided tape or clamps work too, but clay handles irregular geometry better than either.
Whichever method you use, the stone must not move. A shift of half a millimetre mid-job blurs the whole design, and on stone you generally cannot re-run over the top to fix it.
Surface Preparation
Clean the stone before engraving. Dust, grit and handling residue interfere with the mark and can leave patchy contrast. A microfibre cloth or soft brush handles most of it; isopropyl alcohol for anything greasy. Then make sure it is completely dry before it goes in the machine.
Parameters That Matter
Specific numbers vary too much by machine, wattage, lens and stone batch to publish usefully. What is worth understanding is which control does what on this particular material.
Power and speed together set contrast. On stone you are usually chasing a visible mark rather than depth, so the target is enough energy to alter the surface without chipping it. Excess power causes flaking and chipping, especially on layered stone like slate.
Multiple light passes beat one heavy pass. This holds on almost every stone. It builds contrast progressively and reduces the thermal shock that causes cracking on marble and brittle stone.
Air assist matters more here than elsewhere. Stone produces heavy fine particulate that settles straight back onto the surface and hazes the mark. Air assist clears it in real time and keeps edges crisp.
Resolution suits the stone, not the artwork. Fine detail is wasted on a textured or pitted surface. Bolder line weights and larger type read far better on travertine or sandstone than delicate line art does.
Focus tolerance is tight. A millimetre of focal error on stone is the difference between a crisp mark and a muddy one. On uneven pieces, use the defocus technique above rather than hoping.
Run a test grid on the actual stone you will use. Natural stone varies between batches from the same supplier, and slate in particular differs in density and layer structure from one pallet to the next.
Finishing: Making Low-Contrast Stone Work
Weak contrast is not a failed job. Stonemasons have been filling engraved letters for centuries, and it is a normal part of the process rather than a rescue operation.
Colour fill. Brush acrylic paint into the engraved area, let it dry, then wipe the excess from the surrounding surface. This is what makes text and fine lines read on light marble and pale granite, and it is standard practice on awards and plaques.
Mask before engraving. Apply painter's tape over the surface first. The laser cuts through the tape and into the stone, then you spray paint the exposed areas and peel the tape away. Crisp coloured detail with no overspray on the surrounding stone.
Mineral oil on slate. Wiping slate with mineral oil darkens the background and makes the lighter engraved area stand out sharply. No paint, and it is reversible if you dislike the result.
Sealant for outdoor pieces. Garden markers, memorial stones and address plaques benefit from a stone sealant once any colour fill has cured, protecting against weather, UV and moss.
Judge a piece after finishing, not straight off the machine. A marble plaque that looks nearly blank can become genuinely striking after five minutes with a brush and dark acrylic.
Troubleshooting
Problem | Likely Cause | Fix |
|---|---|---|
Stone cracked or popped during the job | Trapped moisture, or an existing internal fracture | Dry stone fully before engraving; inspect for veining and hairline cracks first |
Almost no contrast | Light-coloured carbonate or silicate stone | Not a settings issue. Use colour fill or the masking technique |
Chipping or flaking around the design | Power too high for a brittle or layered stone | Reduce power and add a second lighter pass instead |
Blurry or fuzzy edges | Stone moved, or focus off across an uneven surface | Bed the stone in clay; use the defocus technique on irregular pieces |
Patchy, uneven contrast | Dirty surface or inconsistent stone density | Clean thoroughly; test each batch of natural stone separately |
Hazy mark, smoke staining | Insufficient air assist or extraction | Increase air assist; clean the surface immediately after engraving |
Design vanishes at a distance | Line weight too fine for a textured stone | Increase font size and line thickness for pitted or porous surfaces |
Mark looks good indoors, poor outdoors | Contrast reads differently in daylight | Check finished pieces in natural light; consider colour fill |
What People Make
Memorial and Remembrance
Pet memorials, garden remembrance stones and memorial plaques are consistently the strongest commercial category. Granite and slate both weather well outdoors. Note the division of labour on full headstones: the deep inscription is sandblasted, while the laser handles portraits and fine artwork.
Coasters, Gifts and Personalisation
Slate coasters are the entry product for most people running stone, and for good reason. Slate is forgiving, cheap, gives reliable contrast, and the finished item sells well. River rocks, decorative tiles and engraved pebbles fall in the same category.
Signage and Architectural
House numbers, address plaques, corporate signage, wayfinding and donor recognition walls. Stone signage carries a permanence that printed or acrylic signage does not, and it holds up outdoors for decades.
Awards and Corporate
Marble and granite awards, recognition plaques and branded desk pieces. Usually finished with a colour fill so the engraving reads cleanly across a room.
Photo Engraving
Dark granite and dark marble take photographic detail well, since the tonal range of the frosting or micro-fracturing maps reasonably to greyscale. This is where laser genuinely outperforms every other stone marking method, and it commands the highest prices.
Getting Good Results
Stone rewards knowing what you are working with. Identify whether the stone is carbonate, silicate or layered and you can predict the contrast before you burn a test piece. Check it is dry and free of veining and you avoid most cracked pieces. Run extraction and wear a mask and you avoid the one genuine health issue in the process.
Start with slate. It is cheap, forgiving and gives reliable contrast, which lets you learn focus, fixturing and pass strategy without fighting the material at the same time. Once that is comfortable, dark granite and dark marble open up the higher-value work. If you are choosing equipment, our CO2 laser range covers the options, and our guide to laser cut foam covers another material where extraction matters as much as the machine.
Frequently asked questions
Can a laser cut through stone?
No. Stone is too dense and too heat-resistant for laser cutting to be practical. Lasers mark and shallowly engrave the surface. Cutting stone to shape requires a wet saw or waterjet.
What is the best laser for engraving stone?
A CO2 laser. At 10.6 microns the wavelength is absorbed efficiently by both silicate and carbonate minerals, which covers essentially every stone you will encounter. Diode lasers work on dark stone with more passes; fiber is a specialist option rather than a general choice.
Which stone is easiest to laser engrave?
Slate, by a clear margin. Its layered structure means the laser removes the top layer to reveal a paler one underneath, which gives consistent high contrast without much tuning. It is also inexpensive, which makes it the sensible material to learn on.
Why does my marble engraving look almost invisible?
Because light marble frosts white, and white on white does not read. This is a materials limitation rather than a settings problem. Use a colour fill or mask the surface with tape before engraving and spray paint the exposed areas.
Can you laser engrave river rocks?
Yes, though results vary because mineral content differs from stone to stone. Test each batch. The bigger practical challenge is the irregular shape: bed the stone in modelling clay and defocus slightly above the highest point so the beam stays usable across the curve.
Why did my stone crack during engraving?
Most commonly trapped moisture. Damp or recently cleaned stone flashes to steam under the beam and the pressure cracks the surface. The other cause is an existing internal fracture propagating under thermal stress. Dry stone thoroughly and inspect for veining before running.
Is laser engraving stone dangerous?
The main hazard is dust. Stone contains crystalline silica, and repeated unprotected exposure to the fine particulate is associated with serious lung disease. With proper extraction, a rated mask when handling pieces, and sensible cleaning habits, it is entirely manageable.
How deep does laser engraving go into stone?
Typically a fraction of a millimetre, roughly a tenth to half. Enough to feel with a fingernail. Deep relief and sculptural carving need sandblasting or hand tools.