
How to Clean and Lubricate the Z Honeycomb Bed Screws on a Thunder Laser Bolt Series machine
Preface: This article covers how to clean and lubricate the Z Screws on the Bolt series laser machines. The article was written based on the desktop bolt version of the machine.
Quickstart Video
Complete Guide
Tools and Supplies Needed
| Tool and Supply | Reference Picture |
|---|---|
|
 |
The Procedure
Basic procedure is to gain access to the screws by removing the cover plates, then cleaning the screws, re-lubricating them and assembling the machine back to be ready for service. The steps are covered below.
In order to gain access to the screws we need to remove the Honeycomb and the Crumb Tray:
This would also be a good time to clean the Honeycomb and Crumb Tray
To remove the honeycomb, lower it down below the rotary port. Open the front blue door. Lift the tray out of the frame and pull out the Honeycomb.
| Honeycomb Before | Honeycomb Removed |
|---|---|
 |
 |
To remove the Crumb tray, open the front blue door. Slid the tray out until the stops are engaged and then lift the tray up and pull out the rest of the way.

| Crumb Tray Before | Crumb Tray After |
|---|---|
 |
 |
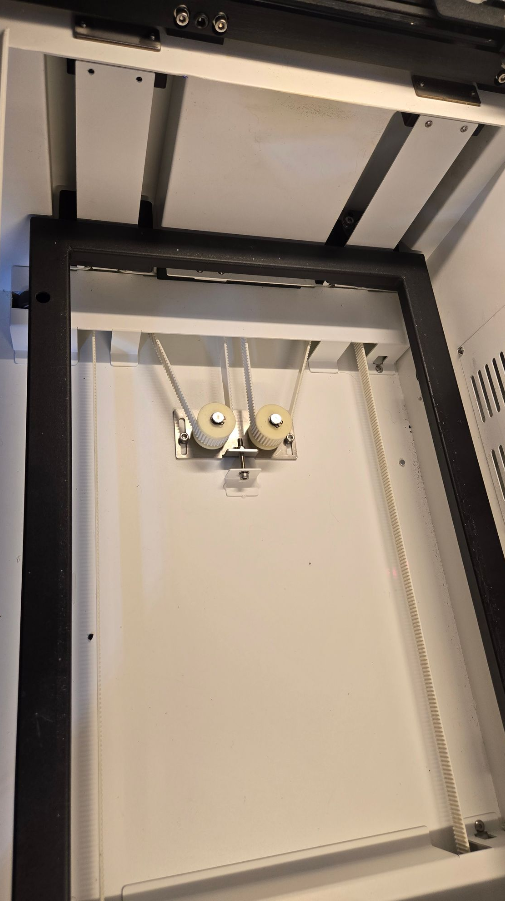
Then we need to remove the protective plates for all 4 screws:
Upper Bolt Location - Remove these 8 bolts completely with the 2mm Allen wrench
| Left Side | Right Side |
|---|---|
 |
 |
Lower Bolt Locations - Just loosen the bolt with the 2mm Allen Wrench, do not remove the bolt completely. The plates are designed to slide into these bolts.
| Left side | Right Side |
|---|---|
 |
 |
| Lower Z Bed to Bottom | Remove the 4 Plates |
|---|---|
 |
 |
Then use the brush, compressed air or towel to remove excess dirt and debris from the screws:
Note that with the debris being stuck on with oil, it will likely require the brush/towel to remove. You may need to raise and lower the bed slightly to expose the opposite side of the screws

Then re-oil the screws:
| Lightly re-oil the screws | Run the bed frame up and down to help distribute the oil |
|---|---|
 |
 |
Then Reinstall the Cover Plates, Crumb Tray and Honeycomb
Make sure the honeycomb is seated properly, it has pins on the front lip.
| Not installed or seated correctly | Installed and seated on pins correctly |
|---|---|
 |
 |
All complete, lets get back to lasering.
Reference Articles
Still stuck?
Fastest response times in the industry from our US-based support team.