
Preface: This article is basically a copy paste of the attached PDF that covers how to replace the Z axis belt on your Nova series laser. It is currently a work in progress.
This work should be performed with the machine powered off and unplugged. Perform this work at your own risk.
Before you start to do this, please keep all screws or parts after you remove them. This is a fairly lengthy install process, so allot the proper amount of time to get it done.
Tools You Will Need
- 12mm Gauge Block
- Metric Allen Wrench Set - 3mm and 4mm
- Calipers
- Snap Ring Removal Tool (Was included in toolbox)
- Sharpie
- Camera
- Knife/Heavy Duty Scissors
Prework
- Remove front Lower Machine Door
- Remove the honeycomb Bed and Knives
- Remove the Crumb Tray(s) (Good time to dump and clean)
- Remove the Belt Covers (If applicable)
- Mark the position of the tensioners and screw rod mounting brackets with the Sharpie
- Take pictures of the belt routing with your camera
Belt Removal
Since the belt is in need of replacement, the easiest removal method would be to cut the belt and remove it. This will eliminate the belt tension on the tensioner pulleys and ease the removal of the tension blocks in preparation of the belt replacement.
With the belt removed:
-
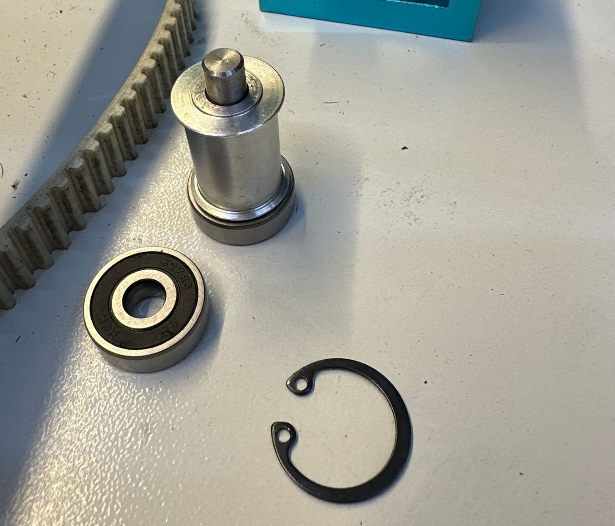
Remove 3 tensioners and then use the snap ring pliers to remove the snap ring to release the bearing and pulley from the tensioner bracket.
Left Side Tensioners Right Side Tensioner 
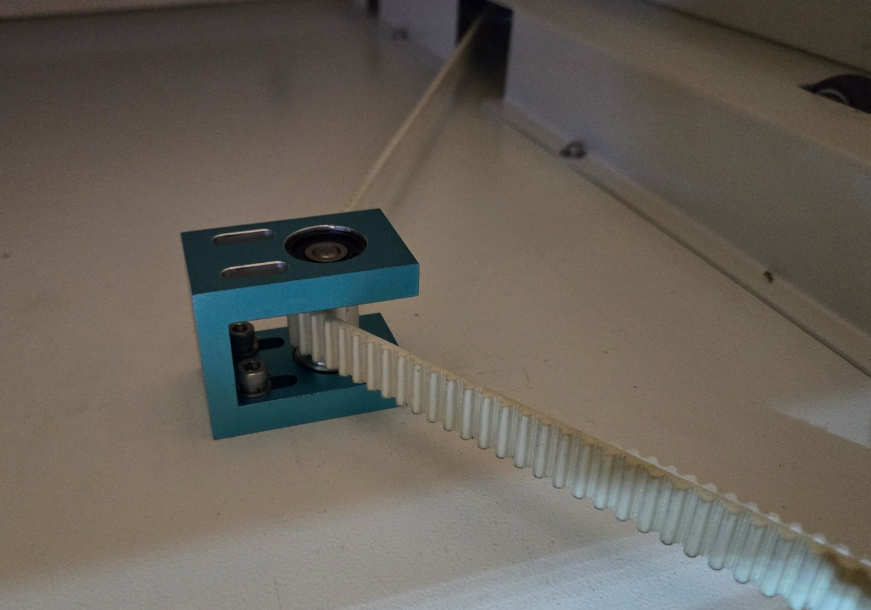
Tensioner Block Assembly Snap Ring and Bearing Removed Components removed from Tensioner Bracket 

Example video of using snap ring pliers with snap rings.
- Remove the Knife Support Bar from the front and rear Screw Rods.
- Unbolt the 4 screw rod plates (upper and lower mounting brackets).
- Loosen the bolts for the Z Bed Honeycomb Motor.
Installation
- Remove 4 Screw Rods from Machine.
- Place belt in the machine and spread it out.
- Place 4 Screw Rods back into machine with the belt on the outside of the pulleys. Screw into place but not tight.
- Install tensioners back onto belt, re-insert the Snap Ring to hold the tensioner pulley in each tension block. Pay attention to the orientation of the belt and that the tensioner contacts the smooth side of the belt.
-
Thread the new belt around the Z motor. Tighten the Z motor down to the base.

-
Reinstall the screw rod mounting bases (do not fully tighten the bolts). Find a piece of wood or aluminum block, the thickness should be 12mm. Then put the aluminum block to the inside of the bar. See below pictures.


Note: All 4 screw rods must be calibrated with this aluminum block.
-
Tighten the bolts for the four screw rods. For the two screw rods at the front side, when you tighten the blue mounting blocks, be sure to measure the distance between the block and machine housing as shown.
The distance of the bottom side is 111mm.

The distance of the up side is 105mm.
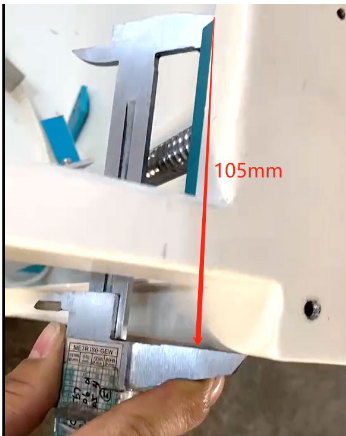
Note: 0.5–2mm error is acceptable.
-
Put the belt inside the three blue tension bases and reinstall the tensioner pulleys. Then tighten the one on the right. You do not have to make the belt super snug; we will be adjusting the Z bed later on and will need to remove tension to do so.

-
Rotate the gear of the screw rod to raise up the silver holder; the other corners also need to be raised up.

- Put the knife holder on and tighten it slightly. Make sure it's level and then tighten it.
-
Find a cube (the cube shown is 45mm), and put it to the four corners to measure that the distance between the knife holder is the same at each corner. If the distance at any corner is different, rotate the gear of the screw rod to adjust. Move the laser head to each of the four corners and repeat these steps until the distance is the same.
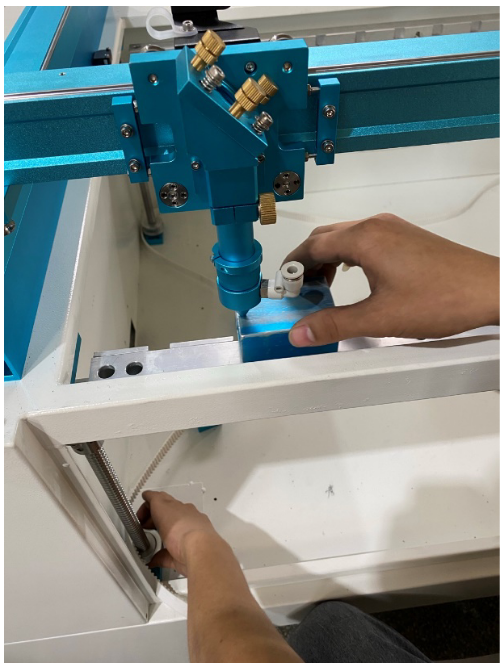
- Put two knives on the knife holder, one on the left side, the other on the right side. Make sure there is a little space between the knife and the knife holder (about 2–3mm).
- Tighten the screws of the knife holder.
- Tighten the blue tensioner on the right side and one of the two blue tensioners on the left side slightly.
- Pull the belt from the right side to the left side, then fix the last blue tensioner. Please note: do not rotate the gear of the screw rods during this process. If the gear is rotated, you will need to adjust bed level again.
- Tighten all blue tensioners and check the tension of the belt. It should be snug but not banjo tight.
Still stuck?
No bots, no runaround. Talk to a U.S.-based laser tech who knows your Nova inside out.