
Preface: This article covers the basics of preparing your Nova Series machine for Pass Through Print and Cut. Print and Cut is a software feature that controls the Laser Machine using absolute coordinates. The machine is oblivious to the print and cut.
Currently this article is a WIP and a collection of data.
Quick Start Video
*coming soon*
Complete Guide
What is Print and Cut
Print and Cut is a software feature that can be used in conjunction with the Pass Through. Print and Cut allows the use of physical marks or points on your material to be used to line up additional cut lines. Print and Cut heavily relies on the machine operator and having a fine tuned machine in order to be successful.
There are two main reasons to use Print and Cut. One reason is when you are trying to cut or engrave an object that is larger than your machines working area. The other reason is for when you are combining technologies, say a Dye Sublimation print on Unisub or a UV print on wood etc. Both reasons require you to align an existing object up for additional laser work.
What is the Pass Through used for
The pass through allows for oversized objects to fit in the machine. Your Thunder Nova has a front removable door and a rear removable slot. The clearance is around .8" depending on the model. The pass through will allow the material to hang outside the machine and be indexed through as you perform your print and cut setups. Be sure to not run into the protruding material, especially while it is being processed. You do not have to use the pass through to use Print and Cut, and you do not have to use Print and Cut to use the pass through. Each scenario will be different and may require different approaches.
Pitfalls to be aware of
- Red dot alignment to the Pulse Spot
- How thick of material your pass through can accommodate. Thunder Nova Series can focus a 2" head to material that is .8" thick (Focus Ring removed)
- How accurate you set the markers
- Proper File Setup
- Using properly scaled vectors for printed artwork
- Combining the output of two CNC machines - Both should be calibrated to the same standard. Meaning if you print a 4" square on your UV printer, it is the same size if you lasered a 4" square.
- Lightburn only uses 2 points for lining up the project. This does not catch skew and it can be masked as scaling.
Prepare the Machine for Pass Through
1. Identify and Remove the Pass Through Panels
If you are using the pass through for the print and cut, you will need to remove the panels, set the proper Honeycomb position and Focus the laser head manually. If you are only using Print and Cut to line up a job that fits on your honeycomb, then you can skip these steps.
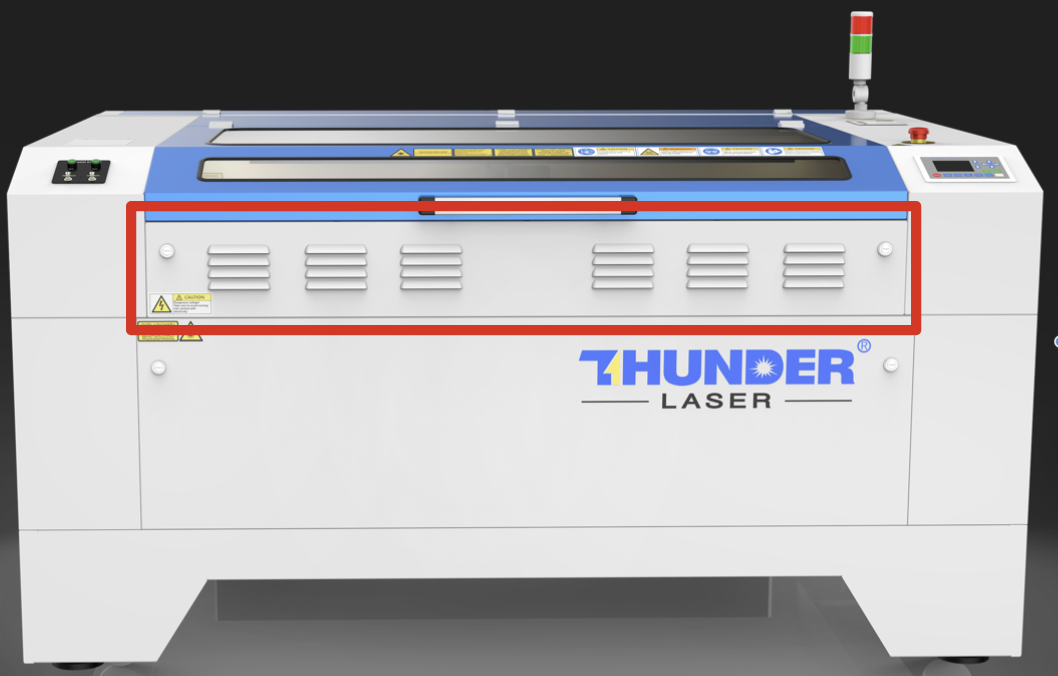
Front:
| Locate the Front Pass Through on your machine |
|---|
 |
Front Panel Removal:
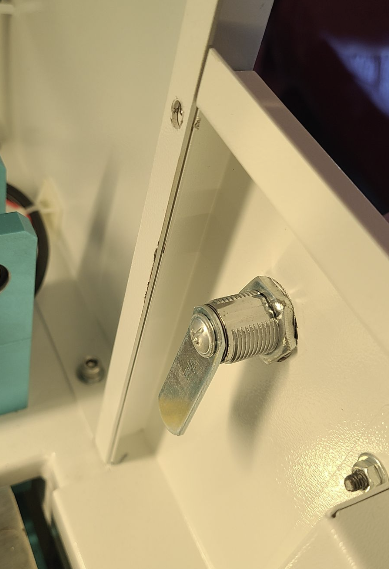
| Remove the two bolts on either side with a 3mm Allen wrench | Unlock the Pass Through on both sides | Make sure lock tang is releasing the pass through |
|---|---|---|
 |
 |
 |
| Remove the front Panel and store it |
|---|
 |
Rear Panel:
If you do not need to push the material through the rear pass-through, you can leave it installed.
| Remove the bolts Holding the rear passthrough with a 3mm wrench. Remove and store. |
|---|
 |
2. Honeycomb Position
| Honeycomb should be level with the main deck so that material will lay flat on the honeycomb and deck as it passes through |
|---|
 |
3. Setting the Manual Focus
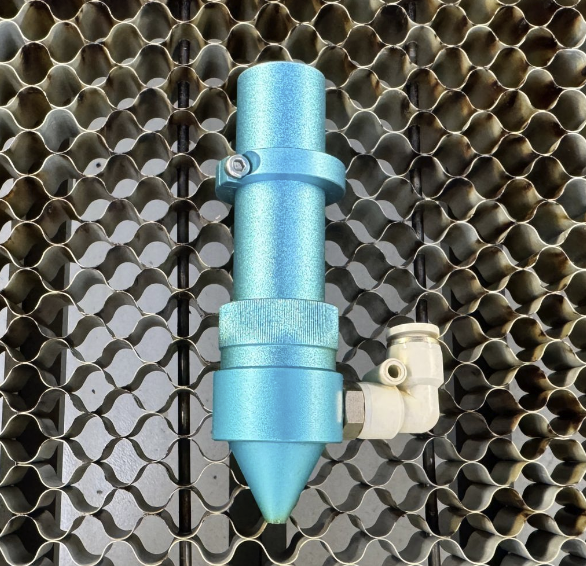
You will be using manual focus for the pass-through as your material will be sitting higher than the optical focus eyes. In order to achieve full pass-through depth, you may have to adjust or even remove the stop ring on your lens. After you are done, you will need to recalibrate the stop ring in order to use auto focus again.
| Stock 2" lens with stop ring | Stock 2" lens with stock ring removed |
|---|---|
 |
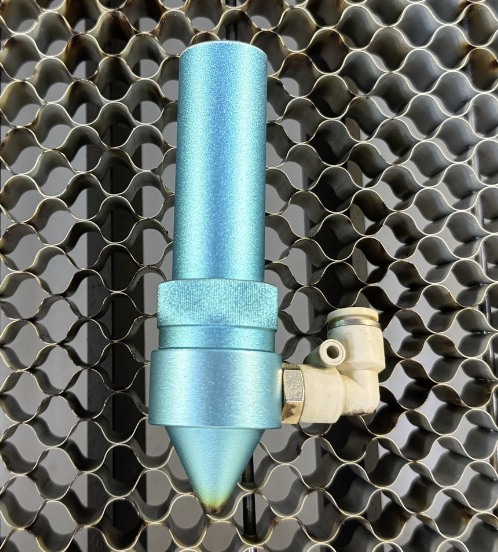 |
| Stock 2" Lens with stop ring, inserted into lens holder. | Stock 2" Lens with stop ring removed, inserted into lens holder. |
|---|---|
 |
 |
Safety and Exhaust Considerations
As you remove panels, you should consider the safety aspect of having an exposed laser beam. SAFETY INFO: C02 Laser Radiation, PPE, & Fire Suppression
The exhaust may react a little differently and there will be more openings for residual smoke and smells to escape into the room. It is advised to only run with the pass-through panels removed when it is necessary.
An overview of Lightburn Print and Cut can be found here.
Tips and Tricks for Success
- Check that your beam pulse is lined up with your red dot
- Set the alignment markers as far apart as possible to minimize your error
- Subdivide your artwork so there are the least amount of crossing lines between sections
| File Prep Tip |
|---|

Notice how on this Nova 24 size bed that the markers are wide spread but still near the artwork to fit on the material. The blue lines will be the separation lines. Notice how they are not the same line and at different heights. This is to minimize cutting into other lines of the artwork that were close to the separation line. The small red and yellow lines can be used to verify that the print and cut markers have lined up. |
- Measure twice, cut once - The better you line the artwork up, the better your result will be. Do not rush
- Use the unused area of the material to perform test lines to verify you lined everything up
Reference Videos
Video 1
Video 2
Video 3
Still stuck?
No bots, no runaround. Talk to a U.S.-based laser tech who knows your Nova inside out.