
Preface: This article covers how to uninstall and reinstall a driver for the TITAN series machines. The information here can also be used to swap the X-axis and Y-axis drivers with each other for troubleshooting. A windows computer will be required to backup Servo Parameters and to write them as part of the swap.
Warning: The machine should be powered off and disconnected from the main power source when performing work that involves electrical hazards.

Preparations before replacing the driver
1. Tools Required
Here is a list of suggested tools to have on hand before beginning:
| Tool List | Reference Image |
|---|---|
|

|
2. Other Preparations
Note: Before replacing the X-axis and Y-axis drivers, please make sure to import the corresponding parameter file into the driver first. It will prevent potential issues caused by swapping the driver without the proper configuration.
-
Connect to the drive "PC port" via a USB Type-C cable.
Cable Driver Connection 

-
The other end of the USB Type-C cable connects to the computer.

-
Unzip the software and open the corresponding application in the folder.
Note: This software needs to be provided by Thunder's technical staff. Please contact us if necessary: [email protected]
Motion Studio Zip Unzip and locate the Application 

-
Select the corresponding communication method (RS232) and port (You will need to find the comm port number in Windows Device Manager), and "Connect".
Example Device Manager Example Comm Setup 
 (Note that your comm port may not be Com19, you will need to find it in your Windows Device Manager. You can check by plugging and unplugging the USB into your computer that connects to the driver and seeing which port shows up in the Ports (Com & LPT) section)
-
Click on "Parameters List", then click "Open".
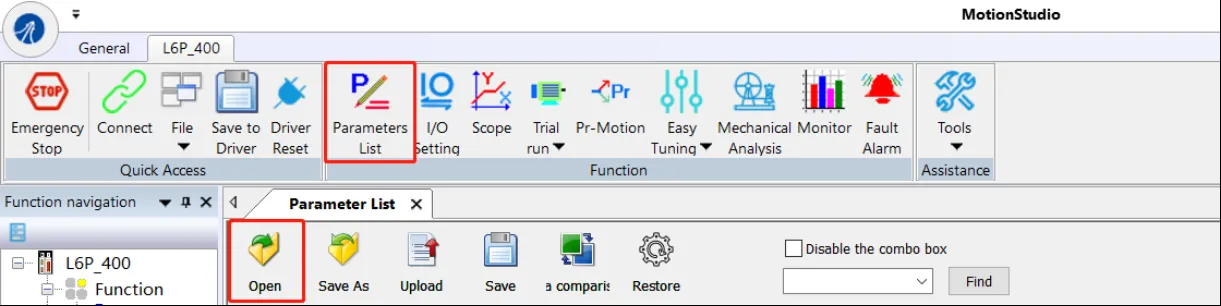
Select the correct file to import and click "Open".
Note: Make sure the file you import to the driver is for the corresponding axis.
-
Click "Save" then click "OK".

-
Click "Drive Reset" and wait for "No Alarm" to show up in the lower left of the window to complete the parameter import.

Swapping the X and Y drivers
Note: Before uninstallation or installation, please clearly label and distinguish which is the X-axis and which is the Y-axis.
This guide shows how to swap the drivers.
1. Driver Uninstall
-
Open the laser tube cover, find the X-axis and Y-axis drivers. (Depending on your machine, the drivers may also be in the right hand side control panel door)


-
Use the tool to remove the yellow ground wire (wire ①) and the wires ② to ⑨ from the black terminal block, remove the gray signal wire ⑩, and remove the black signal wire (wire ⑪).
Before After 

Finally, remove the driver by removing the mounting bolts shown.

2. Swap
-
Identify and properly install the X-axis and Y-axis drivers, secure the drive with screws and connect the cable.

-
Please refer to the image below for connecting the terminals and wiring.
X-axis driver Y-axis driver 

Once you swap the X and Y drivers, power the machine on and check which axis isn't moving. Then let us know the result.
Before After 
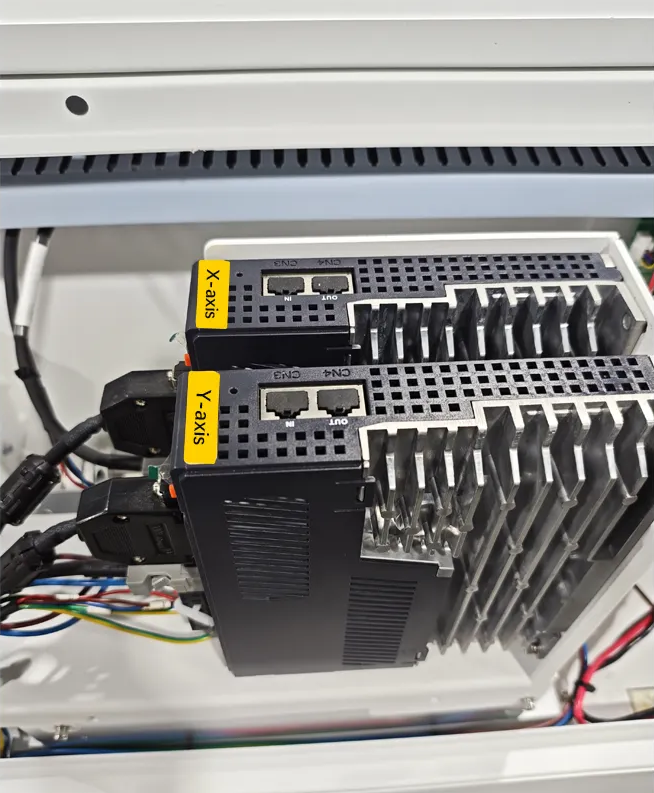
Note: Please check whether the X-axis and Y-axis are moving in the correct directions when the laser head is homing. It prevents the laser head from crashing into the rail and causing damage.
The original X-axis does not move The original Y-axis does not move ① After the swap, the X-axis still doesn't move. And the Y-axis does. The X-axis motor is damaged.
② After the swap, the Y-axis still doesn't move. And the X-axis does. The X-axis driver is damaged.
① After the swap, the Y-axis still doesn't move. And the X-axis does. The Y-axis motor is damaged.
② After the swap, the X-axis still doesn't move. And the Y-axis does. The Y-axis driver is damaged.
Still stuck?
Fastest response times in the industry from our US-based support team.