
Preface: This guide provides instructions on how to vertically adjust the honeycomb bed on the TITAN series to tram the bed to the laser head.
As you begin to make adjustments, it will be an iterative process to where you adjust, measure and adjust again until you are satisfied with the bed tramming to the laser. Any use of the word level when talking about the bed to the head does not mean earth level, it means that the gap to the head and the bed is consistent across the span (Trammed).
Tools Required
5mm Allen wrench
Steps for a minor adjustment
Below you will find steps to make a minor bed adjustment, maybe a few mm. If you have a gross adjustment needed, that is a different method.
Familiarize yourself with the honeycomb bed support system
-
First, open the lower front door (You will need your door keys to unlock) and locate the four lead screws that support the honeycomb bed.

Left Side Right Side 
-
Raise the honeycomb bed in order to locate the screws located at each corner under the honeycomb bed. Take note of the two screws circled in the picture below on each lead screw, they are used to secure the honeycomb support platform to the lead screws and are loosened from up above.

Precheck
You should check the bed in each corner to see which one you plan to adjust.
Adjustments
-
Honeycomb Removal
Start by lowering the honeycomb down for removal and then by opening the upper front door.

-
Lift and remove the honeycomb through the upper front door opening:

Leave the knives exposed but still installed, loosen the bolts circled when adjusting the corresponding corner. You may have to push the foam aside to see the bolt.

Measure the bed at the 4 corners to determine which corner needs adjustment.
-
Next, use a 5mm Allen wrench to adjust the screw in the middle of the lead screw, which is used to set the height of the platform.
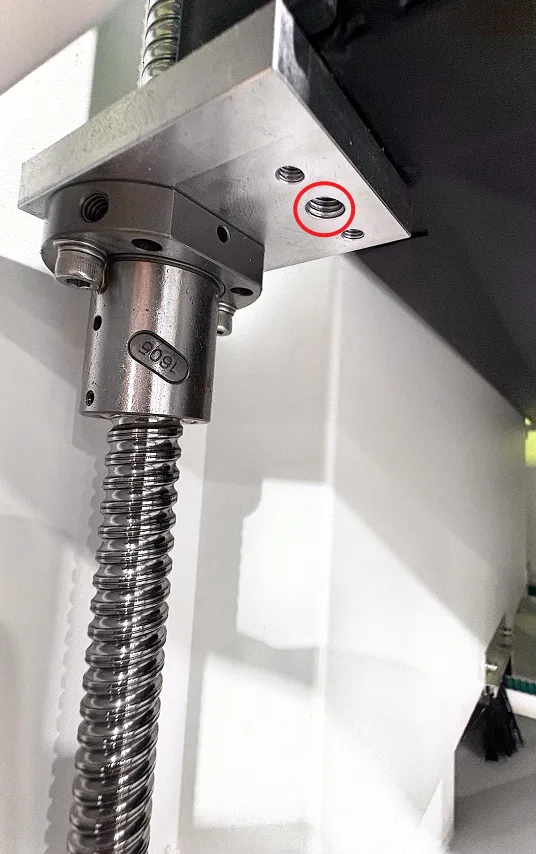
During the adjustment process, it is necessary to observe the change in height and to re-tighten the fixing bolts after each corner has been adjusted.
Clockwise to Raise the Corner Counter-Clockwise to Lower the Corner
Check that the honeycomb bed is level
You can find a reference object; we use an acrylic ruler in this article. You can also make one. (Reference File)
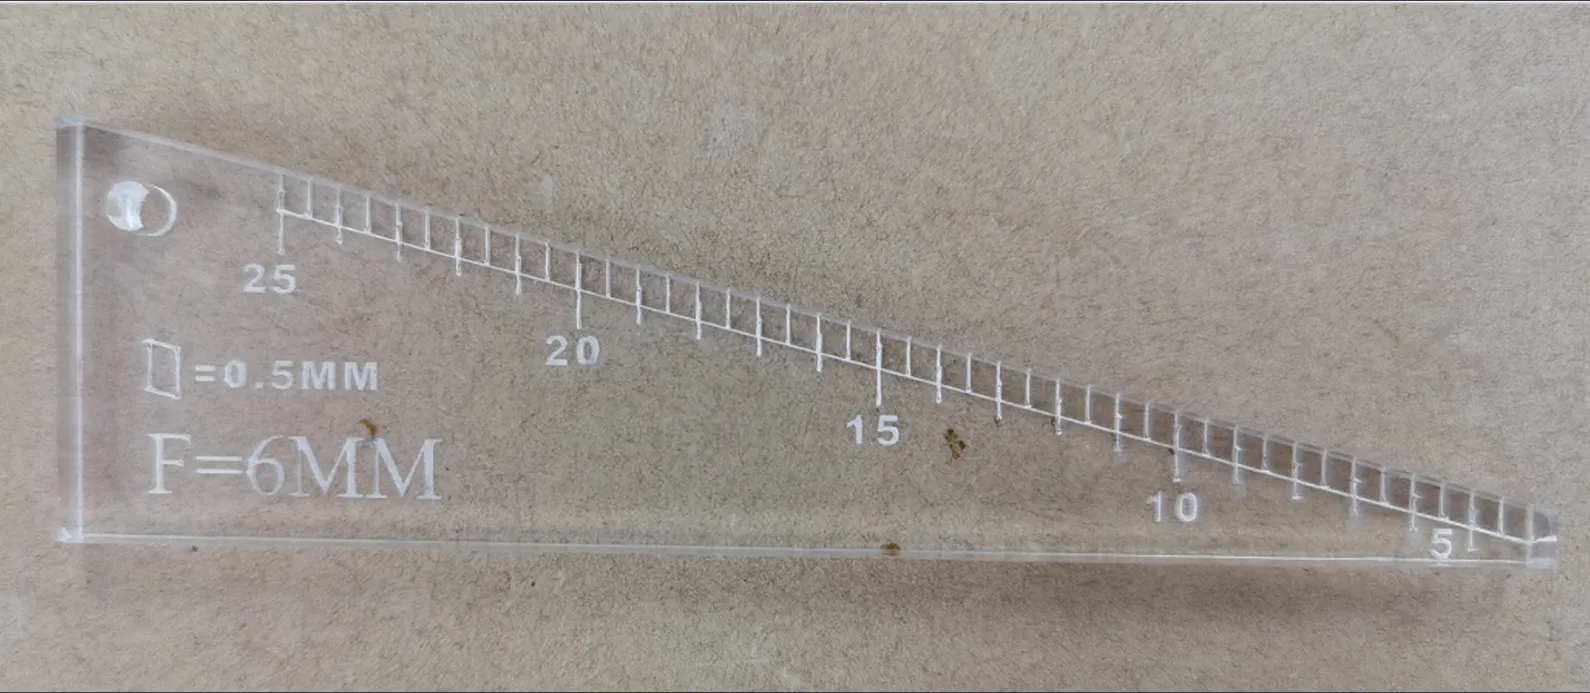
Here is the sample file: Ruler
-
Please move the laser head to the center of the table.

-
Adjust the height of the air nozzle to the honeycomb table to 15mm.

-
Then check the height from the air nozzle to the table at the four corners.
The standard error does not exceed +-0.5 mm across the span of the bed.

a. A height of less than 15 mm indicates a high honeycomb bed.

Then it needs to be re-adjusted.
b. A height higher than 15 mm indicates a low honeycomb bed.

Then it needs to be re-adjusted.
c. A height equal to 15 mm indicates that the honeycomb bed is level.

Still stuck?
No bots, no runaround. Talk to a U.S.-based laser tech who knows your Titan inside out.