
Laser cutting machines are outstanding tools for hobbyists and budding businesspeople alike. Not only can you create stunning artisan products with clean, neat finishes from your own home, but you can also use them for prototyping. No matter what application you choose, the process of designing for laser cutting and feeding them into the machine is the same.
The quality and type of cutting material you select has a huge impact on the finished product, but your understanding of the machine is the most important aspect of quality control. Read on to find out about the various file formats you can use with a laser cutter and discover how to design a product from start to finish.
Laser cutters are durable, long-lasting machines because there’s no mechanical contact between the workpiece and the tool. Electrical manufacturers, mechanical manufacturers, artists and a wide array of other industries use laser cutting machines.
Raster vs Vector File Format Templates
A laser cut machine actually has two very different ways of transferring your graphic design onto your material: vector and raster. You can have the same initial image, but the file type you choose can give drastically different results. Vector images are used for cutting, while vector and raster can be used for engraving.
While raster engraving is often less time-efficient than using vector files, the finish is generally considered better.
Vector Graphics
Vector engraving works great with flat surfaces, continuously and fluidly cutting or engraving the material. It’s very smooth and much faster than raster cutting because it doesn’t cut, etch or engrave pixel by pixel. One major benefit of this file format is the fact you can scale it up without any issues. Types of vector file include:
- Adobe Illustrator
- SVG
- DXF
- CorelDRAW
- EPS
Raster Graphics
If you’ve ever seen the way an inkjet printer works, you understand what raster graphics are. Bitmap images are made up of pixels, which the laser beam scans over back and forth, quickly turning the laser on and off to cut or engrave each pixel onto the material you’re using.
Because of the intricate process, raster cutting and engraving takes significantly longer — but the high-quality finish means you can charge more for the retail price. This type of image also loses quality when scaled up, so you need to ensure the image you use is high res to get the best results. Raster file types include:
- GIF
- PNG
- JPG
Which Design Software Is the Best?
Most laser cutting machines come with a very limited computer program that lets you create basic shapes and wording, but not design, and communicates the design to the machine itself. Thunder Laser machines come equipped with Lightburn software, which lets you do it all.
There are other programs you can use to perform laser cutting, engraving and marking — let’s have a look at some of the features each one has.
Lightburn
Lightburn is one of the most popular software programs for laser cutters. You can create your designs fresh off a blank canvas, rearrange, edit and trace images using this software, in addition to it being a communication platform for the laser machine itself. Design packages from the software providers below can be incredibly expensive and don’t necessarily offer extra functionality. The software is compatible with MacOS, Linux and Windows.
Adobe Illustrator
AI is the standard program used for vector images, which is why so many people associate it with graphic design. However, unless you have fairly extensive experience using the program, it’s pretty complicated. While it has a lot of features — a similar amount to Lightburn — you need to pay for a monthly subscription.
Inkscape
Inkscape is free, open source software for vector files that works with Windows, MacOS and Linux operating systems. Although it’s free, the software can be slow and is prone to glitching and crashing.
CorelDRAW
CorelDRAW is vector file software that has a wide array of features and has a very similar interface to Adobe Illustrator. Although it’s costly, there are different subscription packages to choose from. Some of the best features, such as image tracing, may be behind a paywall and only accessible to the highest-paying customers. It’s only available to Windows and MacOS users.
Laser Cutter Tutorial
Step 1: Prepare the Workstation
First, you need to determine whether the size of your material is correct for the laser bed. We’d recommend setting the work area to the maximum size of your design. You use different color settings for different processes, such as using black for cut areas and red for engraved areas.
You might need the following tools:
- Measurement tape
- Masking tape
- Utility knife
Step 2: Get Your Settings Right
Focus, frequency, speed and power are the four most important settings on your laser cutting machine. You’ll need to tinker around with your machine a little to find out what works best with the materials you use, but there’s plenty of support available if you need extra help. Here’s a basic explanation of your laser cutter’s settings:
- Focus is performed by the focusing lens, which sits inside the laser head. The focal point should either be just below or on the material’s surface, and it needs to be a specific distance away from the surface to work correctly, depending on the lens. You can use the motorized bed to set the distance or manually move the material itself.
- Frequency determines how many times the laser pulses in a single second. You’ll need to use different frequencies for different materials to get a perfect finish.
- Speed is simply how quickly the laser head moves, and it’s usually close to maximum output for cutting and engraving.
- Power is usually set from 0% to 100%. More is required for cutting thick objects, while less is needed to engrave a thin object.
Step 3: Create Your File
Now that you understand your machine and have the workstation prepared, it’s time to prepare your file.
Cutting
When you’re cutting, the laser shoots a continuous beam to cut through the material. You’ll use a vector file with the smallest line thickness for cutting, as thick lines and solid shapes won’t be cut.
Engraving
Vector engraving must be performed at a lower power than cutting, but the process is largely the same. For engraving, you can use vector or raster images — but keep in mind that a raster image will be engraved pixel by pixel, so it’ll take longer but have a cleaner finish.
Step 4: Be Safe
While laser cutters are awesome machines that can transform your home into a production line, they’re also potentially dangerous. Be diligent when it comes to safety, and read through all manuals and instructions carefully. Bear in mind that the laser is usually completely invisible to the human eye, and the red dot you see is for aiming rather than cutting or engraving.
Step 5: Get Cutting!
Before you get started on actual materials, make sure you do some test cuts and engravings. This way you can iron out any issues before it counts — and it usually takes a few tries before you get the settings perfect for a new material. Make sure you write down the settings that work best for you so you can quickly get to work next time you use them.
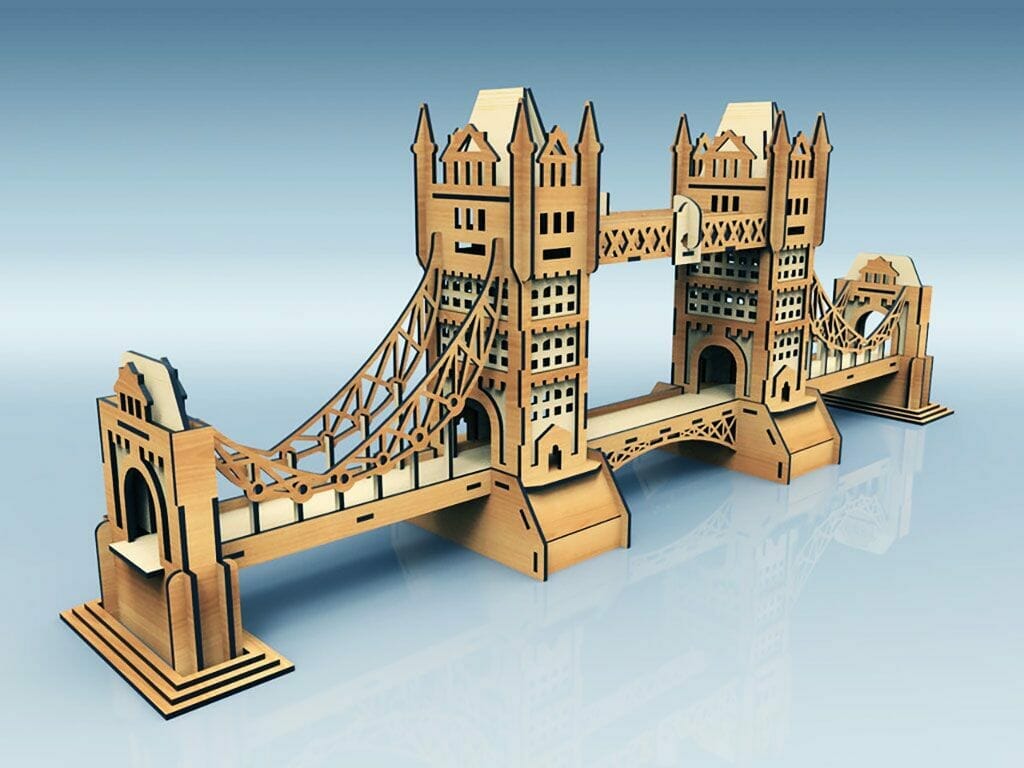
Which Designs Work Best With a Laser Cutter?
People in a wide array of industries with a broad range of skills can use a laser cutting machine. Some great small business ideas include:
- Phone and laptop accessories
- Acrylic wax seals
- Key chains and bottle openers
- Personalized wine glasses and linen for hospitality
- Coasters
- Customized mason jars
- Clocks
- Tombstones
- Book covers
- Glass etching
- Mirror art
- Decorative wood
- Toy boxes
- Ornaments
Top Design Guidelines
For precise, high-quality designs every time, follow these basic principles:
- Avoid making your designs too complex.
- Be sure to remove all intersecting lines.
- Choose the perfect material for each job.
- Convert written text into graphics.
- Make sure the designs are properly “bridged.”
- Scale your design carefully.
- Always remove the notes, gridlines, borders and comments before submitting!
What Is a Laser Cutting Machine?
Laser cut machines use a laser beam and a file fed into a computer program to create precise cut, engraved or etched designs. A laser (light amplification by stimulated emission of radiation) is a highly focused and amplified beam of light that causes the surface of the material you’re using to vaporize, burn or melt. You can also mark metal using a special type of paint that the CO2 laser burns into the surface of the material.
While the machines are usually around the size of a large printer, the actual laser is pretty small. It’s contained within a glass tube that’s filled with CO2 gas. Using the magic of mirrors and lenses, the beam is directed through the laser head and projected onto the surface of the material. Electric motors move the head using the vector or raster design file that’s programmed into the machine using a specific computer program.
What Do Laser Cutters Do?
There are four actions your laser cutter can do: cut, mark, etch and engrave. Let’s take a look at what each one means:
Cut
For a cut to take place, the laser must go all the way through your chosen material. The cut is usually extremely clean and precise, but the cut edges vary depending on the material you use. For example, wood cuts perfectly using a CO2 laser, but materials such as MDF or cork might get darkened edges. Don’t worry; you can use tools to quickly clean the edges for a perfect finish. On the other hand, acrylic doesn’t change color and always has a smooth, shiny finish.
Kerf, which is the width of the cutting groove, is an important measurement when laser cutting. You’ll need to adjust this metric depending on the material you use and your specific laser cutting machine. The kerf measurement usually falls somewhere between 0.002 inches and 0.02 inches.
Mark
Marking is the main action you’ll use if the material you’re working with is a metal, such as stainless steel. In this instance, the laser cutter doesn’t remove any material; instead, it simple changes the appearance of its surface. You apply a marking solution such as Enduramark or CerMark to the workpiece. Once dry, you use the heat from the laser to permanently mark the surface of the metal.
Engrave or Etch
Engraving and etching refer to the action of using the laser beam to cut away some of the material without slicing all the way through. Engraving usually produces a deeper mark than etching.
Materials You Can Laser Cut
There are many different substrates you can cut, etch or mark using a CO2 laser cutting machine. Bear in mind that the material thickness varies depending on what you use, so be sure to refer to the manufacturer guidelines to find out the maximum and minimum thickness for the specific material you use.
Cutting
- Acrylic
- Wood
- Plywood
- MDF
- Paper
- Cardboard
- Cork
- Cotton
- Leather
- Felt
- Delrin
- HDPE
- Polypropylene
Marking
- Stainless steel
- Aluminum
Engraving
- Acrylic
- Wood
- Plywood
- MDF
- Paper
- Cardboard
- Cork
- Cotton
- Leather
- Felt
- Delrin
- HDPE
- Polypropylene
- Glass
- Ceramic
- Marble
- Granite
- Slate
- Stone
Materials to Avoid
It’s not possible to use certain materials. In some cases, this is because it produces toxic fumes, although it’s usually because the laser can’t cut through a particular substrate. Some materials to avoid include:
- Carbon
- Artificial leather
- PVC
- PVB
- Phenolic resins
- Teflon
- Fluorine
- Iodine
- Epoxy
- Astatine
- Chlorine
- Bromine
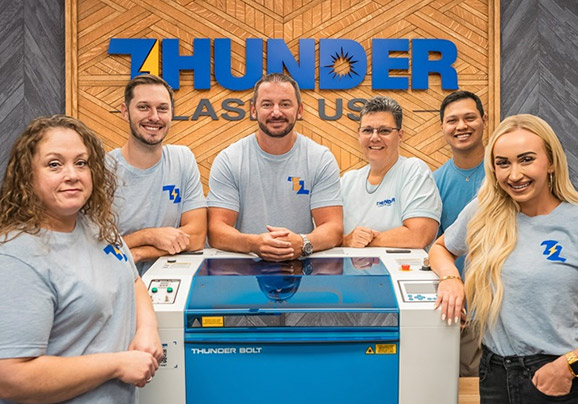
Thinking of Setting Up a Laser Cutting Machine Business?
You don’t have to be an expert in graphic design to use a laser cutting service or buy your own laser cutting machine. At Thunder Laser USA, we make high-quality CO2 laser engraving, cutting and etching machines that are affordable and accessible for pretty much anyone with entrepreneurial spirit. Plus, we can customize the machine’s settings to your unique requirements, so you never pay for more than what you need.