
THE INFORMATION BELOW IS LEGACY INFORMATION AND FOR REFERENCE ONLY! WE CAUTION YOU AGAINST USING WIFI TO SEND FILES TO YOUR MACHINE.
WARNING: This capability is not intended for remote monitoring and/or operation of your laser. You should always remain close by, and attentive to, your machine while in operation. Additionally, The LAN communication protocol for Ruida DSP's is UDP which can be problematic when using wireless connectivity.
Many laser engravers have an ethernet port but do not have embedded wireless networking capability. This seems to be a stumbling block for many folks who want to be able to connect their lasers via wi-fi. This article will explore this topic and provide an easy, cost-effective solution that will work for any Ethernet capable controller. We are focusing specifically on Ruida DSP's and LightBurn software but the principle is basic IT and can be applied to other DSP's (or any other wired Ethernet device for that matter) and applications that support TCP/IP.
KEEP IN MIND that Ruida uses UDP (not guaranteed delivery), with no retry mechanism, so you'll likely get more failed sends over Wi-Fi than with hardwired Ethernet. MORE ON RUIDA PROTOCOLS HERE: https://edutechwiki.unige.ch/en/Ruida#Protocol

Ruida has a Wi-Fi solution available but is rather expensive and there is no magic pixie dust inside. It's a white-labeled TP-Link wireless gaming adapter shown above.
We will be doing exactly the same thing except with an off-the-shelf network appliance that costs less than $70 and is 3 devices in 1: A standard wireless router, a dedicated access point, and a wireless bridge/extender. The last function is the one we will focus on. This device is the Asus RT-N12 D1 (N300).

Setting Up the RT-N12D1
Here are the steps to configure the RT-N12 to your existing network:
- Insert your wireless router's AC adapter to the DC-In port and plug it to a power outlet.
- Using the included ethernet cable, connect your computer to your wireless router's LAN port (Yellow port on the back).
- Using another network cable, connect your modem to your wireless router's WAN port (Blue port on the back).
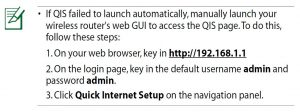
CLICK IMAGE TO ENLARGE - Launch your web browser. Quick Internet Setup should launch automatically then click Next. If not see the note (>) then resume here.
- Key in a new administrator password to prevent unauthorized access to the router. Click Next.
- Select Repeater mode. Click Next.
- A list of nearby wireless networks will appear. Select yours, enter the network security key, and click Connect.
- Keep the "Use the default settings" box checked.
- Click the Apply button to save the changes. The router will apply the settings and restart. The wireless repeater has now been set up successfully.
- Relocate the device near your laser engraver, connect the laser's ethernet port to one of the yellow LAN ports on the RT-N12 with the supplied network cable, then power up the device and wait a minute for it to connect.
Your Asus network appliance should now be providing the laser controller a network connection (and extending your wireless network).
Configuring Your DSP Controller
Here is a video tutorial to help you configure your DSP to your existing network:
This video is specific to LightBurn but the principle is the same in RDWorks.
NOTE: If you assigned a static IP address to your DSP that is within the DHCP pool and did not add an exception (or reserve it) in your main router the IP address could be given to another device at some point. This would cause an IP address conflict and cause one or both devices not to function properly. To find help with this google "How do I reserve an IP address on my ??????? router (or modem)?"
Your DSP should now be connected to your existing network. Your laser engraver should now be connected to your network and be communicating with LightBurn!
Reference Articles
- Connecting your Thunder Laser to your Existing Network with a Router over WI-FI or Hardwired Ethernet
- Why your IP address matters and describing it in terms that are easier to understand
- Best Practices for setting up Lightburn to control Multiple Thunder Laser Machines
- LightBurn Bridge
Still stuck?
No bots, no runaround. Talk to a U.S.-based laser tech who knows your machine inside out.