
This article covers the best practices for using multiple machines with Lightburn. There are many ways to do this from Basic to Advanced and is based off the user preferences and needs.
Recommendations and Reference
- Use Ethernet — USB connections cannot distinguish between one controller or the other so picking machines would be left to using the com port and being diligent as to which com port your computer assigned to each machine (Can vary based on which USB port used and user setup).
- Use an Ethernet Hub to connect the machines together. A HUB will minimize the complexity that a smart router can encompass. Multi Port Hub from Amazon
- Utilize multiple IPs for a single NIC if you want to add an internet connection to your HUB but to keep your machines on a separate network address scheme (Shared hardware but keeps a software config separation barrier)
- Watch this video about Multiple Lasers in Lightburn
- You should be fairly knowledgeable about Ethernet Device setup but if not, please refer to the article on connecting a Thunder Laser to LightBurn via Ethernet.
Hardware Setup
2 or more lasers, each with an Ethernet cable each

A multi-port Hub. Buy one that has at least 2 more ports on it than you have Lasers. Spare port for a PC interface and internet connection if desired.

Example: Five Port hub (Will need a hub with enough ports as you have machines +1 for your computer)
- Port 1: Nova 35 — 192.168.2.100
- Port 2: Odin 22 — 192.168.2.101
- Port 3: Internet (Home\Business network connection) — No IP
- Port 4: Programming Computer — 192.168.2.200, 192.168.1.200
- Port 5: Spare or an additional Laser etc
Software Setup
Lightburn Devices will be created separately with their own unique IP based on what you set the IP to on the machine screen.
| Laser 1 | Laser 2 |
|---|---|
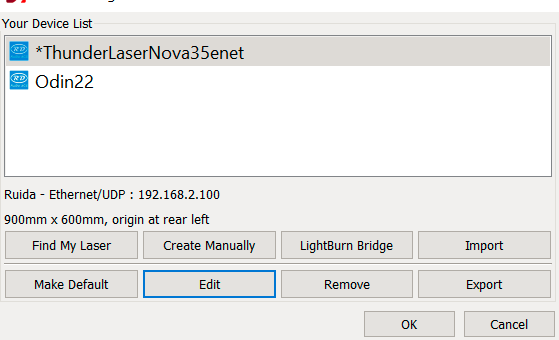
Note the IP of the Nova 35 device is 192.168.2.100 |
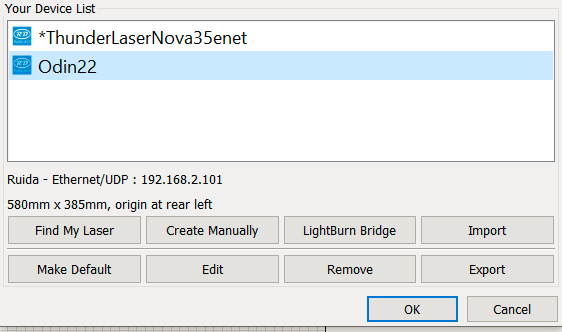
Note the IP of the Odin22 device is 192.168.2.101 |
Windows PC Network Card Config
This setup shows how to assign multiple IP address so that the Laser Machines can use the same hardware and network as the typical router based network but still have software configuration to keep them separate. You only need to do this step if you plan to run a cable from your hub to your router.

Lightburn Device Selection
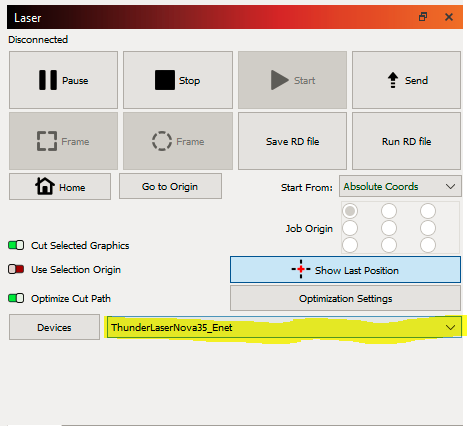
You can have multiple instances of Lightburn open, and then select which device you want to connect to. Since they have different IPs they will be easily distinguished by Lightburn. It is still on the user to select which machine to download, properly configure the device etc.
Select your laser machine in the dropdown in the lower right of the Laser Control window in Lightburn.
Setting a Default Machine
If you want a default machine to be selected, you can do that from the Devices control window in Lightburn. Your default machine will have a * next to it. The "Make Default" button is in the lower left corner of this window. To use it, highlight your desired Laser Machine and then click the button.

Advanced Setup Idea
- Utilize a small form factor PC to be a software terminal to run Lightburn and EzCad.
- Example Computer: HP EliteDesk
- Assign IP to Computer in the range of the machines and your network if desired
- Install the computer, configure the Software licenses and Laser devices.
- Use RDP to connect to the computer to control the equipment from another laptop or install a wireless Keyboard\mouse and monitor.
Splitter Cables for Ethernet
Warning: Do not use a non powered splitter cable like the example below. It does not allow for multiple devices to talk at the same time.
For the price of this splitter you can nearly buy a 5 port hub and have the functionality you need and no frustration.


Still stuck?
No bots, no runaround. Talk to a U.S.-based laser tech who knows your machine inside out.