
Connecting A Thunder Laser To LightBurn Via Ethernet
Preface: This article covers an overview of the connection types (Adhoc\Direct vs through a Router\Switch) for the Ethernet connection from your Computer to your Laser Machine.
Note: The Ethernet connection is not Plug and Play and requires configuration to work. It also does not function with Lightburn's "Find My Laser" utility. The Laser also does not take an auto-assigned IP address from your DHCP server on your local Router. The Laser has a static IP that must be set up to match your network (Default is 192.168.1.100 with a Subnet Mask of 255.255.255.0). More on DHCP down below.
Brief Overview
When connecting your laser to your computer or existing network, there will be some configuration required. Depending on how you want to connect, the configuration will vary. Each user's setup may be a bit different. There is not a single simple answer to fit all the situations. Depending on the users networking knowledge, it might seem difficult to get everything working.
Two main types of connections to consider. The Direct connection, aka ADHOC and the Networked through a Router\Switch type connection. Both can work, but they require different considerations when connecting the Laser to them. What is common to both methods is that you still must assign the proper IP to your Laser and configure Lightburn to look for the machine at that IP. More on each type of connection down below.
Please also consider reviewing this article if terms like IP, Subnet Mask, Host ID and Network ID seem like a foreign language:
Why your IP address matters and describing it in terms that are easier to understand
Adhoc (Direct Cable Connection)
| Description | Reference Image |
|---|---|
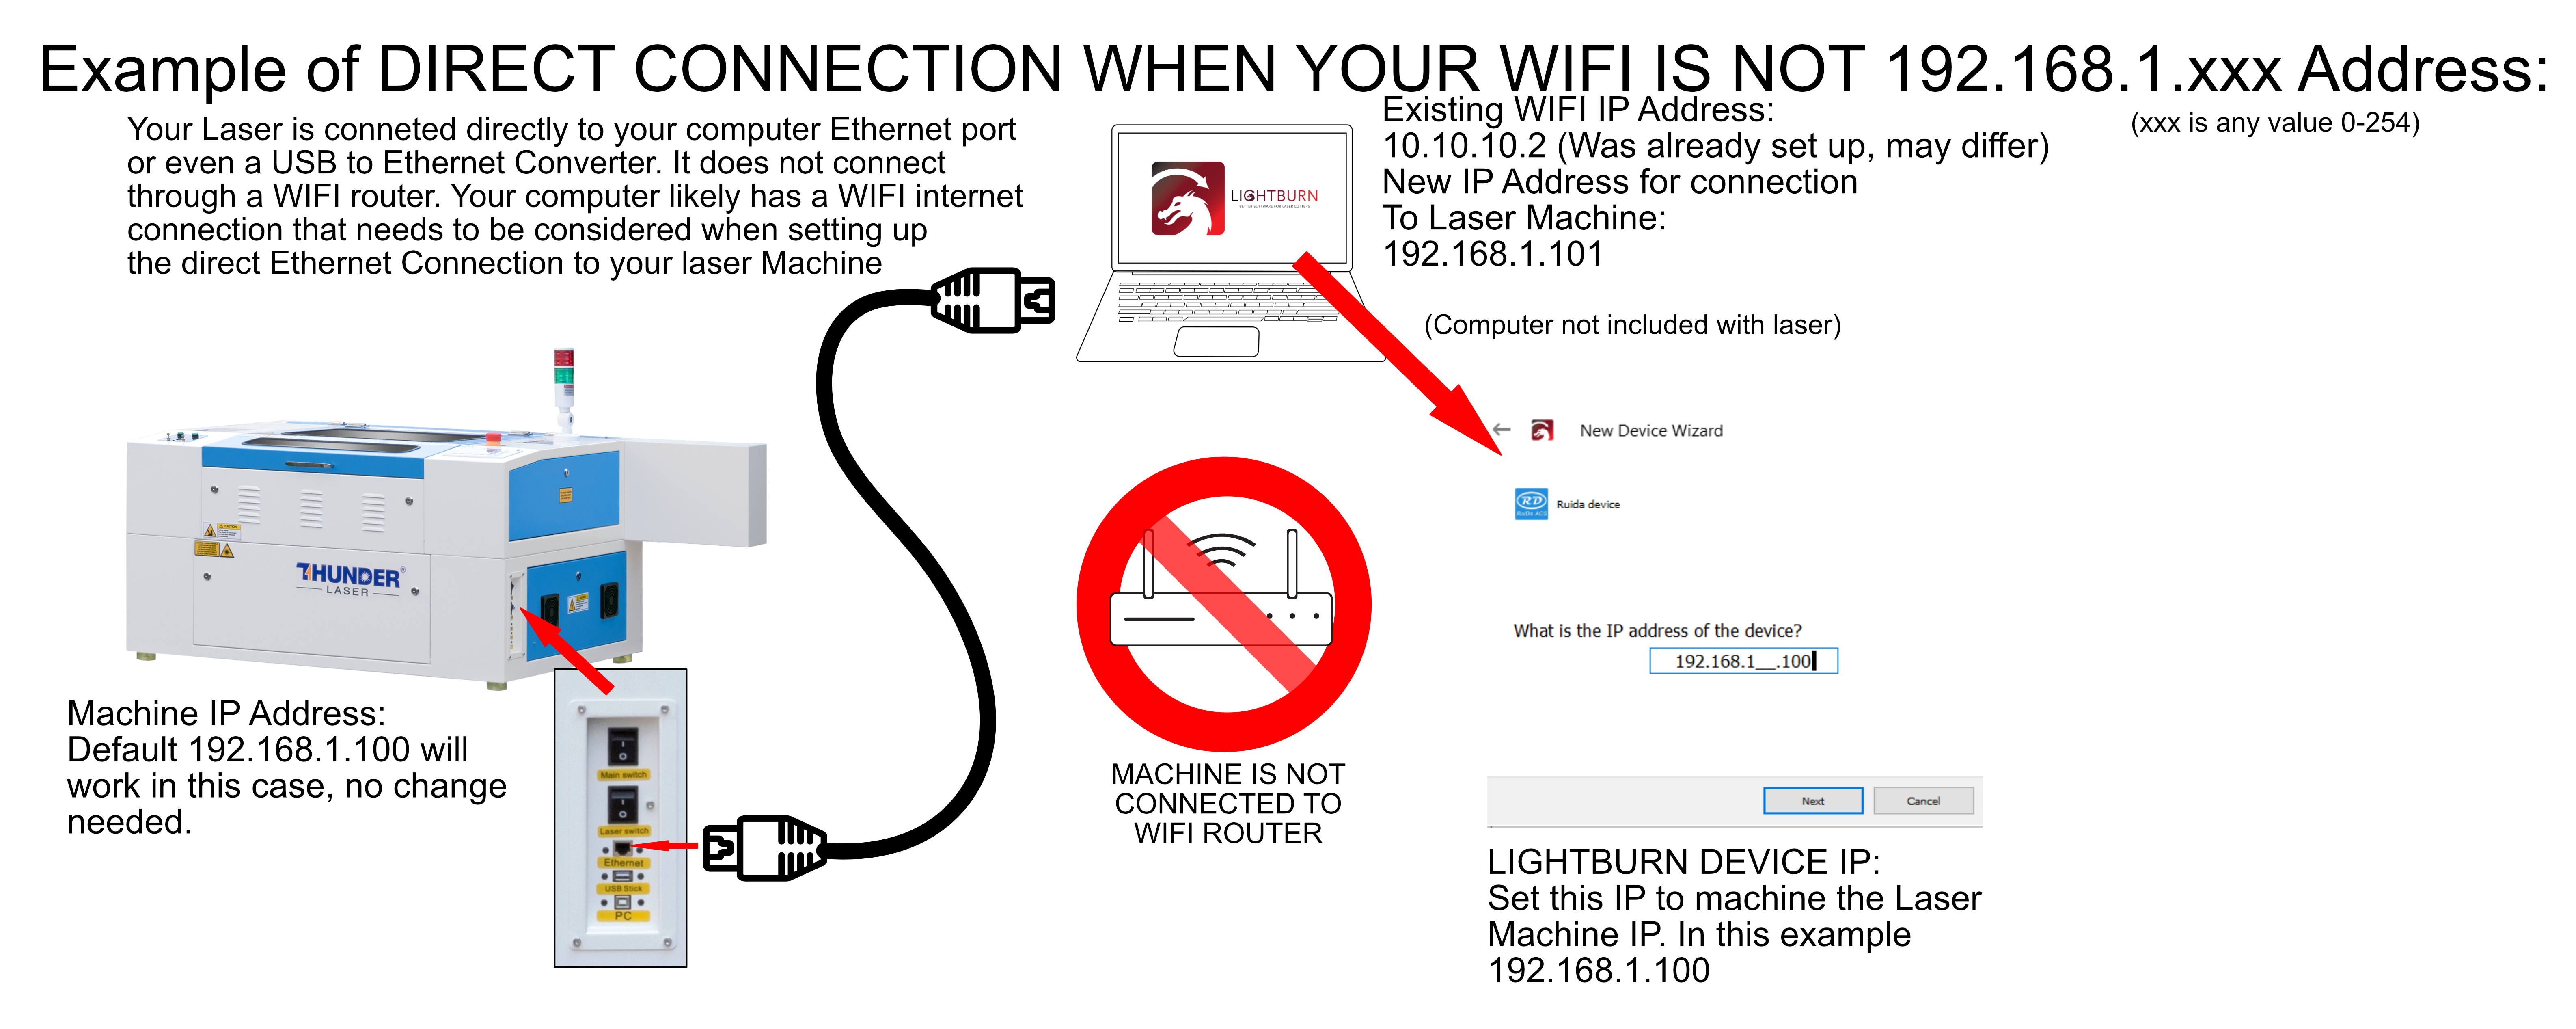
| This method utilizes a direction connection from your computer to the machine, like the USB cable would be, but with the included Cat-5 Ethernet cable. This is the most robust method and is easy to set up. This connection creates a separate network from your WIFI which means the IP addresses used, should not coincide with your WIFI IP address scheme. |  |
Router\Switch Connection on your existing Network
| Description | Reference Image |
|---|---|
| This method utilizes a intermediate connection between your computer to the machine like a Router or Switch that has a level of control over a network, not like a basic 5 port hub or similar. This method is easy to set up, but since it utilizes a Router\Switch it can have additional steps that no guide can cover completely. We have also seen issues where a router will block communication to the laser either immediately or even months after service was established. This connection puts the Laser machine on your existing network and the IP address assigned to the Laser Machine should be in sync with your current network address scheme. |  |
What is DHCP and Why does it matter when connecting through a Router\Switch
| Description | Reference Image |
|---|---|
|
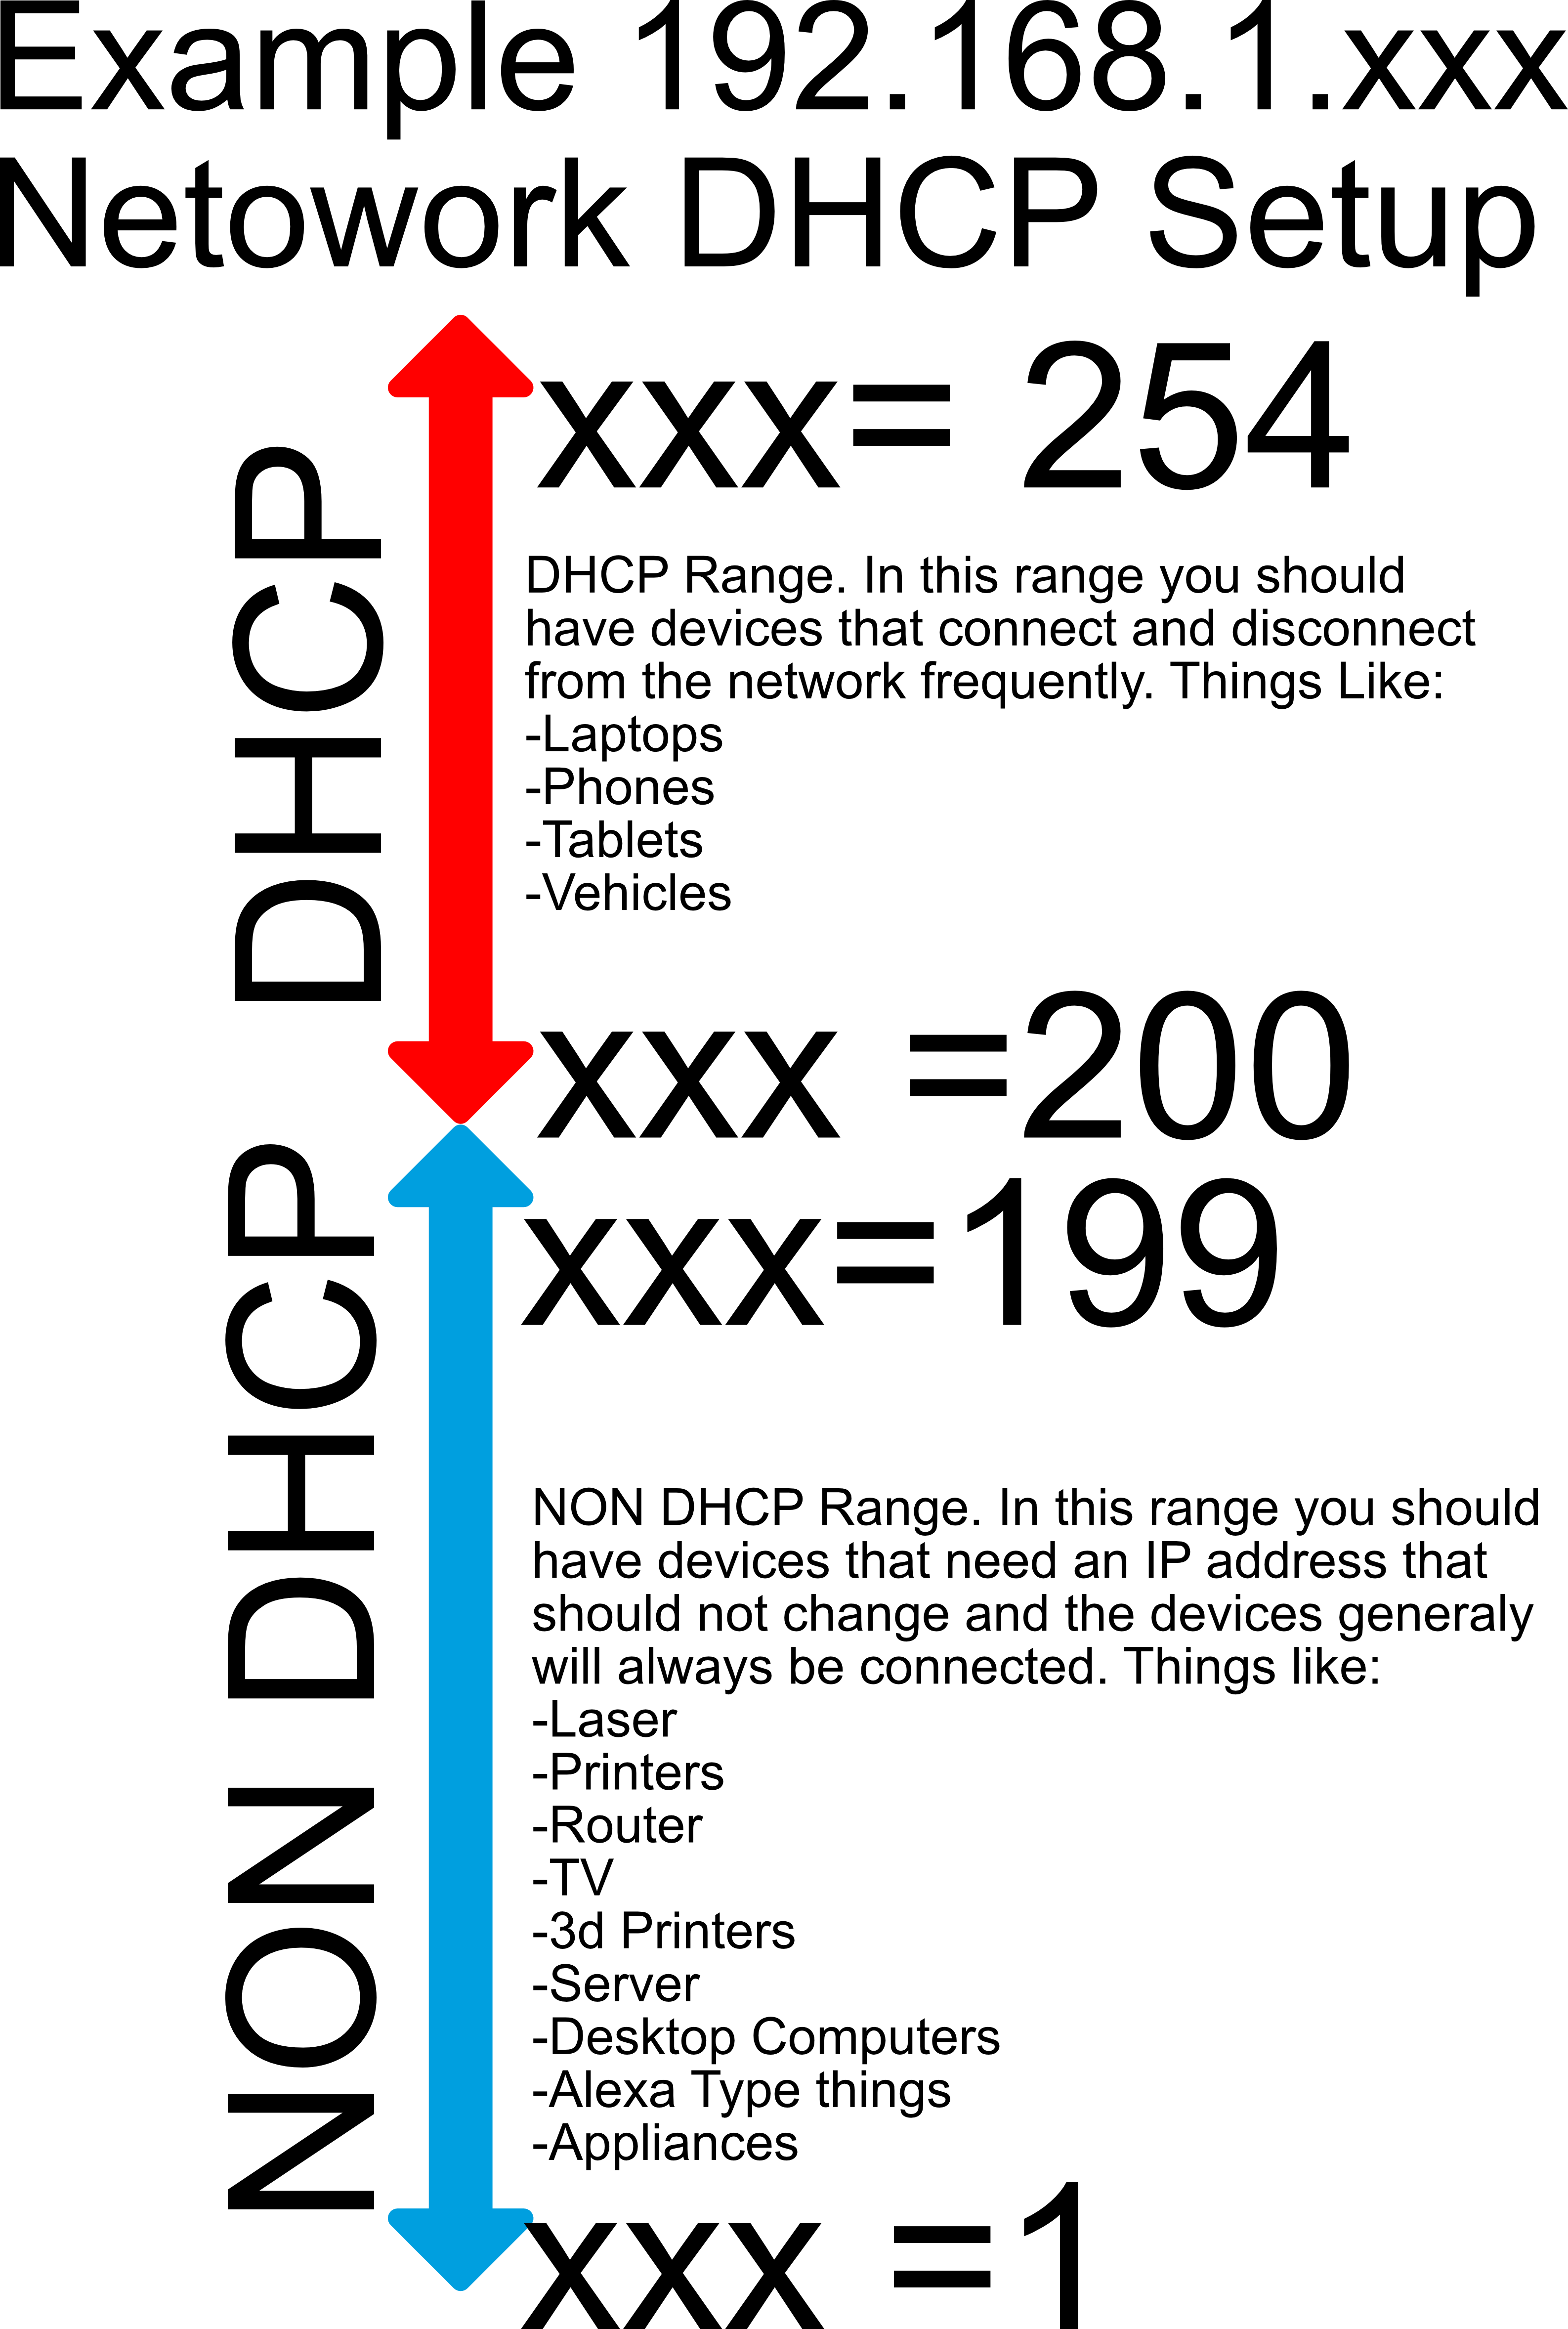
DHCP is a protocol that is used on just about every Router\Switch out there. You probably do not even know that you use it or that it is enabled. DHCP will assign each willing device that connects to a network, either WIFI or by cable, and IP address that is able to communicate with other devices and that is in the DHCP allotted range. IP's that are assigned to devices by the DHCP server can expire. For example, your Cell Phone may have a DHCP IP assigned that expires every 24 hours, so it could change. For your cell phone, it is ok that the IP changes, no one is typically looking for the IP of the phone for other software to connect to it. On the other hand, printers, machines, Desktop computers...they all benefit from having non DHCP assigned addresses that are often call Static IP's. This is so that they do not expire and always stay the same. It would not be fun to have to always find your Laser IP and input that into lightburn would it? That is why you must manually assign a Static IP to your laser machine that is outside of your Routers\Switch's DHCP range. Each users DHCP will vary based on how it is set up. Most of the time, the DHCP range is not the full address space of a subnet which means you will have plenty of IP's to grab. You will need to login to your Router\Switch to look up how your specific DHCP server is set up. |
 |
Connection Examples with IP Suggestions
Your exact IP address may be different, these are just examples.
| Example of ADHOC Direct Connection when Existing Network\WI-FI does not conflict with Laser Default IP: |
|---|
 |
| Example when your existing Network\Wifi is already in the 192.168.1.XXX address space. Must change IP on Laser Machine: |
 |
| Example of a setup when using a Router\Switch: |
 |
Next Steps
Still stuck?
Fastest response times in the industry from our US-based support team.