
This article covers how to replace the 24V Power supply that powers the controls for your NOVA machine. Note that this was done on a NOVA35. Larger Machines like the NOVA63 will have this Power Supply by it self not hidden by the 36V power supply. You can skip the removal steps for the 36V power supply in that case (steps 4 thru 6).
You will need:
- 60 minutes
- Phillips screw driver with standard length
- Voltmeter (How To Use A Multimeter)
- Camera
- Replacement Meanwell LRS-75-24 power supply
⚠ WARNING: UNPLUG THE MACHINE FROM THE WALL BEFORE WORKING ON IT. TEST BY TRYING TO TURN THE MACHINE ON OR WITH A VOLTMETER TO VERIFY POWER IS REMOVED
Step 1: Unplug the Machine from the wall outlet and the back of the machine at the socket

Step 2: Flip the Main Breaker to the Down Position

Step 3: Verify Power is Removed from the 36V Power Supply
⚠ CAUTION: Test that Power is removed from the 36V Power Supply. Check that there is no voltage from L4 to N4 and L4 to PE\GND
(Note that the terminals on the Power Supply are Labeled L, N and the Ground Symbol)
Step 4: Take a Picture of your wiring before removing the wires from the terminals of the 36V power supply
Note that your order of wiring may vary, there are groups of common terminals V+ and V-. Remove the plastic cover over the terminals.
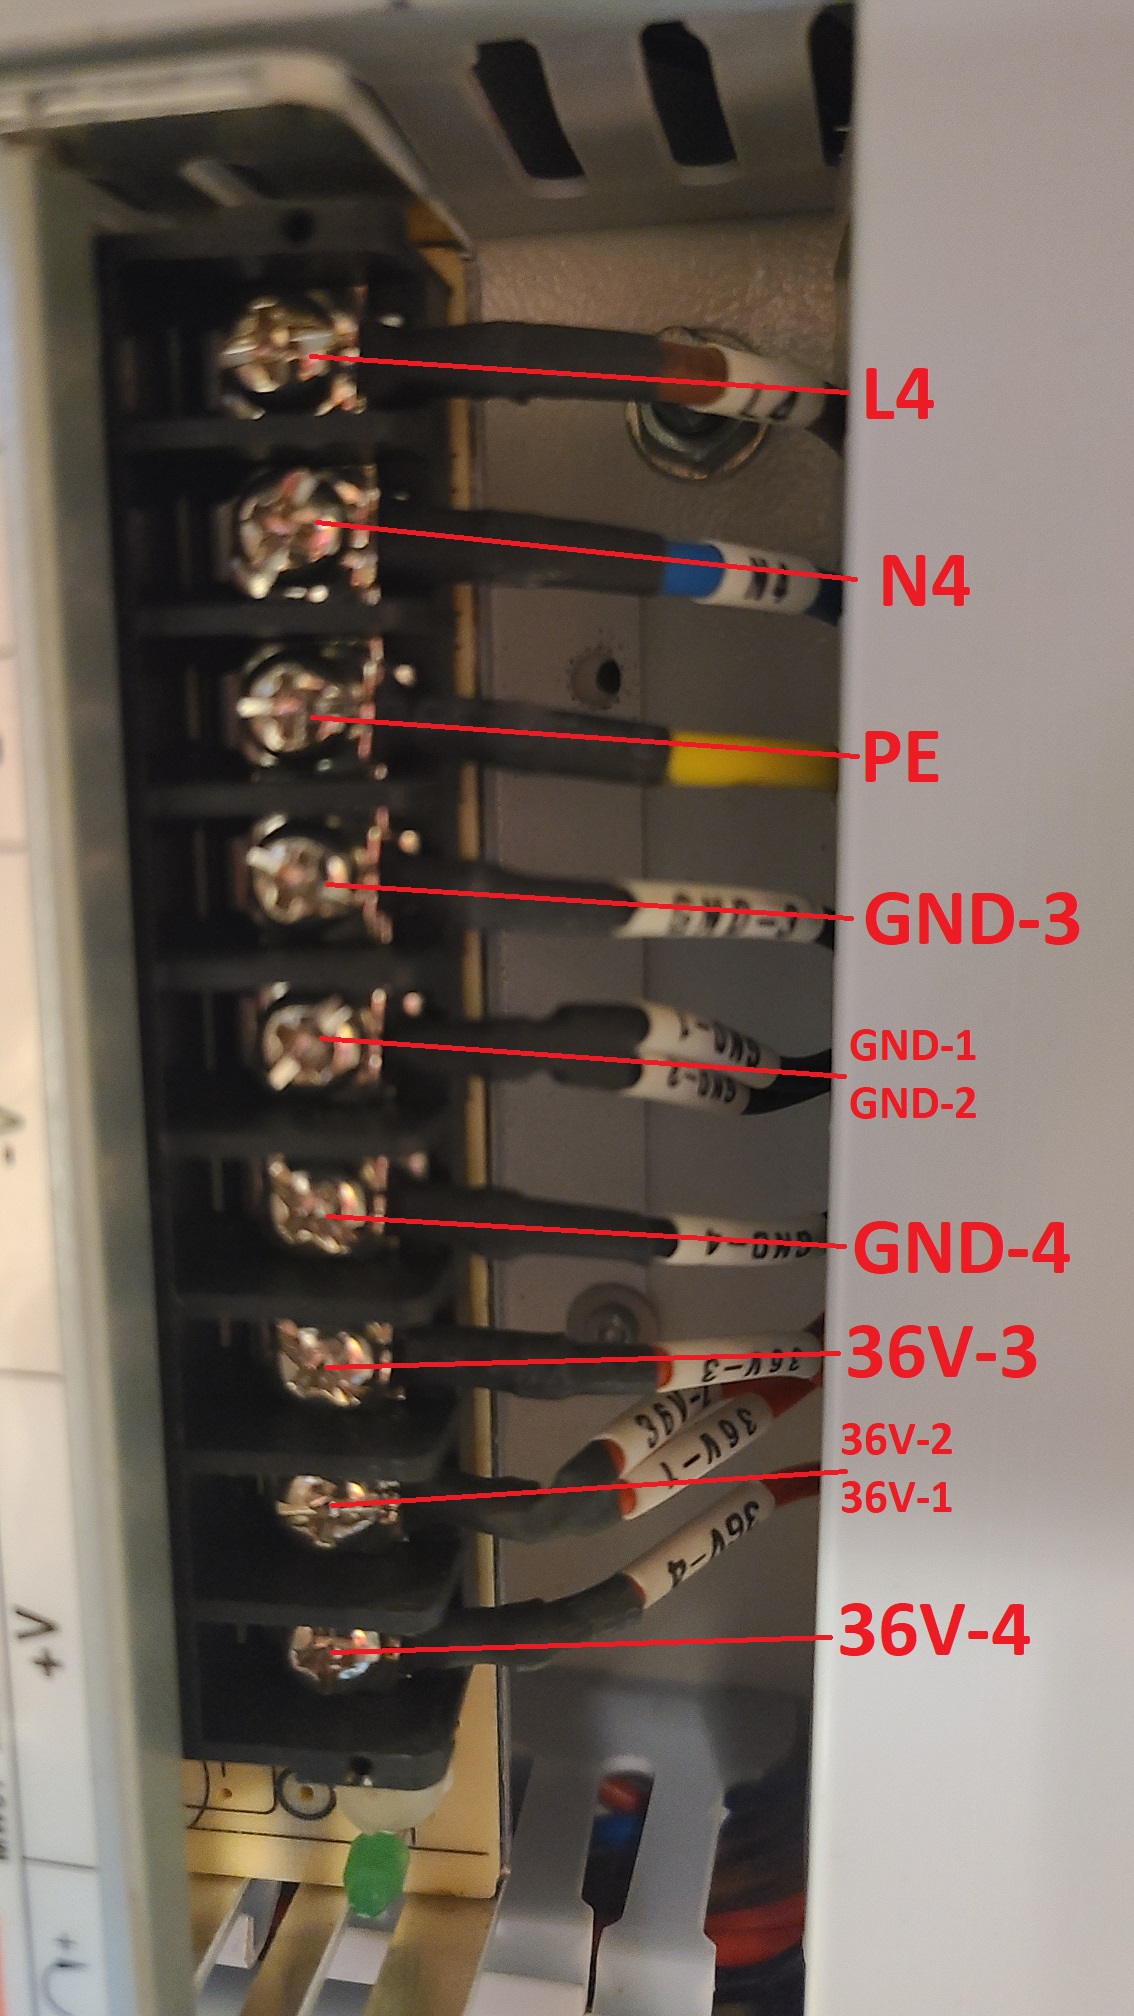
Step 5: Disconnect the Power Supply wiring and push fork terminals to the side
(Optional: you can swing the power supply to the side but be sure to support its weight if you just leave it hanging)

Step 6: Remove the 4 Screws holding the 36V power supply to the backpanel
Remove the 4 Screws (Circled in Red) holding the power supply to the backpanel (2 Per side). Start with the right side first, be careful not to drop them. Move the power supply out of the way.

(These screws will be easier to access with the wires removed from the terminals)

⚠ CAUTION: Test that Power is removed from the 24V Power Supply. Check that there is no voltage from L3 to N3 and L3 to PE\GND
(Note that the terminals on the Power Supply are Labeled L, N and the Ground Symbol)
Step 7: Take a Picture of your wiring before removing the wires from the terminals of the 24V power supply and then disconnect the wires

Step 8: Unscrew the two screws holding the 24V power supply to the back panel
Should be on the bottom left and top right corner as marked by the red circles in this picture.
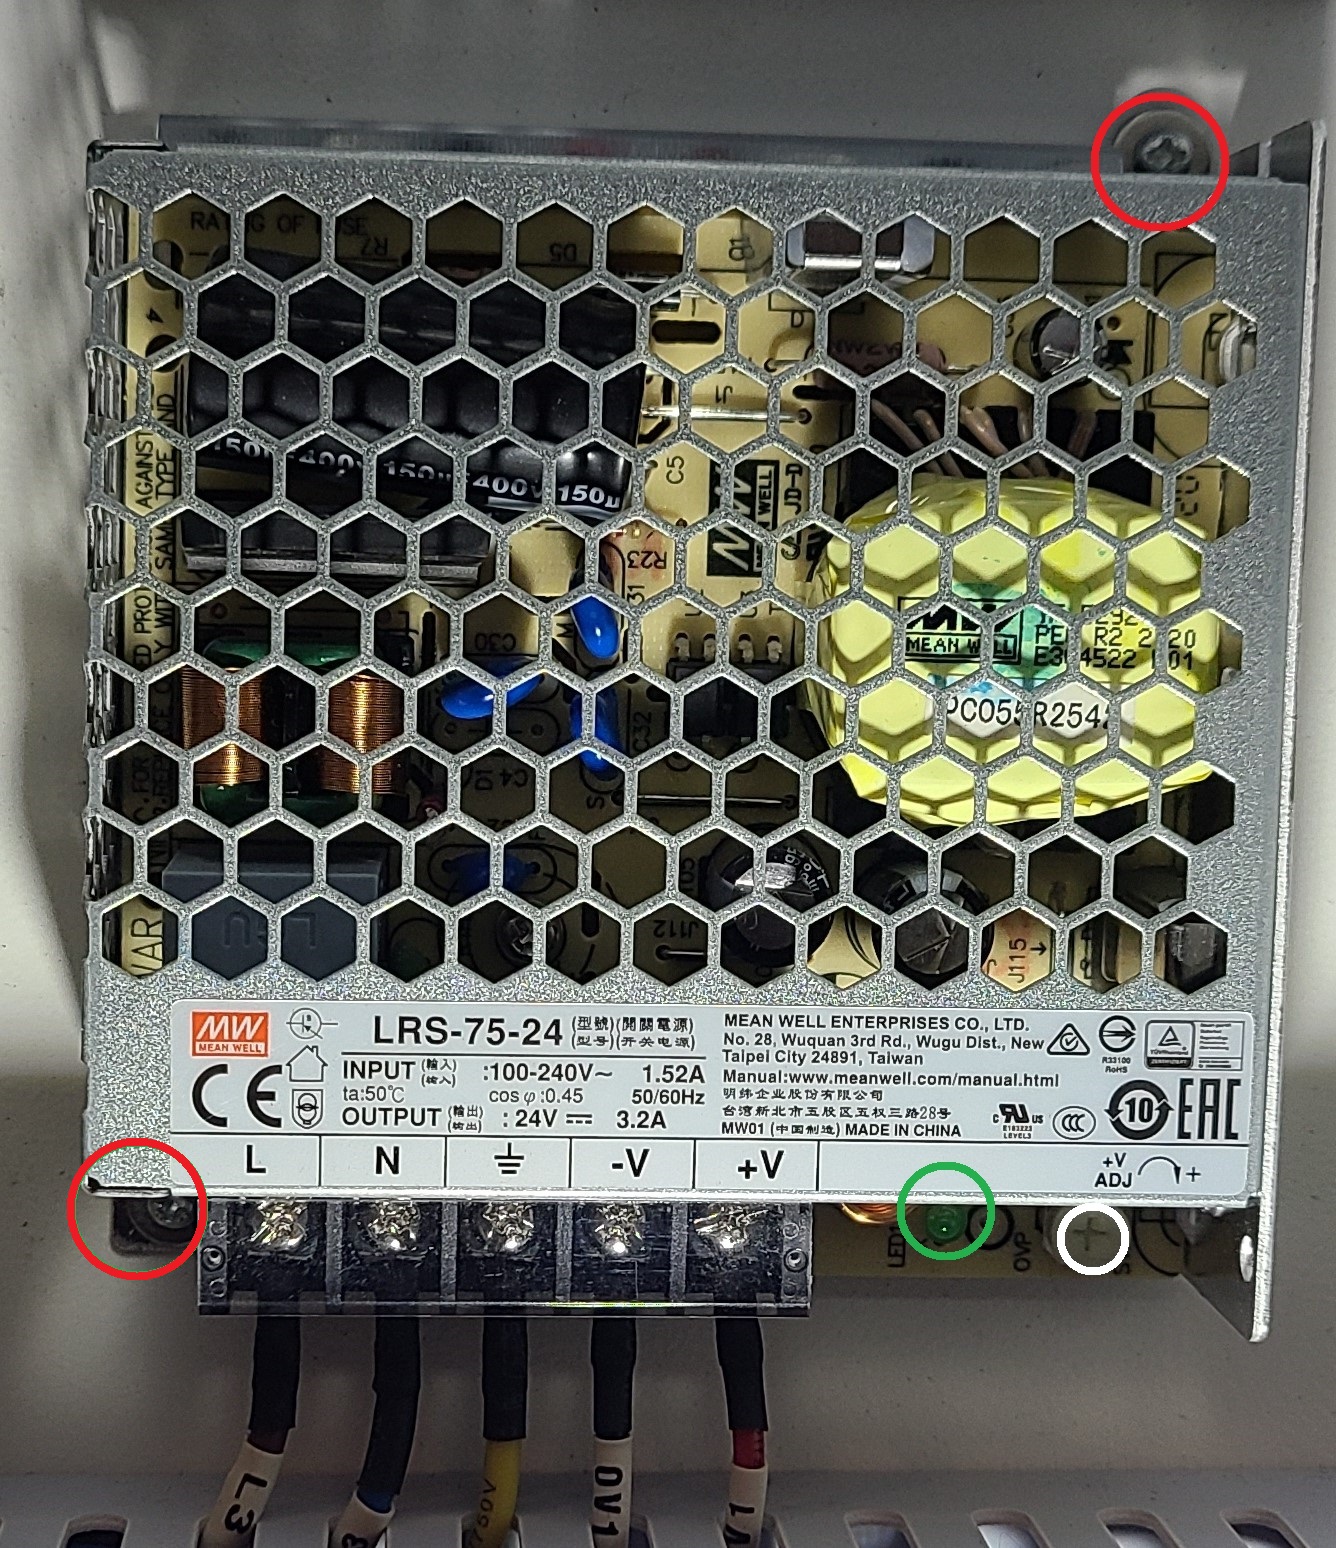
Step 9: Re-wire the 24V and 36V power supplies
Pay attention to wiring and when you tighten the screws, make sure the termination is not landing on the insulated part of the fork. Before re-installing the 36V over the 24V (if applicable), lets set the voltage level for the 24V Power Supply.
Step 10: Adjust the Power Supply for 24V output
Once everything is wired and double checked for correctness, power the machine back up and turn on the Main Laser Switch. Use a voltmeter to measure the output from V+ to V- and Adjust the White Trim Pot to get 24V reading on the voltmeter. With a small flat head screwdriver, turn the trim pot next to the green LED slowly clockwise to increase voltage, counter-clockwise to decrease.
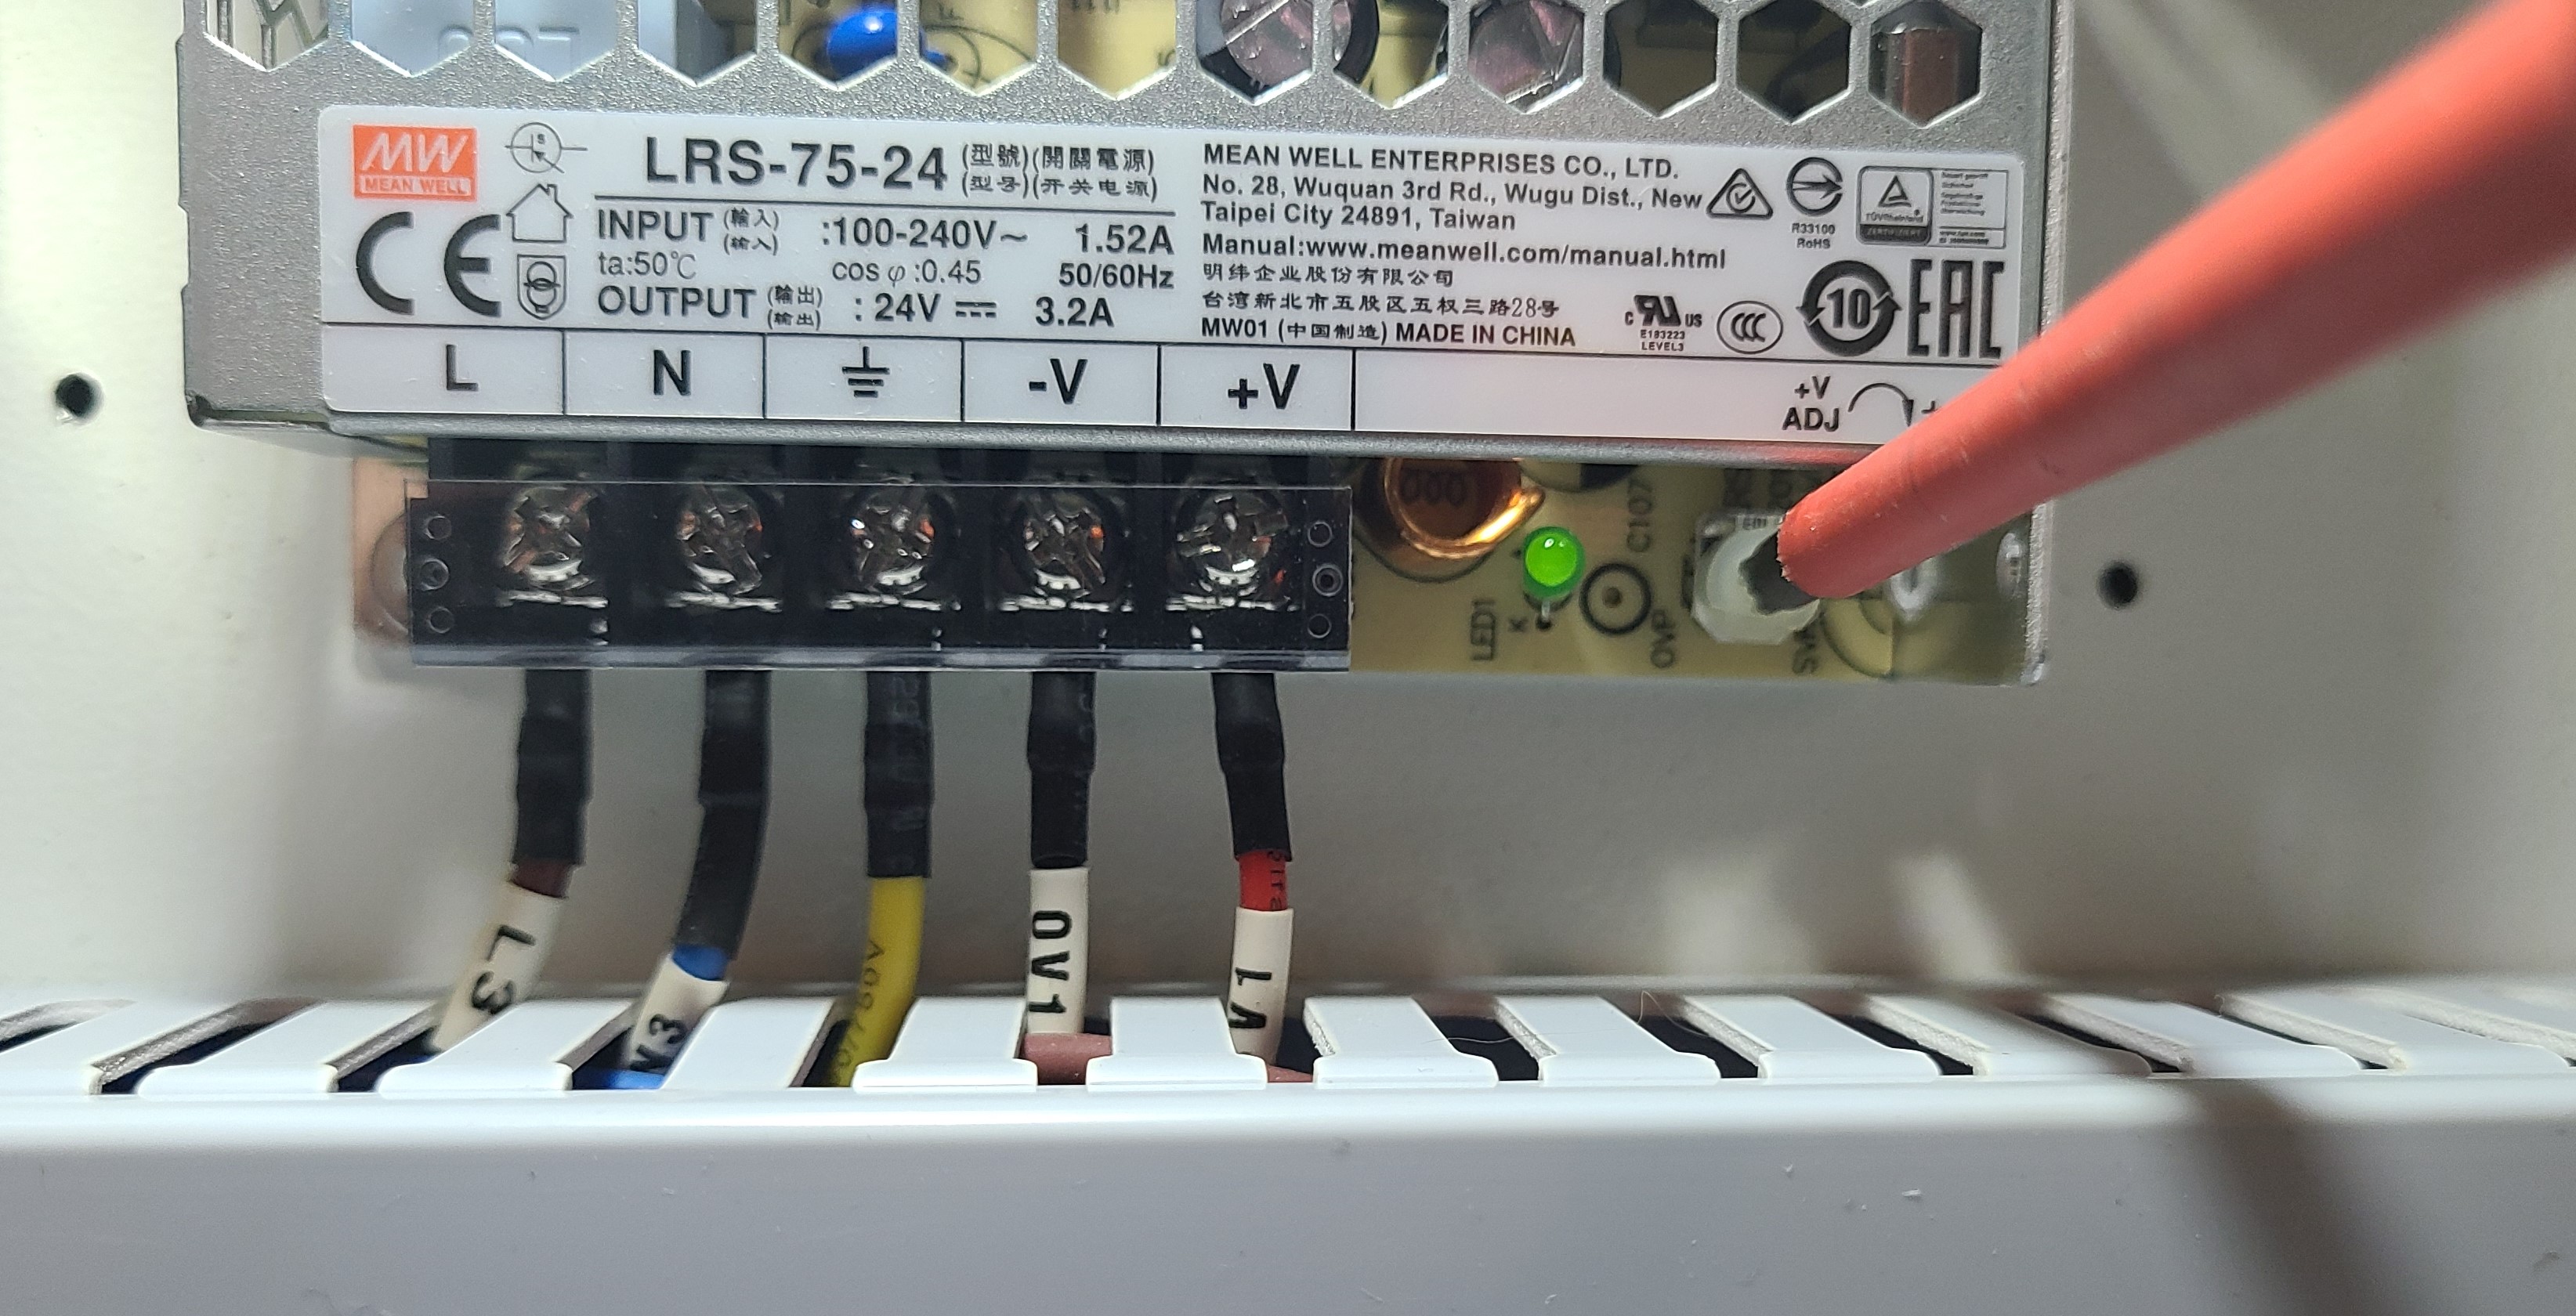


Step 11: Secure the machine for operation
Now turn off the machine, unplug the main power and flip the breaker like step 1 and 2 and secure the 36V power supply (If applicable) to return the machine to runnable condition.
Still stuck?
No bots, no runaround. Talk to a U.S.-based laser tech who knows your Nova inside out.