
Preface: This article will cover Laser Power Supply replacement on Thunder Laser Nova series machines.
Before We Begin
Warning: The LPSU outputs somewhere around 30,000 VDC and can store a charge so always heed the big red wires and connectors. They are specially insulated but could still pose a hazard. The HV output does utilize a fly back transformer. Before working on the LPSU, let it sit unpowered for at least 1 hour. The machine should be powered down and unplugged from the receptacle before beginning work.
Quickstart Videos
Complete Guide
Tools Needed
It would be good to gather up all the tools needed prior to starting the job. Since the LPSU is in the back of the machine, it may not be the most accessible so moving back in and out to go get tools may be a chore.
Required:
- Small Green Flat Head Screw Driver
- Red Phillips Head Screw Driver
- Nova Door Key
- Small Adjustable Wrench (For Nova 24 Ammeter Connection, Not Shown below)
- Allen Key 3mm with Ball End

Optional:
- Work light
- Small Baggie for Bolts and Washers
- Painters Tape and Sharpie
LPSU Removal Process
Step 1: Power off and unplug the machine
Let it sit off and unplugged for at least an hour.
| Power off the Main Power Switch | Unplug the Main Power Cable |
|---|---|
 |
 |
Step 2: Locate Power Supply for your machine
Nova 35, 51, and 63:
Located on the back of the machine, behind the blue door to the Left of the exhaust outlet
| Back Of Machine | Behind the Left Blue Door |
|---|---|
 |
 |
Nova 24:
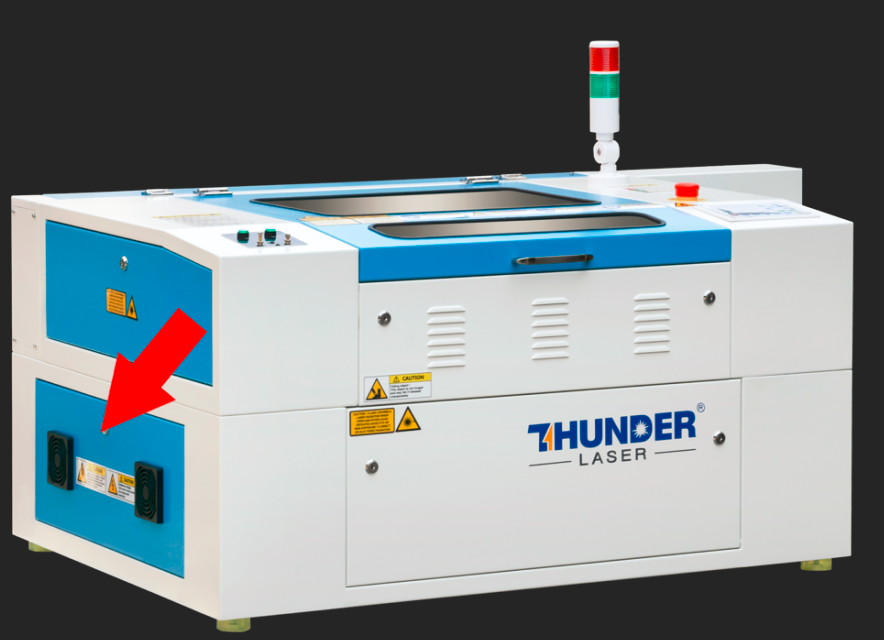
Located on the left side of your machine behind the lower blue door.
| Left Side Of Machine | Behind the Lower Blue Door |
|---|---|
 |
 |
Step 3: Prepare the LPSU for Removal
| Remove the Door for Easier Access | Mark the Bad LPSU with Tape and Sharpie |
|---|---|
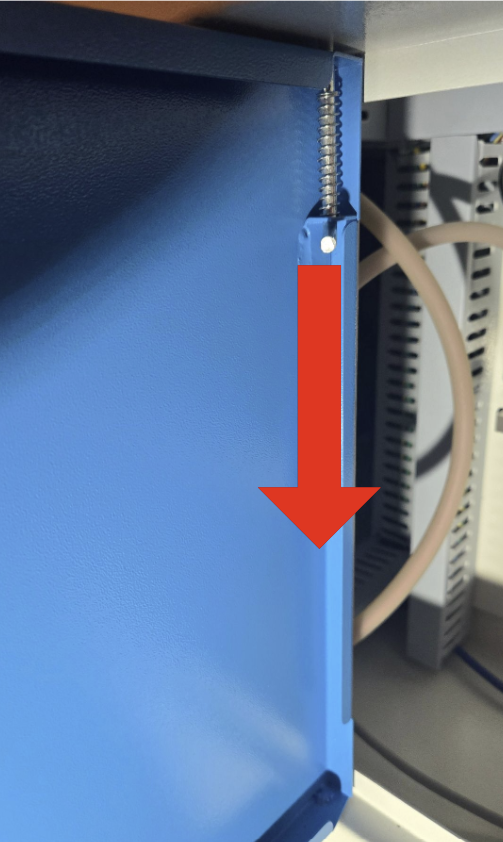
Pull down on the spring loaded pin to release the door. Set aside |
 |
Remove the Input Wiring
On the right side of the LPSU there are two green connectors. Grab them with your thumb and pointer finger, wiggle and pull out. (They are not screwed in).
| Nova 24 LPSU | Nova 35, 51 and 63 LPSU |
|---|---|
 |
 |
| Grab the sides of the Green Blocks | Both Input Connectors Removed |
|---|---|

Wiggle the block up and down as you pull it out. Set aside. |
 |
Disconnect the Positive HV Wiring
Lift the HV connector out of the mounting bracket and unscrew the two halves
| Loosen the Set screw on the Left and Lift out | Unscrew the two Halves |
|---|---|
 |
 |
Disconnect Negative Wiring
| Nova 24 (Back of Ammeter) | Nova 35, 51 and 63 |
|---|---|

Accessed from the back of the machine through the door to the right of the exhaust outlet |

(White wire that goes to the 3 position terminal block next to the LPSU) |
Step 5: Remove LPSU from the machine
For the Nova 24:
| Loosen 3 Screws |
|---|

(2 Shown here in the Black tabs, there is one more on the Right that is behind where the 3 pin power connector was) Slide the LPSU to the Left and remove from the machine. |
For the Nova 35, 51 and 63:
Remove the 4 screws and washers that are holding the LPUs to the back panel. Place the screws in a bag for safe keeping.
| Remove the Lower Screws | Remove the Upper Screws |
|---|---|

(Remove the lower screws first, they are harder to access) |

(Support the LPSU weight so that the screws are easy to turn and threads are not messed up) |
Step 6: Reinstall LPSU
Reinstall in the reverse order.
Critical Watchout for Nova 35, 51 and 63 LPSU Replacement
| Incorrect Termination Example | Correct Termination Example |
|---|---|

(The white and black lines are not in-line. The tube may fire but the high resistance will cause arcing and thermal insult to the connector, the) |

(Black and White wires must be In-Line with each other) |
Additional Resources
Nova Series DSP TL Timer Mid 2022 Block Diagram v8.4
Still stuck?
No bots, no runaround. Talk to a U.S.-based laser tech who knows your Nova inside out.