
Rotary Tips, Tricks and what to watch out for on your Thunder Laser Nova, Odin or Bolt Series Laser
Preface: This Article covers some tips, tricks and watchouts for your Rotary on a Thunder Laser Nova, Nova Plus, Odin, Titan or Bolt series laser.
Things to know before you begin for Rotary Journey
Here is a list of things to know ahead of time which will make your usage and understanding of the rotary with your Thunder that much easier. Skipping this list will make things more difficult. It is highly advised to read through this list.
1. Rotary Enable
The machine knows when the Rotary is plugged in, you do not need to enable it from Lightburn. If you want to use some of the mirroring functions in lightburn's Rotary window, you may need the Rotary Enabled button since it is a software switch in order to perform the mirror.
Enable Rotary Button | Disable the Enable Rotary Button |
|---|---|
 |  From Edit>Settings in Lightburn, you can Disable showing the Rotary Enable Button |
2. Rotary Steps, Object Diameter and Roller Diameter
They are not part of the file that the .RD controller runs, they are a machine setting and must be sent to the controller.
Rotary Setup Tool | Machine Settings |
|---|---|
 |  From Edit>Machine Settings you can find the values saved there. The Rotary Parameters do not save to a project file like Layer Settings and such. |
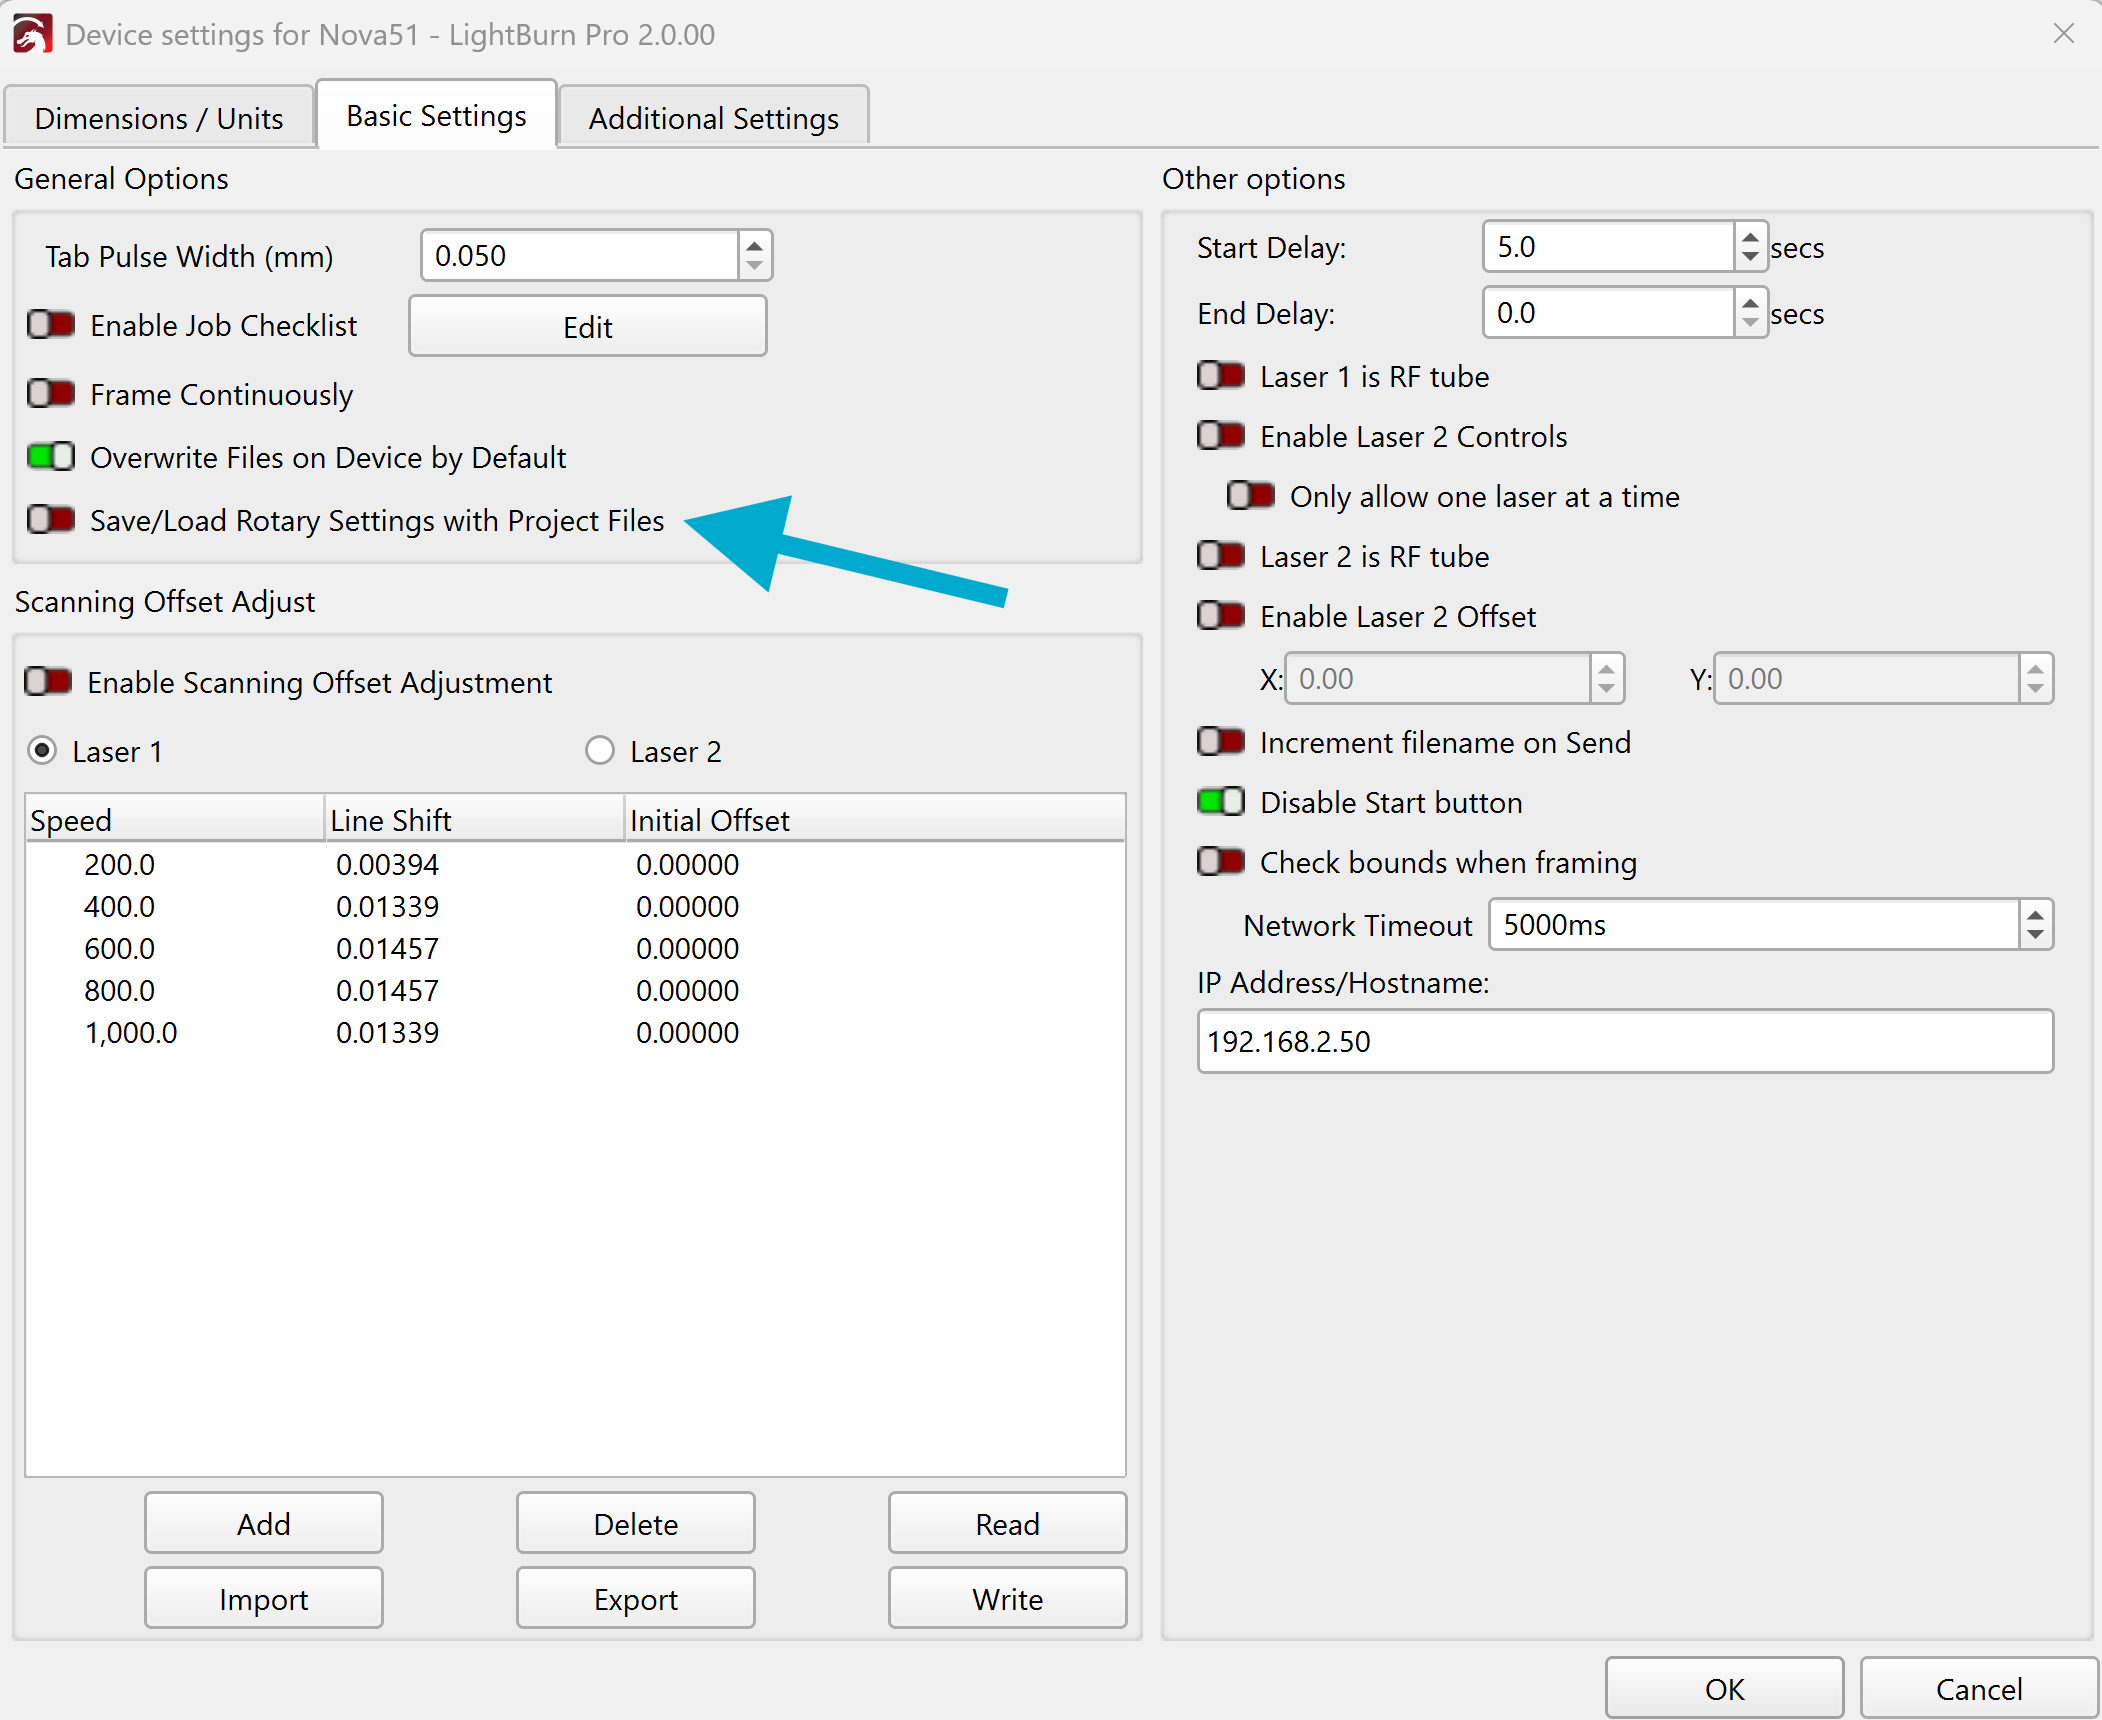
Update on V2.0 and greater of Lightburn. There appears to be an option to enable the saving of Rotary settings now. Be sure to still check that the values are written to the machine.
3. Rotary Setup parameters
You must be communicating with the Laser Machine (Rotary does not have to be plugged in). The settings that are being read are in the controller itself, not the rotary.
Not Communicating | Communicating with the Laser Machine |
|---|---|
 |  |
4. Test Button
Do not use the TEST button on the rotary prompt
Do not Test from the Rotary Setup Window | Frame from the Machine Control Panel |
|---|---|
 |  |
5. Start From
In Lightburn, use USER ORIGIN with the rotary. Do not use Current Position or Absolute coordinates
Do not use Current Position or Absolute Start From | Only use User Origin for Start From |
|---|---|
 |  |
You will get an error message when using absolute coordinates with the rotary, more on that here.
6. Send, Frame and Start
All rotary jobs should be framed and started from the machine (You can shift+send a rotary job but it is not ideal, you should frame before you run)
Do not Frame from Lightburn for Rotary | Frame from the Laser Machine Control Panel |
|---|---|
 |  |
If you frame from Lightburn, the machine will frame out the X and Y dimensions of the artwork and not spin the rotary
7. Rotary Data
Save the Steps and roller Diameter, Cup type, Color etc of the tumbler with the Lightburn file using the Notes option.
(V2.0 an higher can save the settings to the project file)
File>Show Notes | Write Values and Display on Open |
|---|---|
 |  (Drawback is the window must be closed to be able to open the Rotary Setup Window) |
or
Or as T1\T2 Text | Or as Screenshot Image |
|---|---|
 | 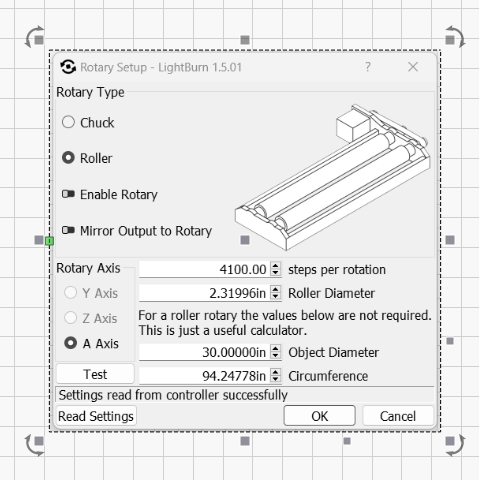 Screenshot and paste the image into the project file and save |
When you open your Lightburn Project for the tumbler you wish to run, go ahead and take the Steps\Roller Diameter and enter them
8. Roller rotary - One pass...make it a good one.
Do not try to do multiple passes or multiple layers. All graphics should be on 1 layer for best results, no sublayers. Engrave with either 0 or 180 degree fill layer angle, no crosshatch and use Fill All Shapes at once.
Bad Example | Good Example |
|---|---|
 |  |
9. Line layers or Offset fill
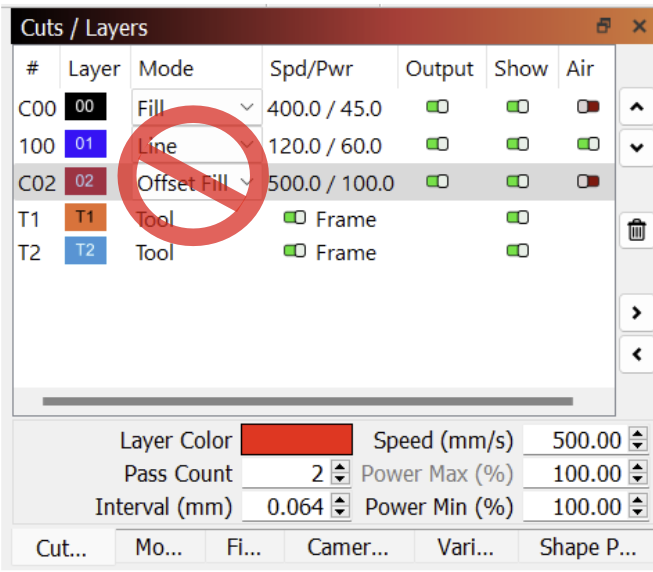
Are not advised on a Roller Rotary job. Only Fill and Image engraves for best results. Combine all engraves onto a single layer. For a chuck style, you are able to do multiple passes and other things more reliably due to the grip nature of the chuck
10. Graphics Squish
Circles will engrave to the correct diameter but since they are wrapped around a cup, they will appear as ovals. The Y direction of the circle needs to be stretched. Same for squares that will look like rectangles. All shapes are effected by this physical property, it is just more noticeable on symmetric shapes. Please see this article for more information.
11. Do not overtighten the tumbler in the Roller Rotary
It can cause the tumbler to bind and slip. Tumblers from the same manufacturer can vary in length and roundness.
12. Avoid spinning the cup on Threads of tumblers
Instead of spinning on the threads which can cause the tumbler to walk, remove your clamp and backplate assemblies and spin the tumbler around to drive on the heel. Adjust your artwork and steps to match.
Not Recommended | Recommended |
|---|---|
 |  |
Still stuck?
Fastest response times in the industry from our US-based support team.