
Nova and Nova Plus Series Machine Protected Work Paused Alarm Message
Explains the causes and fixes for the "Machine Protected Work Paused" message on Thunder Laser Nova series machine control screens.
Preface: This article covers the reasons you will see the "Machine Protected Work Paused" message on your Thunder Laser Nova series machine control screen.
LCD panel shows the "Machine Protected Work Paused" message towards the lower right of the screen. Generally this message shows up only when you are trying to run a project.
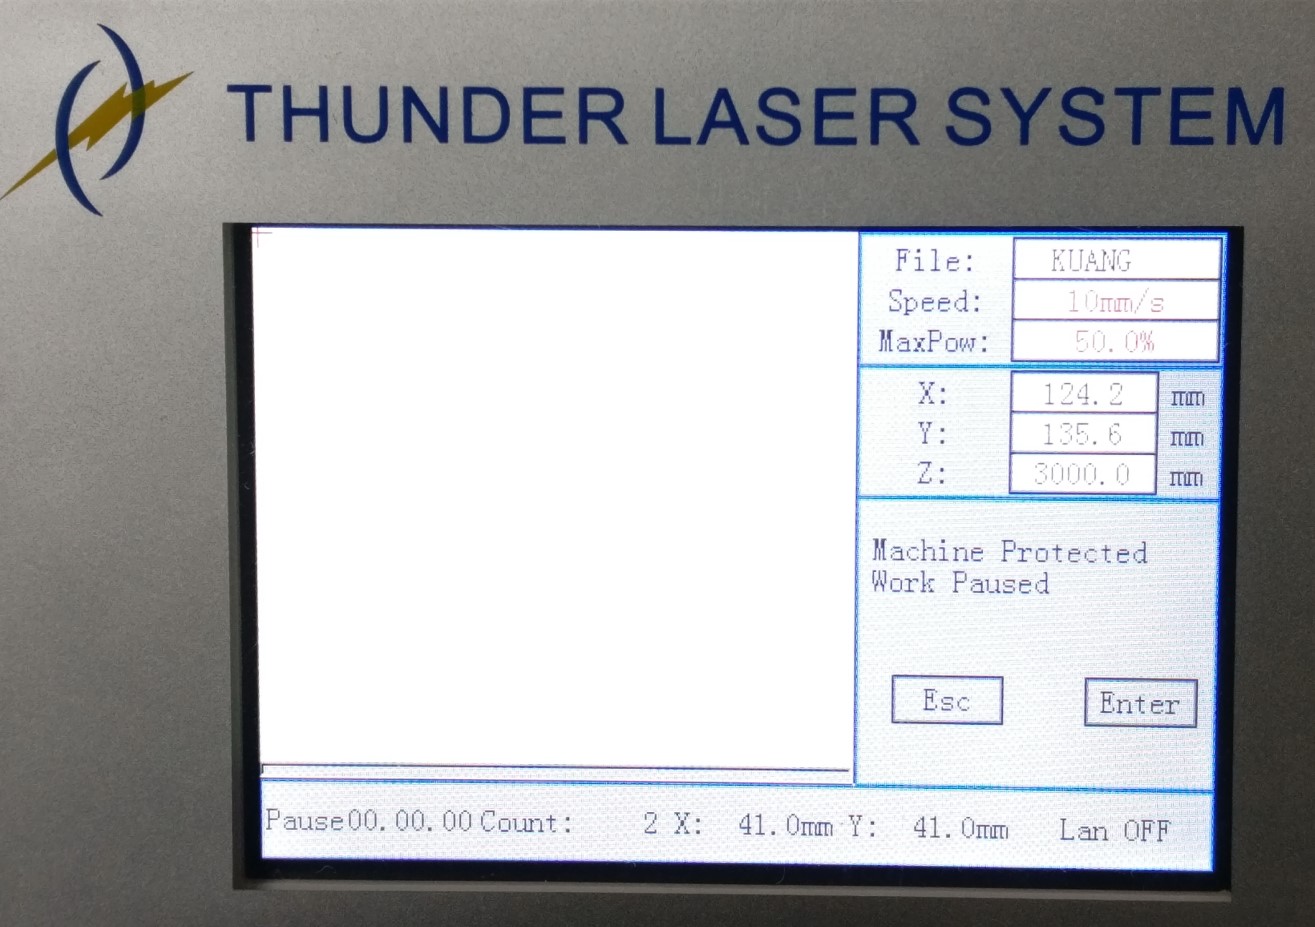
- One of the machine protected doors is open. Close all the doors and then clear the message and try to run the project again or continue the current project by pressing the Start/Pause button.
- A sensor on the door sensor safety system is not reading right, failed or misaligned. Even with all the doors closed and secure, the alarm will not go away. See below in this article for more information.
- Heat Sensor Alarm. See the Heat Sensor Alarm article for more information. Generally the message on the screen is accompanied by a beep tone.
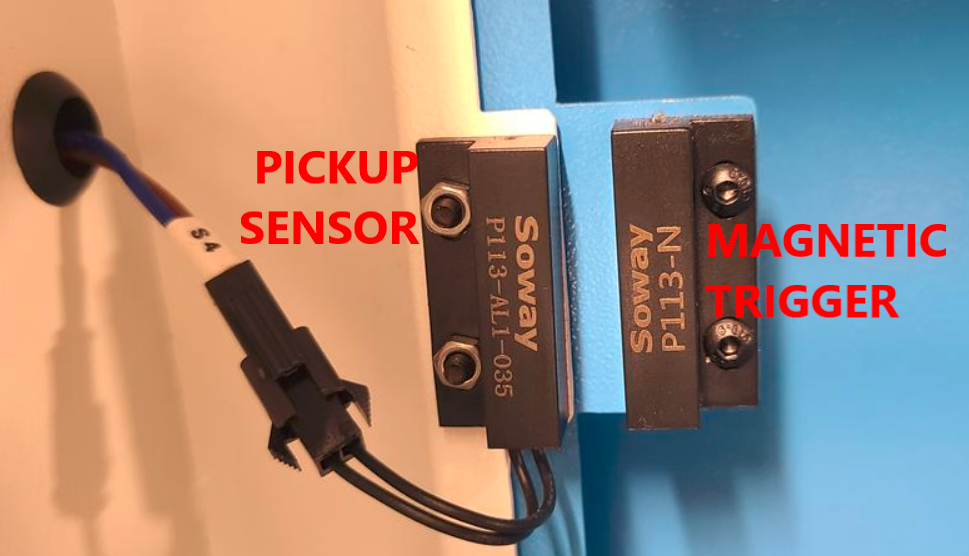
Each sensor has a magnetic part and a magnetic pickup. The pickup part has the wire. The magnetic part is usually on the moving part of the machine like the lid, front panel door etc. If the magnetic part is not aligned, broken, missing etc then the sensor cannot be "made" and will not signal to the Door Flap Board. The Door Flap board is the hub for all the sensors that then sends the OK signal to the controller. For more on the Door Sensor Systems, please check out this article: Door Safety System information for sensors and flap board
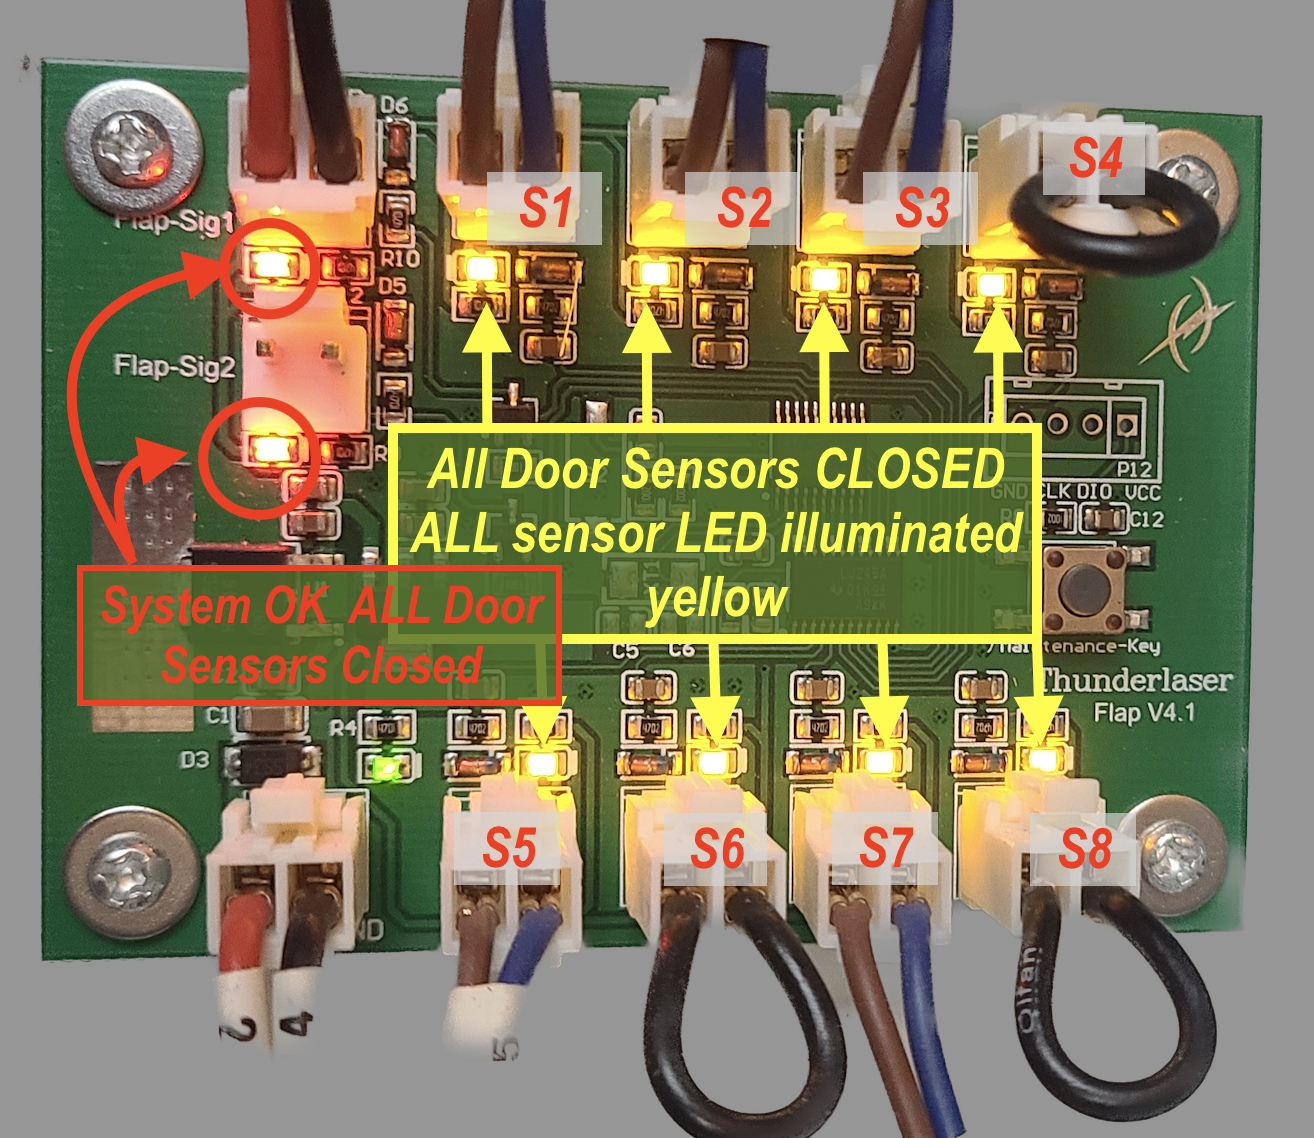
When troubleshooting, you can use the status lights on the Door Flap board to see which sensor may be at fault. Each sensor will have an identifier on the wired pickup part of the sensor part. It will be a S number on a white sleeve around the wires. On the Door Flap board, a yellow LED will illuminate when the sensor is being "made".
If you see a sensor that should be "made" but is not illuminated, please perform the following checks on that sensor:
Look for the Connections of the Sensor to be Properly Plugged In
Check that the plugs are fully seated, wires are not pulled out or melted.
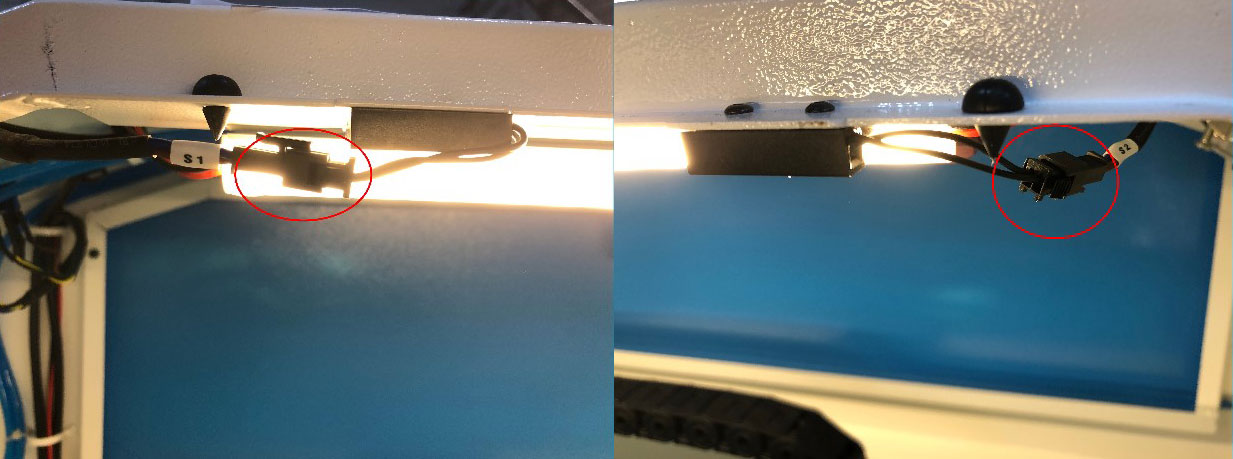
Check the Sensor Pair for Alignment
Adjust the position of the magnetic trigger or the pickup sensor to ensure alignment. (See graphic below) If the alignment is good and the yellow light is still off on the door sensor, then the sensor or wiring may be faulty. You can try to test a pickup sensor by placing a magnet directly onto it and checking the status. This test eliminates an alignment issue and will prove if the pickup sensor is working.
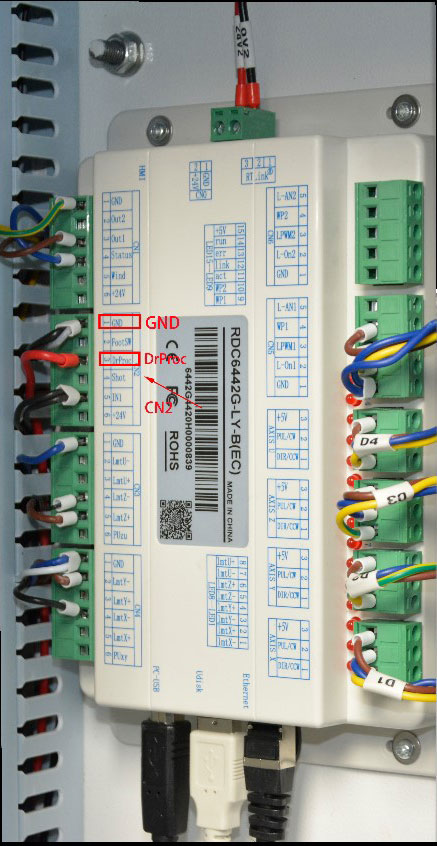
Controller Signal Wiring
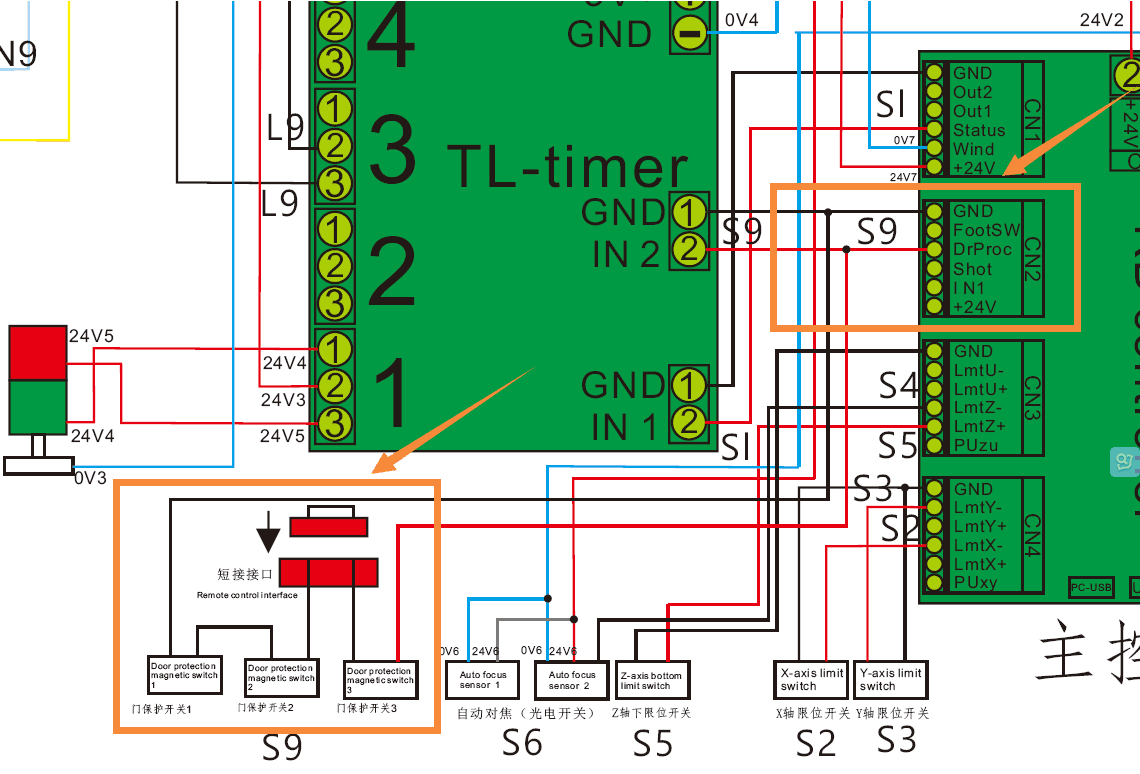
Locate the DrProc and GND on the CN2 area of the control board and make sure they are seated tightly. Also observe the red LEDs on the door flap board that indicate to the controller that the door sensor circuit is ok. The red LED should be on.
| Controller Inputs | Door Flap Board Status |
|---|---|
 |
 |
If your machine was produced before September 2019, the door sensor checking board is not installed on your machine. Please check the machine according to the below link (article is copy pasted below as well):
Alarm message of LCD panel--Machine protected(Old type sensor) (thunderlaser.com)
LCD Panel Shows the Following Information
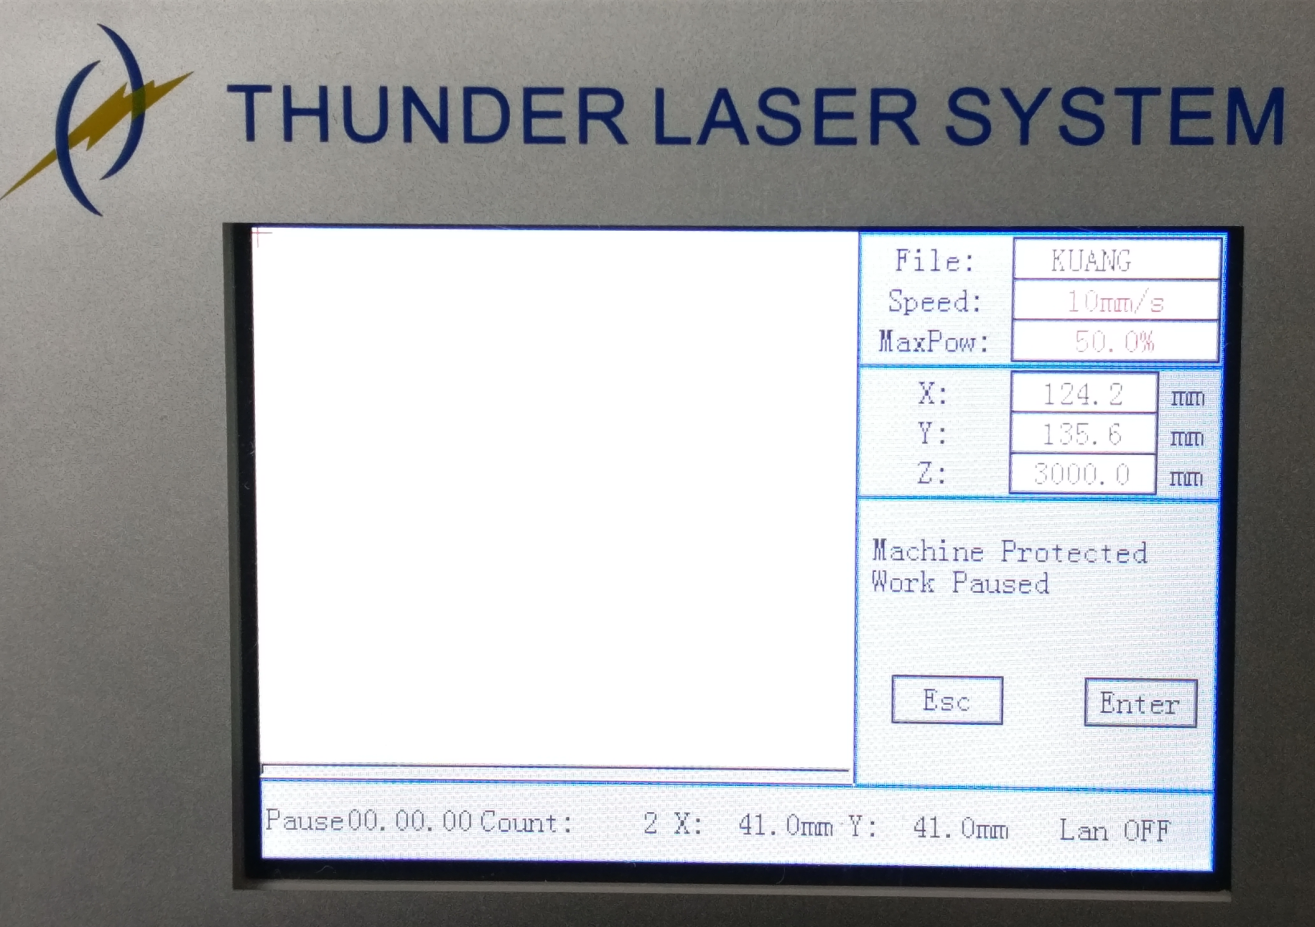
Causes
1. The Doors with Sensor Are Not Closed
Each machine has protection sensors for Top door/Lid and laser tube cover, see below.
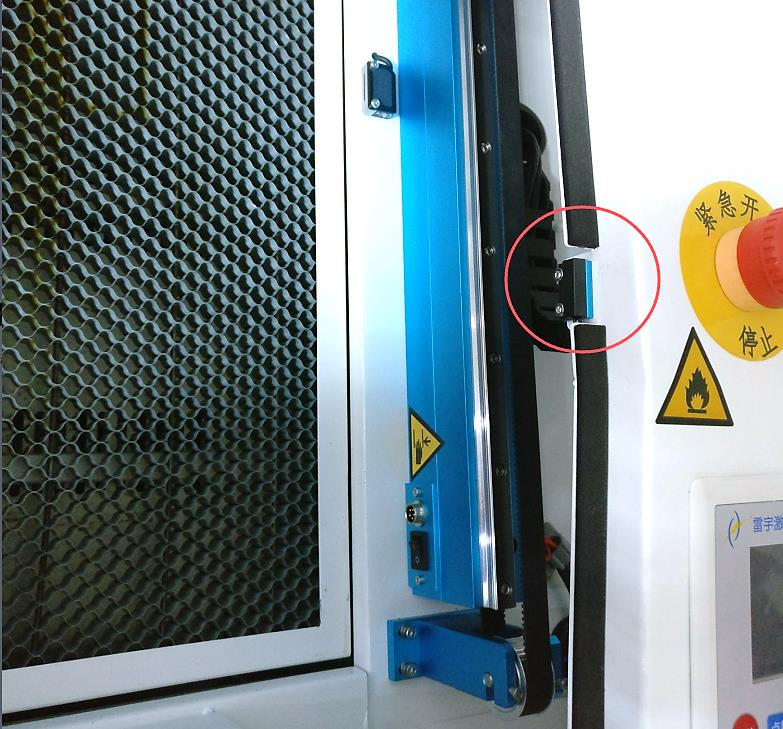
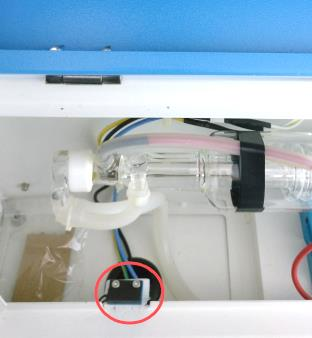
Solution:
Please close all the doors before starting work.
2. The Induction Magnet Is Not in Good Position
If any of the sensor magnets is in bad position.
Solution:
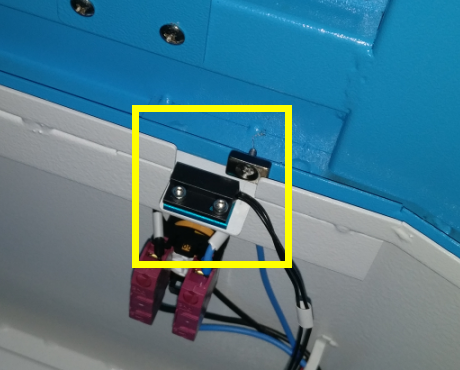
- Take out these three magnets and directly place them on their sensors.
| Main Lid | Tube Box |
|---|---|
 |
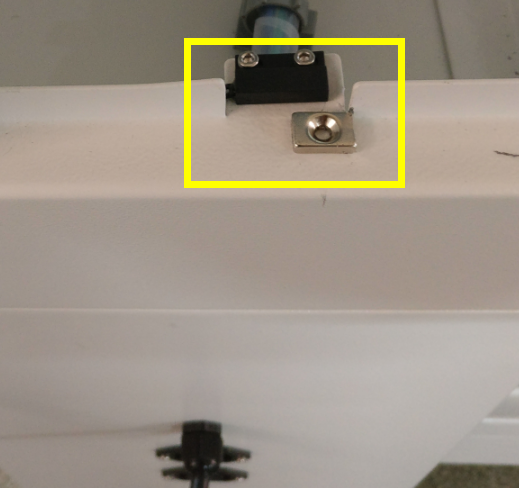 |
Ensure you place magnets on both sides of the sensor instead of the center.
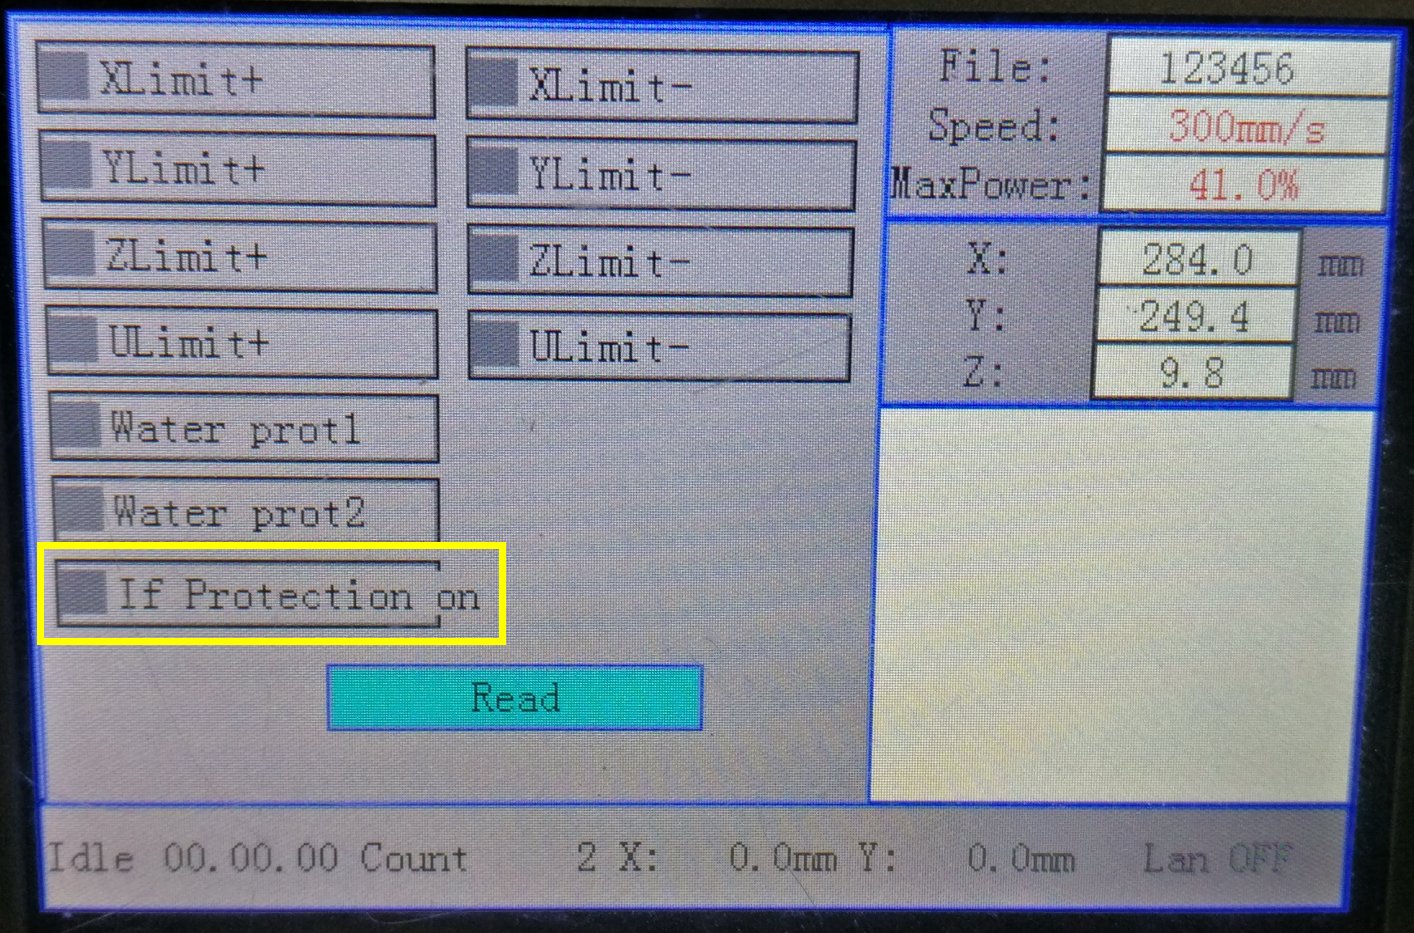
Position the magnets on sensors like above pic shown, check if the red light of "If protection on" shows a grey box on the Laser Machine Diagnosis screen.
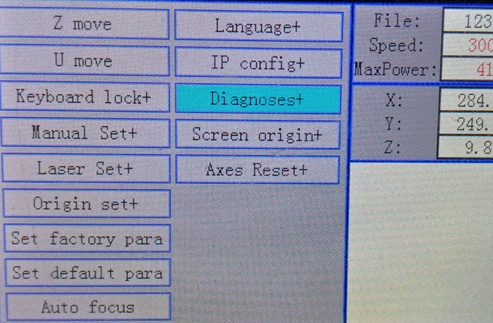
To access the Diagnosis Screen:
Machine LCD panel → Z/U button → Scroll Down to Diagnoses+ → Press Enter → "If Protection on"
If it shows Red color: At least one of the three protection sensors is not working well (if all doors are closed).
If it shows Grey color: All protection sensors are working normally.
| Diagnoses Option in Menu | Diagnosis Screen |
|---|---|
 |
 |
- If the red color disappears, it proves one of the magnets was in bad position.
- Then please install the magnets back to the doors one by one to test which one causes the issue, then fine tuning the position for it.
3. The Wires of DrProc and GND on CN2 Is Loose from Controller Board
| Schematic | Controller |
|---|---|
 |
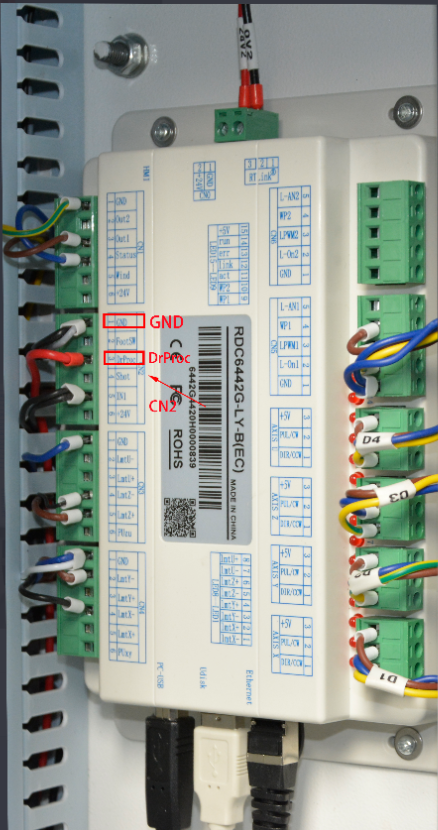 |
If the wires are tight, maybe the door sensor is bad. Please contact us: [email protected].
Be sure to confirm that these parts match your existing part.
- Door Safety System information for sensors and flap board
- Disabling The Safety Interlocks (Door Sensor Checking Board)
Still stuck?
Fastest response times in the industry from our US-based support team.